Articles

Nursery serves as second classroom

txaas_mastheadHorticulture TherapyGardening is restorative. Taking in the fresh air, appreciating a job well done and enjoying nature – all help revive the spirit.

The mental and physical benefits of gardening have been recognized since ancient times. Today, horticultural therapy is used to help people with a broad array of disabilities in rehabilitative, vocational, and community settings.

It is used to improve initiative, language, and cognitive and social skills. Horticultural therapy can also help those with physical disabilities to strengthen muscles, improve balance and enhance coordination.

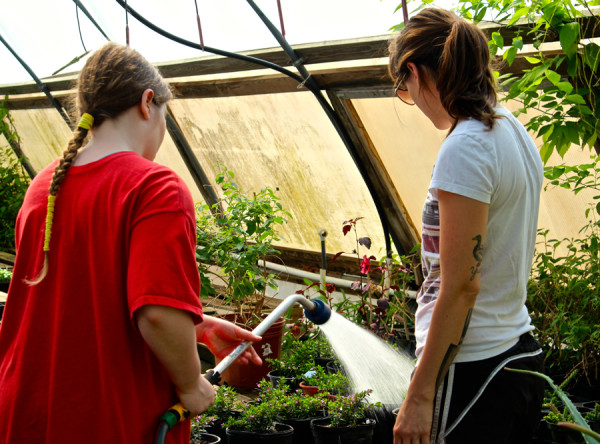
It’s About Thyme Garden Center on Manchaca Road is helping Austin-area special needs students learn important work skills and problem-solving techniques using horticultural therapy.

The nursery works in partnership with the Life Skills program at Akins High School, which is designed to provide special education students with rehabilitative and vocational skills in a community environment.

Once a week, a small group of Kelsey Williams’ Life Skills students travel by bus to the nursery, where they work with nursery owners, Chris and Diane Winslow and their staff. Depending on the students’ skill levels, students help in the greenhouses, fill and stack pots, sweep and help unload plants. Some high-functioning students are even able to help with planting and transplanting plants.

In addition to their job training experiences, students are interacting with staff and developing key social skills.  The nursery also serves as a second classroom where Williams teaches students about plants and conducts science experiments. The students then continue learning about horticulture in the classroom by potting plants and tending their own small school garden.

Williams describes the class as an internship-like program, giving the students invaluable real-life experiences.

“The owners and staff at It’s About Thyme are always so welcoming and friendly with us,” said Kelsey.  “The work definitely helps the students, and it also helps others who get to have exposure to these great kids.”

The Winslows have been working with the district’s program for several years, but Chris’ history with horticultural therapy extends far beyond that.

He worked for 26 years as the greenhouse director at Marbridge, a community education and job training facility for the mentally disabled, before retiring in 1998.

Winslow believes their work at the nursery provides the students with a wide range of benefits, both tangible and intangible.

“It gets the kids out of school and into the community,” said Winslow.  “They’re getting life skills and training.  They work in the vegetable garden and pull weeds and water and learn different skill sets.”

“They’re fun to work with and talk with,” said Winslow.  “And it brightens their day a little bit, too”

When asked what she liked most about the experience, one of Williams’ students said she liked the work because growing plants helped her to create something.

“They enjoy being around plants and nature,” added Williams.

Akins has 5 classrooms with a total of 60 students in the Life Skills training program.  A few of the other Austin businesses that partner with the Akins Life Skills program include Hobby Lobby and Half Price Books.

For more information about the uses and benefits of horticultural therapy, visit the website of the American Horticultural Therapy Association at AHTA.org.

Local Landscape Designer and Garden Coach Diana Kirby provides landscaping tips at www.dianasdesignsaustin.com and writes a garden blog at www.dianasdesignsaustin.com.


By |2017-11-29T23:27:07-06:00April 26th, 2014|Articles|Comments Off on Nursery serves as second classroom

Spring has sprung, and so have the weeds

txaas_mastheadweed puller

Now that the veil of winter has finally lifted, gardeners eagerly await green growth in the garden. Daily surveys begin – in an attempt to detect tiny buds lining tree limbs or a hint of foliage emerging at ground level from the roots of our hardy perennials.

Not so difficult to find, however, is the burgeoning crop of spring weeds. They’re everywhere. Having spent a cold, quiet winter dormant and lying in wait, they’ve germinated and are spreading like … well, weeds.

What is a weed? One man’s weed is another man’s wildflower, right?

According to Webster’s dictionary, a weed is: “a plant that is not valued where it is growing and is usually of rank growth; esp: one that tends to overgrow or choke out more desirable plants.”

The most obvious method to rid the garden of weeds, is to pull them or to pop them. It’s generally easier to pull them when the soil is moist, so take advantage of our infrequent rains or water the affected area before starting.

There are a variety of tools designed to make this process easier. My favorites are the Garden Weasel weed popper and the CobraHead weeder and cultivator.

The first allows you to remove larger weeds like crabgrass and dandelions while standing up – a big plus for me. The tool has a row of sharp tines. Using your foot on a pedal, you push the tines into the soil at the edge of the weed and then push down on the pedal and the weed literally pops up out of the ground.

The CobraHead weeder enables you to whack at the weedy area and loosen the soil like a short hoe, and drag it toward you to pull it out of the ground.

If pulling isn’t your passion, there are several other safe and proven methods you can try to remove your weeds without dangerous herbicides that pollute our groundwater.

Corn gluten is an excellent pre-emergent that prevents weed seeds from sprouting or kills them right after they germinate. Only use corn gluten near shrubs and perennials or on lawns. Do not allow it to come in contact with areas where you intend to sow seeds. The corn gluten should be spread before the emergence of weeds in early spring and fall.

One of the simplest approaches, if your weeds are somewhat isolated from desired plants, is to pour good old boiling water on them. But be careful, as this method will kill anything else in its path. Make sure it doesn’t run over to something you’ve been working hard to grow.

You can also apply the same method with bleach – putting it in a small sprayer and using the concentrated nozzle to gently spray specific weeds.

Some gardeners also use vinegar in this manner. But grocery store vinegar is only 5 percent acetic acid and won’t work. To use this method, you would need to use a vinegar that is 20 percent acetic, which is not available in grocery stores. However, at this strength, the vinegar can cause skin, eye, ear, nose and throat irritation. Goggles should be work to apply it. And it may not kill the roots, just the foliage, which really isn’t very helpful if you want to eradicate the weeds.

Some serious gardeners have also taken to using a small propane torch, like that used to caramelize the top of delicious creme brulee. Torching weeds make be fun, but again, it doesn’t necessarily get at the roots. This method would work best on annual weeds, but is not recommended for use around mulch, bark or pine straw. Given our drought, winds and periodic burn bans, this method should really only be considered only in areas with rock, concrete or pavers to avoid any possibility of fire.

For those with a wide area of weeds, smothering them is another option.  Layer newspaper (at least 4 sheets thick) or cardboard over the offending area for a while. The length of time will depend on the weeds and the time of year, but they will eventually die from lack of sun. Be sure to leave the layers on long enough to ensure that other weed seeds aren’t sprouting as well.

And, finally, my favorite way to deal with weeds is to simply hide them or choke them out with beautiful plants. In the competition for sunlight, water and nutrients, a garden thick with ground covers, low-growing perennials or flowers can overwhelm weeds.

Whichever method you use, the best approach is to keep after them on a regular basis, so they don’t get out of hand.

Local Landscape Designer and Garden Coach Diana Kirby provides landscaping tips at http:/www.dianasdesignsaustin.com and writes a garden blog at https://www.dianasdesignsaustin.com

By |2017-11-29T23:27:11-06:00March 22nd, 2014|Articles|Comments Off on Spring has sprung, and so have the weeds

Spring cleaning in the garden

txaas_masthead
IMG_2258

Unlike warmer winters, when many of the perennials in our gardens survived and even bloomed through the season, this year has been a cruel test of our gardens.

After repeated record cold spells, our gardens have suffered significantly more than recent years. The severe freeze damage we’re seeing has even the most seasoned gardeners wondering what will live and what will die when it’s all said and done. Is it dormant or is it gone for good?

We officially have only a few more weeks to worry about the danger of frost. But the excessive cold this winter could turn traditional garden wisdom on its ear. According to the USDA Hardiness Zone map for the Austin area, our average last frost occurs between March 1 and March 31. It’s typically the middle of March. But with this atypical winter, I’m trying to adjust my early spring expectations and prune a little more conservatively than I normally would on non-woody perennials.

But we can start pruning back our dormant woody perennials now – those tough native and adapted plants that now look like dead sticks in your garden.

Perennials

Woody perennials are still growing from their roots and will soon show some tender growth down at the ground level. With these plants—like lantana, esperanza, Turk’s cap, copper canyon daisy and the salvias that aren’t still green above ground—it is time to clean up the dead limbs and stimulate new spring growth. Don’t be afraid, woody plants can be pruned almost to the ground.  Just make clean sharp cuts leaving about 6” of stem above the ground. You can also prune native and ornamental grasses down to the base now.

Other plants, like the salvia greggiis and skullcaps that are still green above ground, should get a good pruning now, too, but not down to the ground. Because they are still green and growing above ground – you can cut them back by up to one-third to encourage fresh, new growth and give them the shape you like. Most gardeners are hesitant to prune this much, but plants like these will bounce back quickly with full, lush foliage will soon be blooming as the days continue to warm up.

Now is also the time to prune most roses. Do not prune spring-flowering plants, however, until after they have bloomed.

You should also wait to prune most evergreen shrubs until we’re closer to that last frost date, so that a surprise late freeze doesn’t kill tender, new growth.

Now that everything is looking clean and starting to bud out, don’t be tempted to fertilize newly-pruned plants just yet. They need to use all of their energy to begin new growth and fertilizing now will over-stress them.  Wait until a little later in the spring — when they are established again.

Succulents

What do we do with those squishy succulents and agaves? Many of our aloes, agaves and other similar plants with juicy leaves disintegrated in these repeat freezes.  I assessed the damage in my own garden a month ago and was pleased that many of my agaves were hanging in there. Since then, many more have collapsed and turned to mush.

Freeze-damaged succulents are usually a lighter color, almost white, soon after the freeze. Later, the damaged part of the plant will wilt, and then turn black with rot. In some succulents, the affected part just eventually falls off.

On your Agaves, even with rotten or dead leaves, if the center bud is green and firm, the plant will likely to grow out and recover. However, the parts that are damaged or dead never will recover and the dead parts should be cut out. You might want to wait until the danger of frost has passed to prune the dead leaves, though, as they can still provide some protection for the center of the plant. You may be lucky enough to have some little pups – new plants – growing under the dead plant when you remove dead leaves, so look for them as well.

On these periodic warm days with spring just around the corner, it feels great to be out in the garden again, even if it means mundane chores like weeding and pruning.

Local Landscape Designer and Garden Coach Diana Kirby provides landscaping tips at http:/www.dianasdesignsaustin.com and writes a garden blog at https://www.dianasdesignsaustin.com

By |2017-11-29T23:27:11-06:00February 28th, 2014|Articles|Comments Off on Spring cleaning in the garden

Sow seeds now for spring vegetables

txaas_mastheadIMG_2357
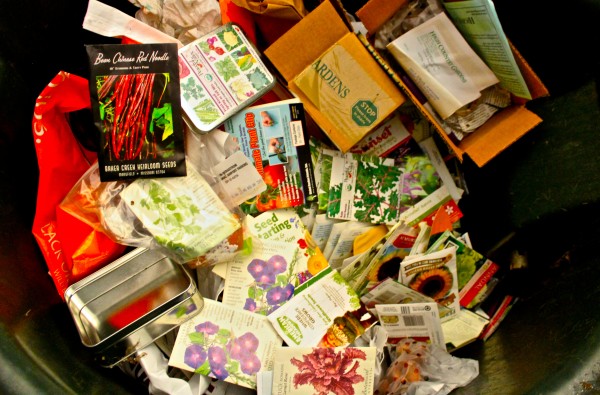
It’s seed-sowing time in Central Texas.  Indoors, that is.  If you’re eager to try some new varieties of vegetables in your spring garden, now is the time to check out seed catalogs and the seed displays at your local independent nurseries.

Seeds won’t germinate in the garden yet. The ground is too cold. But if you have a greenhouse or a cozy indoor spot to keep them warm, you can start growing now.

Generally, the time to plant seeds inside is about 8 weeks before the average last frost date – for us, that’s about early March in Austin.  Areas around the Hill Country usually have to wait just a little bit longer for the ground to warm up. With the unusual winter we’ve had thus far, it’s hard to predict what the next two months will hold for gardeners.

Planting early and indoors will give your vegetables a nice head start so you will have well-established plants to put into the garden when spring arrives.  You can certainly put in transplants once the weather warms up, but planting from seed allows you to choose from hundreds of different varieties of vegetables since nurseries can only bring in so many plants to sell.

You can plant in many different containers – you can buy nice plastic flats with multiple planting holes or biodegradable pots that can be placed directly into your garden when it’s time to transplant. Or you can repurpose washed out yogurt containers as long as you punch a drainage hole into them.

Many people are surprised to learn that you shouldn’t use potting soil for planting seeds. Instead, buy small bags of specially-prepared sterile seed starter mix – it doesn’t compact as much as potting soil and gives your tender seeds more room to germinate and grow.

I’ve had the best success with seeds when I used a heat mat.  Even in the warm house, the seed mix must remain at just the right temperature, and a heat mat ensures that continuous warmth for germinating seeds. You can find them at many  nurseries or online. You can also place your seeds on top of the refrigerator, but I forget about them up there and then…no seedlings. If you place them near a sunny window, remember to move them away from the windows at night because the cooler air by the window will lower the temperature too much for them to germinate. They have to stay warm, day and night.

Be sure that you keep the soil moist. You can water with a spray bottle so you don’t disturb the seeds. As soon as the seedlings emerge, give them lots of light. You can put them by a window or place them under grow lights. Turn them regularly when they begin to lean toward the sun. If they seem long and stringy, they need more light. The first leaf shouldn’t be more than an inch from the soil.

Now you can start watering your plants gently and letting them dry up a little in between waterings. You can move them to larger pots if you need to.  It’s also time to give them a little liquid fertilizer like liquid seaweed or fish emulsion.

When the chance of frost has passed and the ground begins to warm up you’re ready to put your seedlings into the garden. Not so fast, though. Seedlings need to be hardened off before they can be plopped in the garden. That’s a fancy way of saying they need to get used to being outside in the elements since they’ve been babied in the house over the winter months.

Just take them outside into a shady spot for half a day for a few days, then for a full day or two and then slowly move them into the sun in the same way.

Remember, spring winds can be hard on delicate plants, so be prepared to give them some wind break if you need to. And my sweet transplants seem to emit a signal to insects that the buffet is open. You can protect the plants from some of them by cutting a solo cup in half to make a cylinder, and placing it around the base of your seedling until it gets a little bigger and stronger, just make sure it doesn’t block the sun or the water.

Once you have all your seedlings planted, mulch, water and eat.

By |2017-11-29T23:27:11-06:00January 29th, 2014|Articles|Comments Off on Sow seeds now for spring vegetables

Bringing indoor art and style outside

txaas_masthead

dog sculpture in gardenThe current trend to create “rooms” in our gardens is opening doors to incorporating more art into our landscapes. Garden design has taken on a new sophistication in recent years, evolving from the traditional whiskey barrel planters and gnomes of old.

Today, art is being used to bring color, texture and contrast into our outdoor rooms. From gazing globes and bottle trees to metal sculptures and pottery, art can add interest and depth to your landscape. How magical it can be when visitors to your garden discover a small sculpture or stepping stone slipped in among your flowers and foliage.  Or when you can draw them down a garden path to a beautiful gazing ball.

dragonfly sculpture in garden
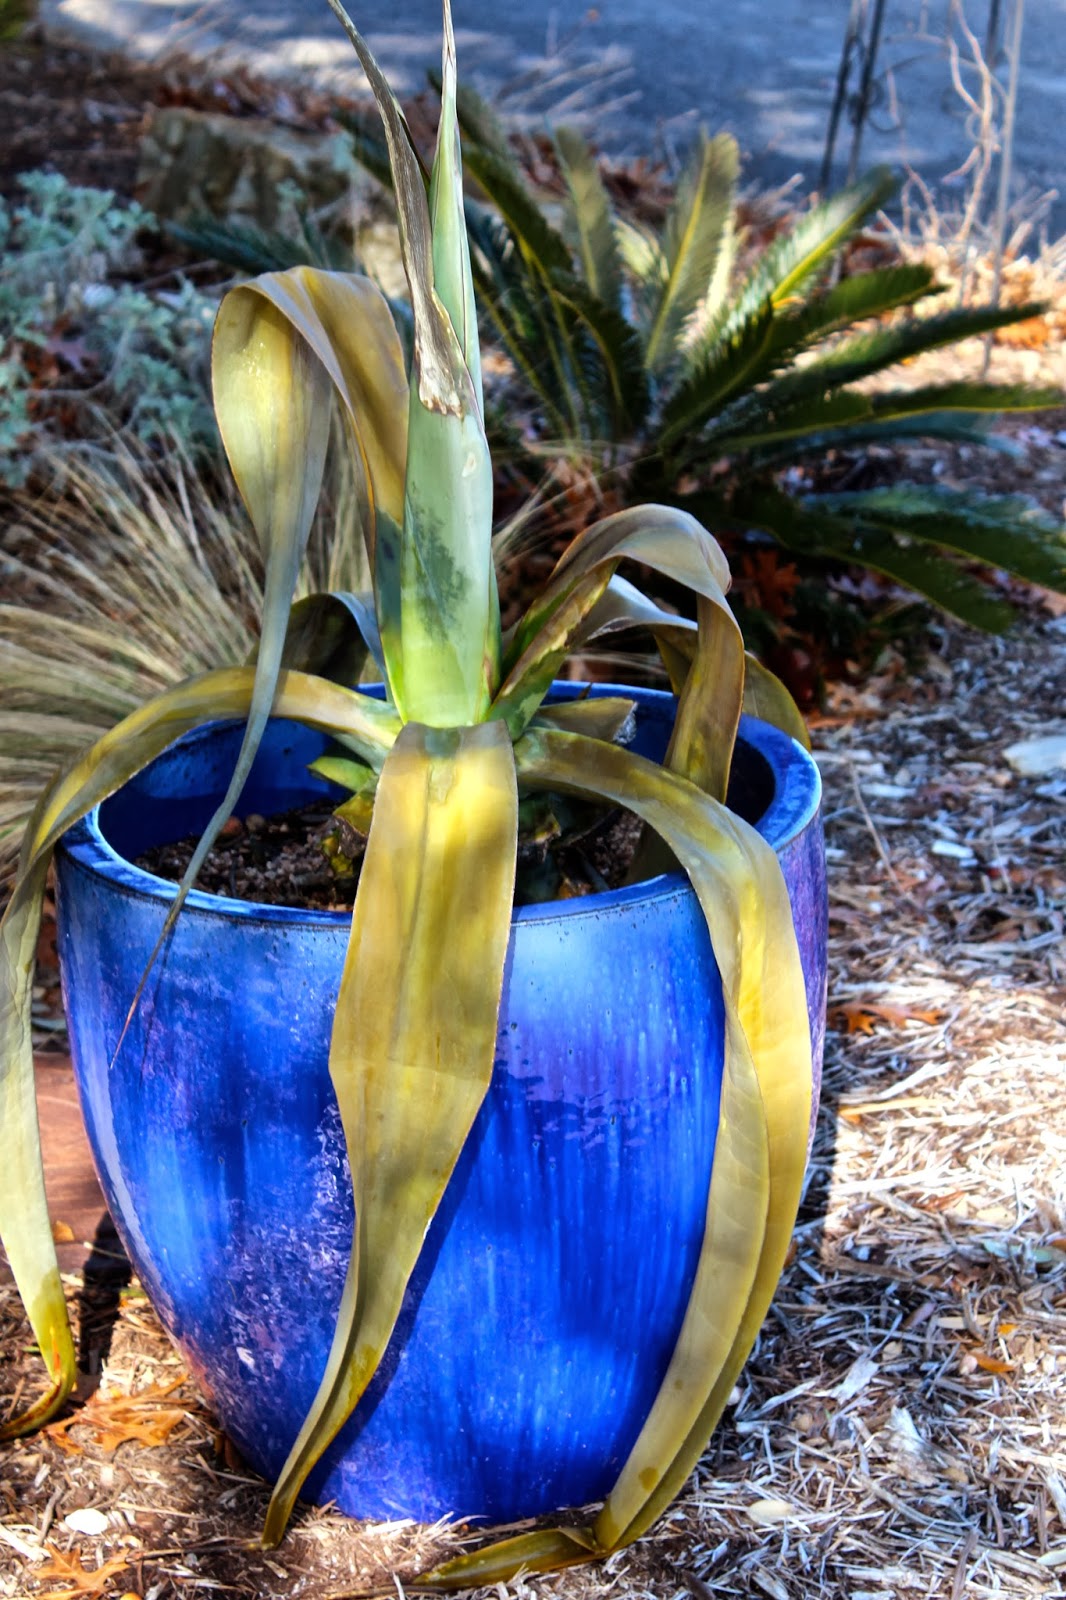
You probably shop around to find just the right painting or pottery for that special place in your home. Now, the popularity of indoor decorating with items from nature also carries over and makes that possible in the garden. Home stores like Pier 1, World Market, Home Goods and other larger retailers are adding outdoor-themed decor to their shelves. Stone or ceramic irds, iron scrollwork and small statues have become staples, available for both indoor and outdoor use.  A variety of stores also offer all-weather paintings that can brighten up a fence or front porch. A few carefully-selected items and you can add a new twist to your garden rooms.

Gardeners are always looking for ways to extend the color in their landscapes as the seasons change. Colorful art in the garden can also add a pop of interest when plants lose their blooms or go dormant. A bright blue bottle tree will brighten up a brown winter landscape.

Bringing art into our landscapes is also another tool in the raging battle against the drought. Replacing grass or beds with hardscapes and art creates new focal points – focal points that don’t need to be watered.

How to find the right art for your garden, style and budget.

Sometimes finding the right accent for your garden is as simple as bringing your indoor decor outside. Perhaps you have some lovely metal lanterns or candleholders on your bookcase – a few more placed on your porch can create a cohesive feel.

Think about your personal style and think about traditionally-indoor home decor items for use outdoors if they are weatherproof or can be placed in a protected area. You may want to find a place for something that’s special to you, or you might want to find something for a special place in your garden.

mosaic artwork in gardenConsider areas in the garden that might need a special focal point or sprucing up.  And think about the point of view – do you want something to see when you look out your kitchen window or from the couch? Or do you want to place a little treasure in some secret spot in the garden to surprise visitors to the garden?

Be sure to choose an item or items that match the scale of your garden – a grand, life-sized sculpture might overpower a small cottage garden. Something too small could get lost, so think about the right balance for your space.

And, finally, art in the garden is intended to be the finishing touch.  Don’t overdo it – the objective is not clutter, but creating a sense of purpose. People should appreciate your garden, not your “stuff.”

Your choices should compliment your garden design and your personal style, and, most of all, make you happy.

By |2017-11-29T23:27:12-06:00December 28th, 2013|Articles|Comments Off on Bringing indoor art and style outside

The right tools make gardening easier

Gardening is hard work. Digging, lugging and pulling can take their toll on you. But the right tools and techniques can transform a seemingly insurmountable job into a more manageable chore.

I used to buy garden tools wherever I could find them on sale, paying no attention to the brand or the style. With years of gardening trial and error behind me, I am a now a garden tool snob — with good reason.

IMG_1777

Carry around a good soil knife to cut through clay soil.

There’s nothing worse than a dull pruner that leaves you twisting and yanking stems because it just won’t cut it. It’s frustrating, it’s time consuming, and frankly, it’s really bad for your plants.

After watching a television ad for a pruning saw a few years ago, a Black & Decker Cordless Alligator lopper found its way onto my Christmas list. Purported to make easy work of pruning with a mid-range rechargeable power tool, I was eager to try it. Imagine my horror when the blades started whirring and churning as it literally chewed through my shrub.

Tools do make a difference.

Start with good garden tools to make the work easier. These are some of Diana Kirby’s and including a child’s rake, … read more

IMG_1780
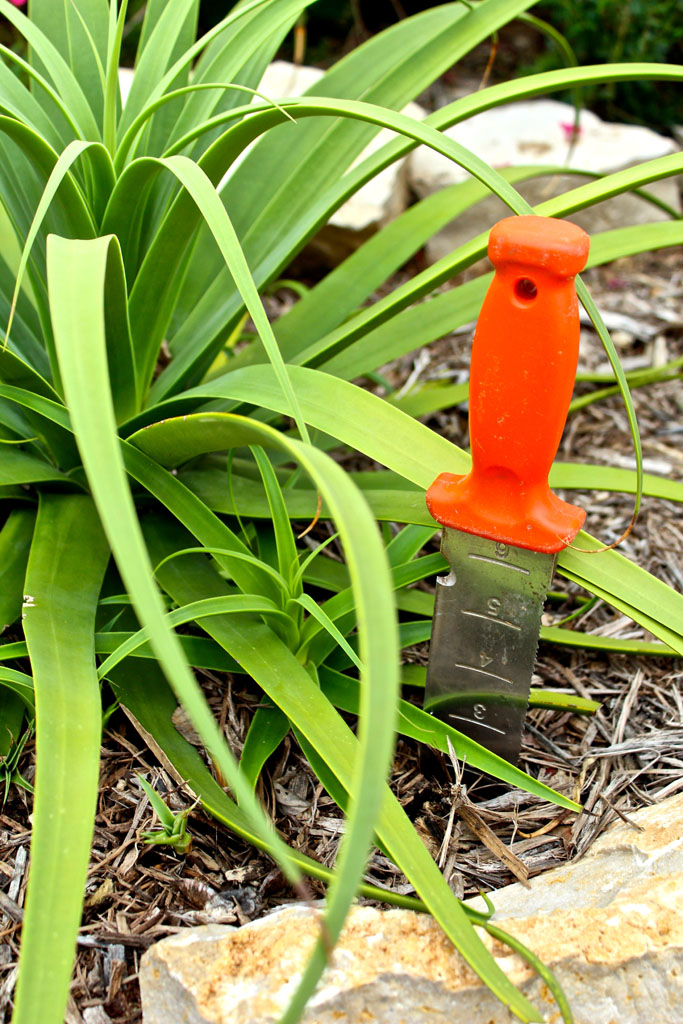
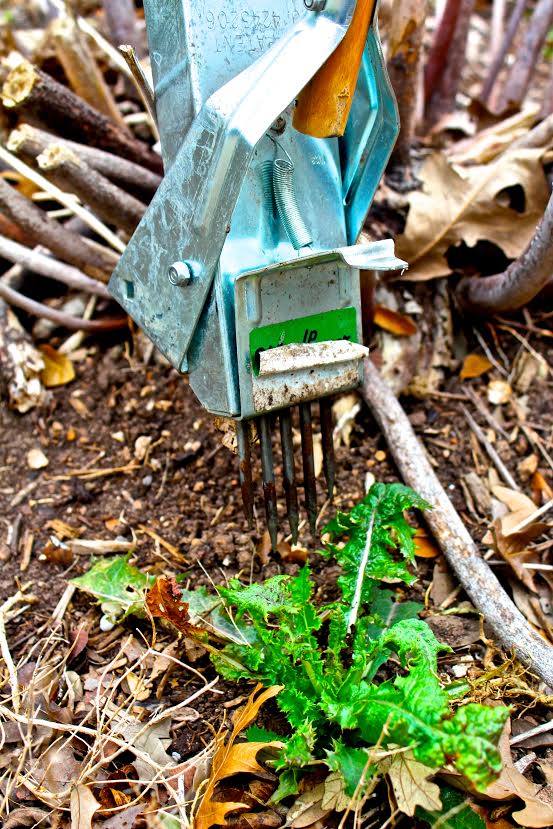
These are some of the tools I wouldn’t garden without.

Soil knife. Great for cutting, digging in small spaces and trenching, I am never in the garden without my soil knife in hand. The sharp point and serrated edge make penetrating clay soil much easier work. It’s great for digging small holes. It can cut through weed barrier, remove small agave pups and little roots that might be in your way. If I were stuck on a deserted island, this would be my one garden tool. My soil knife is from www.gardenersedge.com.

Telescoping pruners. I’ve always had loppers — long-handled pruners for reaching in to trim shrubs or small trees. But my latest pair is expandable — with handles that unscrew and lengthen to reach just a little bit farther without having to get a ladder. At 5-foot-2-inches and with a fear of heights, anything that keeps me off of a ladder is a good thing.

Tomato cages. If you plant indeterminate tomatoes, you know they can grow up to be top-heavy monsters that can literally lay down a traditional round tomato cage. Then I discovered the extra-tall tomato towers by Gardener’s Supply Co. They are square, so they are sturdier than a 3-legged, cone-shaped cage. The extra tall ones can easily handle a vigorous grower, and they fold flat for storage — a real plus. They’ve recently added a new feature — coating the metal so they don’t rust. They are from www.gardenerssupply.com.

Rechargeable blower. Gardening is messy. You’ve got to have a broom, and a blower. I have three blowers. I started with the standard electric model, but the cord was always too short or in the way. So a few years later I bought the lightest-weight gas blower I could get. That was a mistake. Always messing with the pull cord and the primer and the fuel mix … ugh. The third one was just right. It has a little less power than the others, and the battery charge doesn’t last a long time, but it lasts long enough to clear off my front porch, sidewalk and really long driveway on one charge. It’s lightweight and easy to handle — so much that I gave one to my 83-pound mother-in-law, who loves it.

Bypass pruners. There are a lot of good pruners on the market — Fiskars and Dramm to name a few of the top brands — but I am a Felco girl. Yes, they are expensive, but they work. They handle well and have at least a dozen models that are specifically designed to fit your hand, no matter what size it is. They even have a full line of pruners for left-handers. With chronic tendonitis in both my arms, an easy-to-handle pruner that fits my hand makes a big difference.

Compact pruners. You need those curved bypass pruners, but you also need a pair of straight ones for deadheading and for cutting softer stems that tend to get bent in pruners for larger stalks. This little tool makes quick work of the snip, snip, snipping of spent blooms. There are many different brands of small and straight-edged pruners — my favorite pair is from Dramm.

Weeder. You can’t just pull weeds. Not in this kind of Central Texas soil. (Although our recent rains have made it easier, if only temporarily.) The clay and limestone we live with gets a death grip on weed roots and all your work will be for naught if you don’t take the time to pry a little of the root. My favorite tool for this is the CobraHead. Because of the way it’s made, the angle at which you use it is so much more comfortable for my hands and arms. Instead of holding a straight weeder with your thumb on top, pressing down and trying to pry upward, you can use the real power of your body to smack it down into the soil to pry loose the weeds.

Children’s tools. I have two different children’s garden tools on my rack in the garage — a hoe and a tiny rake. These are not well-made, but they often make working easier. The small hoe can come in handy in the vegetable garden where plants are often planted very close together. It’s also much lighter weight than a full-sized version. The rake is great for getting leaves out from between perennials and shrubs in garden beds.

Trowel. You might think a trowel is a trowel. Not so. When I first got my Fiskars “big grip transplanter,” I thought it was really heavy-duty and I didn’t know if I would really need that thing. That “thing” is great. Like the soil knife, its beveled, sharp, pointed end is perfect for slicing into unforgiving soil. And it’s big – it holds a lot of soil for a trowel and works well for digging a hole too large for the soil knife.

When I discover fabulous tools, I give them as gifts to my gardening family and friends. You can find the soil knife, tomato cages, pruners and blower at my parent’s house and my mother-in-law’s house. Other tools have found their way into friends’ Christmas stockings!

My motto: when you find something that really works, buy two.

By |2020-04-13T16:17:25-05:00October 30th, 2013|Articles|Comments Off on The right tools make gardening easier
Go to Top