
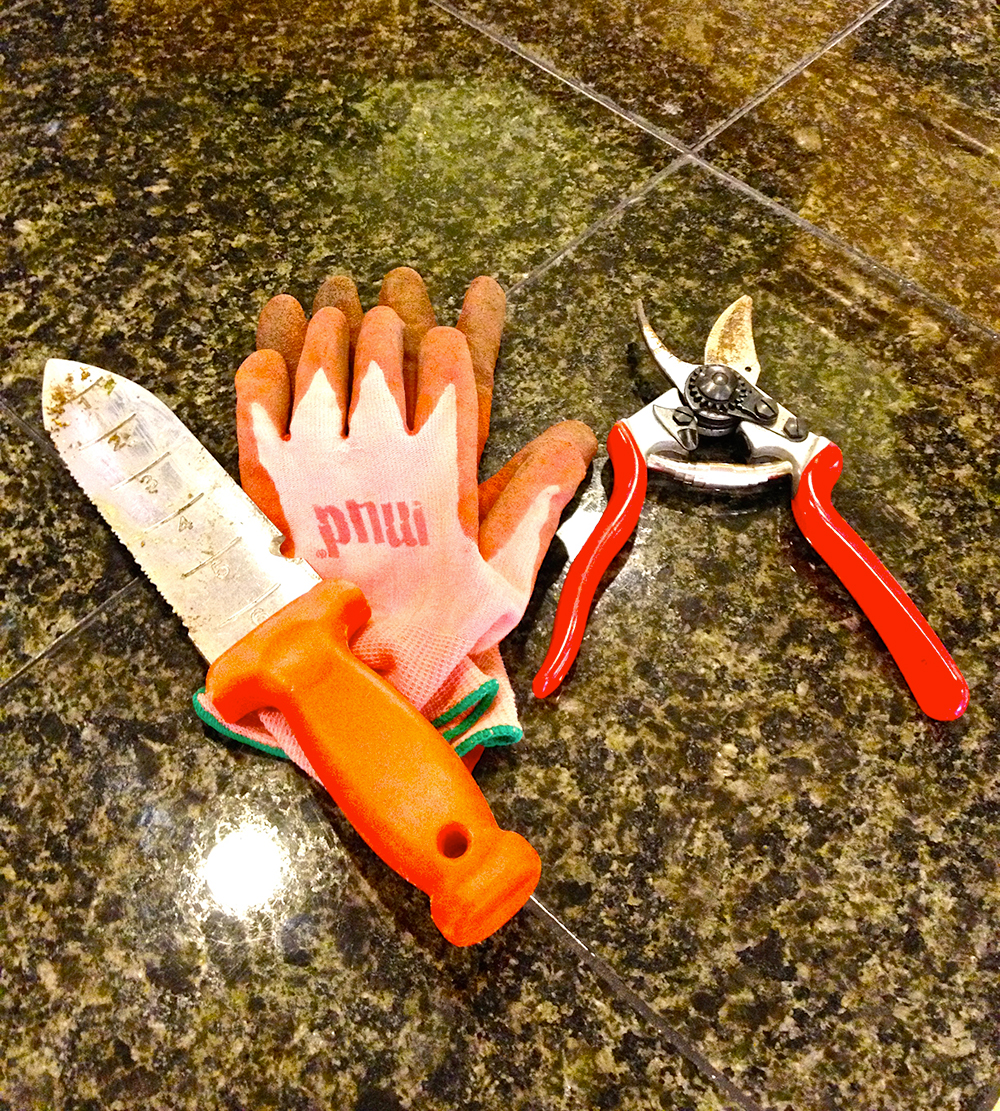
Take care of tools to save time, money and work
 For cold climate gardeners, now is the time to bring in tender plants, clean and put away the tools, and curl up with seed catalogs to wait for spring. Here in Central Texas, where we garden and use our tools most of the year, tool maintenance should be a regular practice.
Even the most meticulous gardeners spin tool horror stories. Like the tale of the fish that got away, any gardener can entertain you with stories about pruners left in the rain or spades left in the compost. We’ve all done it. My best tool tale involved my tossing an uncapped construction paint can into a bucket where it immediately began spraying the Felco pruners in the bucket and the grass and everything else around it a bright, Day-Glo orange.
 Taking care of your tools makes gardening easier. Rust-free pruners cut more easily and don’t crush and damage tender plant stems. Sharp shovels and hoes require less effort to push into the ground. A little linseed oil will go a long way to lessen the amount of elbow grease your need to accomplish your gardening chores. And if you’ve priced good bypass pruners lately, giving tools a longer life means more money for plants.
Designed to make clean up a simple habit, use these quick-care tips to lighten your gardening load
Rinse off your tools immediately after using them. Stuck-on wet soil, especially our terrible clay, sets the stage for rust to begin degrading tools. Use a scrub brush or S.O. S. pad to remove any stubborn remains. Wipe them dry with a rag and leave them outside for a while to fully dry.
Just as you carefully oil and ‘season’ your cast-iron skillet, oiling your tools will also give them longer life. Fill a small plastic container with sand and barely moisten it with linseed oil, or even motor oil. Then push your hand trowel down into the moistened sand, pull it out and let the gritty mix help you clean your tool as you rub it with a rag, removing all the sand.
For tools that have collected sticky plant sap or resin, use a little paint thinner on a rag to remove the residue before the sand cleaning process.
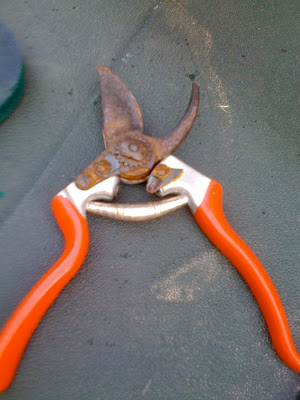
If your pruners are already sporting a nice burnished coating of rust, roll up your sleeves and start by taking them apart. The most important rule to remember – as you begin to disassemble – lay each part out in a line on the counter in the order in which you removed it. Use steel wool or sandpaper to begin removing the rust. Then wipe the tool off and finish with linseed oil.
Travis County Master Gardener Sheryl Williams recently hosted a tool cleaning and sharpening gathering for a small group of Austin garden bloggers. She showed us her techniques.
“I grew up in a hunting family,” said Williams. “My grandpa taught me early on how to sharpen a knife using a whetstone, and then later taught me how to sharpen a hoe and a shovel.”
“I know some novice gardeners who have simply thrown away their tools because they didn’t know they could be sharpened.”
To sharpen tools, clean them, then use a sharpening stone or a file to sharpen the beveled portion of the blade. For hand pruners, a 6” smooth file should work, while hedge trimmers and loppers will probably require an 8’-10’ mil file. For harder steel tools, you may finish with a diamond or ceramic hone as well.
Do not sharpen both sides of the blade; make sure each filing stroke goes down the entire length of the blade with the file parallel. Don’t file across the blade or on the back side of the blade. This can lead to nicks and damage to the blade.
Williams keeps her sandy bucket and rag by her tools and makes a quick cleaning part of her routine each time she gardens.
Williams summed up best motivator of all for developing proper tool maintenance habits, “If you’re using dull or dirty tools to garden, it’s going to take much more human effort to do it.”
Local Landscape Designer and Garden Coach, Diana Kirby, provides landscaping tips on Facebook at Diana’s Designs, at www.dianasdesignsaustin.com and writes a garden blog at www.dianasdesignsaustin.com.

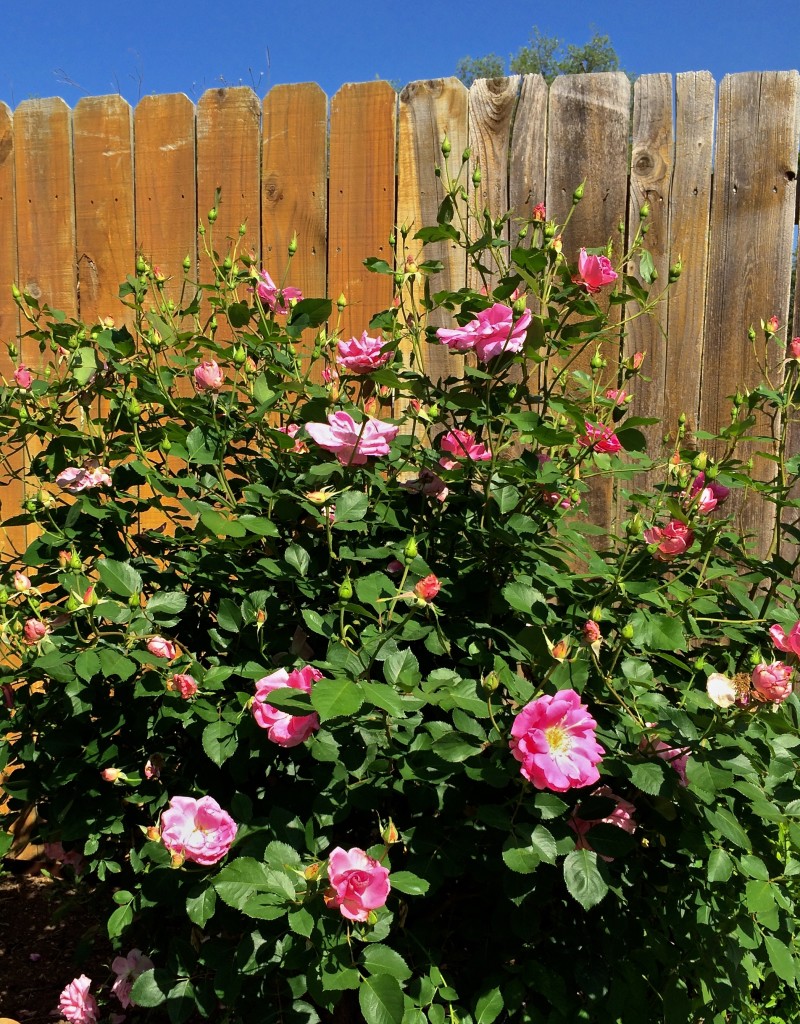 Just as most plants in the garden are starting to shoot up, it’s time to whack back your roses. Oh no, you say, I couldn’t possibly do that. But if you want healthier plants and more prolific blooms, take your shears in hand.
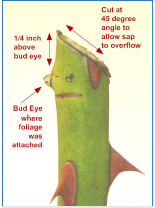 If you have climbers or one-time bloomers, wait until after they have finished their spring blooming because they bear flowers on last year’s wood. For continuous bloomers, a thorough spring pruning in Central Texas is usually done between the middle of February and the first week in March. Don’t worry if your rose has already sprouted growth, it’s still important to prune them now – they will reward you if you do. The ever-blooming varieties will then put on a show all summer because they bloom on new growth, which is prompted by pruning.