dry creek

Delightful garden tour on a challenging slope …

It’s a treat to get together once a month with other Austin garden bloggers to share stories, enjoy each others’ gardens, eat, drink and pass along plants at our plant swap.

On Saturday, we were treated to double the fun.  In addition to our monthly gathering at the stunning garden of David and Jenny of Rock Rose, we also ventured nearby to their neighbors and were given a guided tour of another beautiful garden.

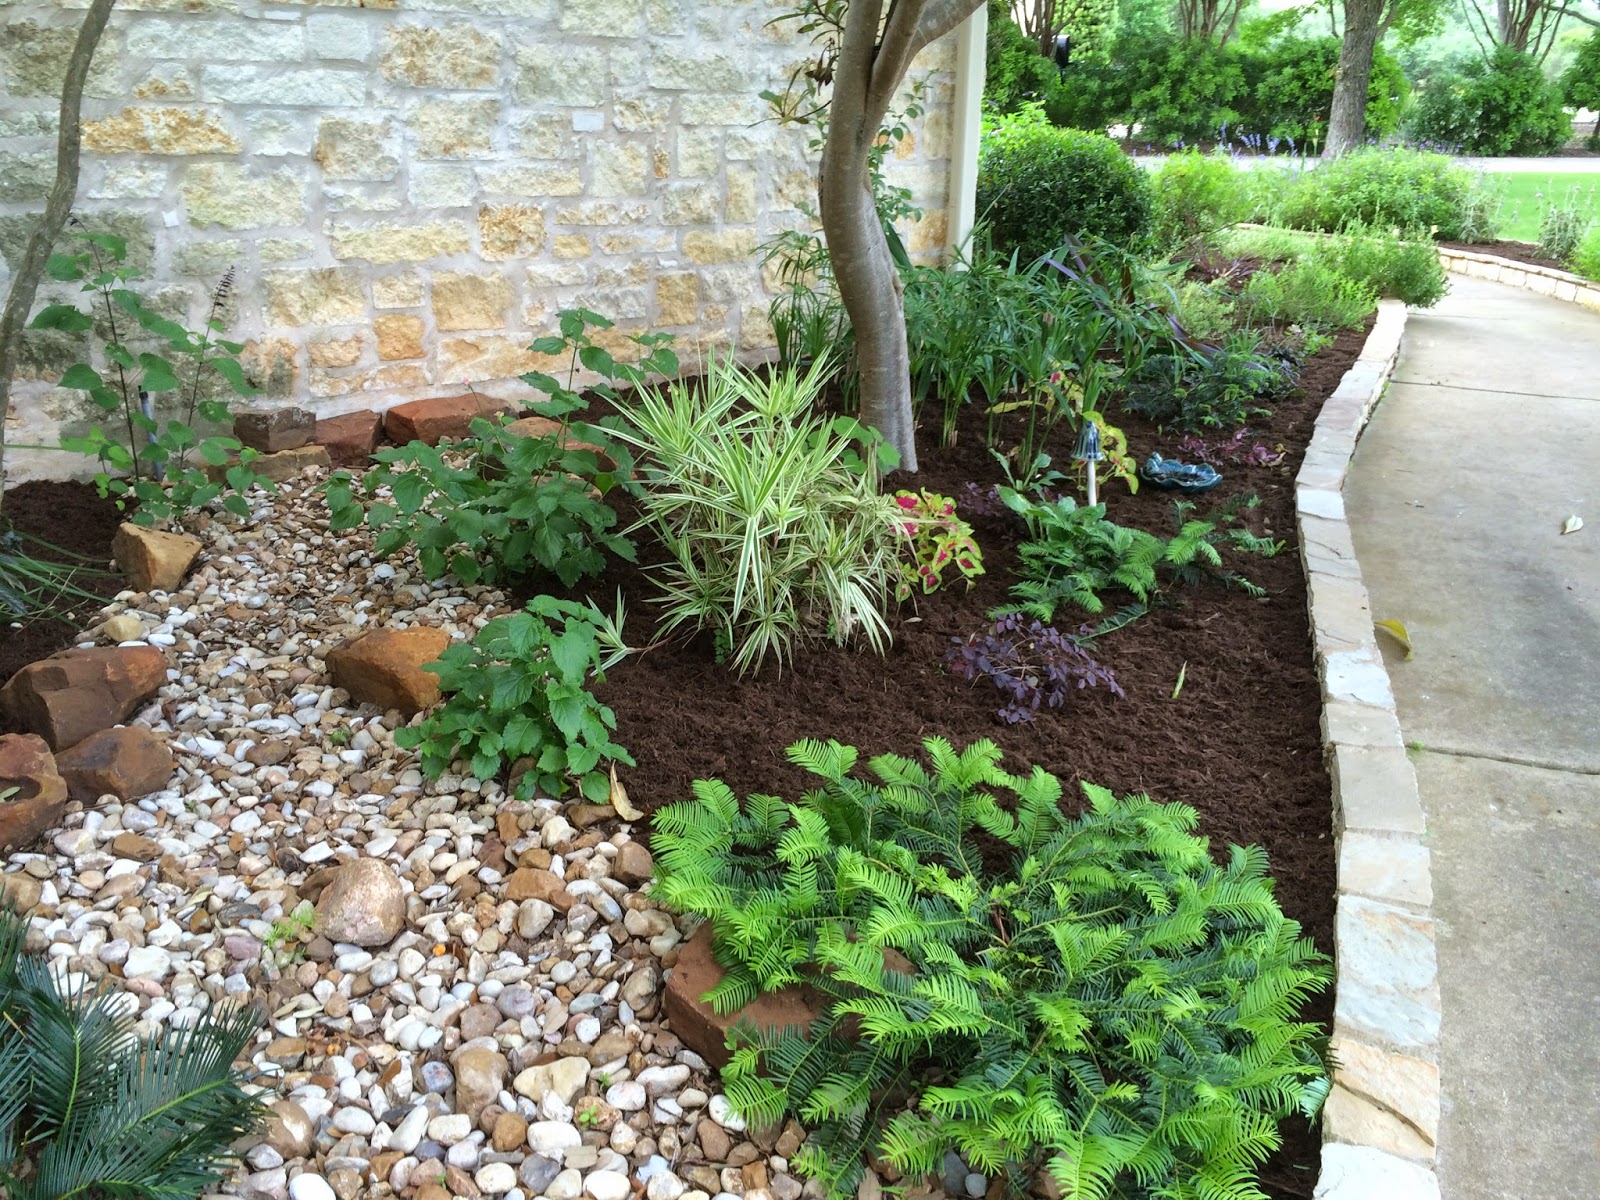
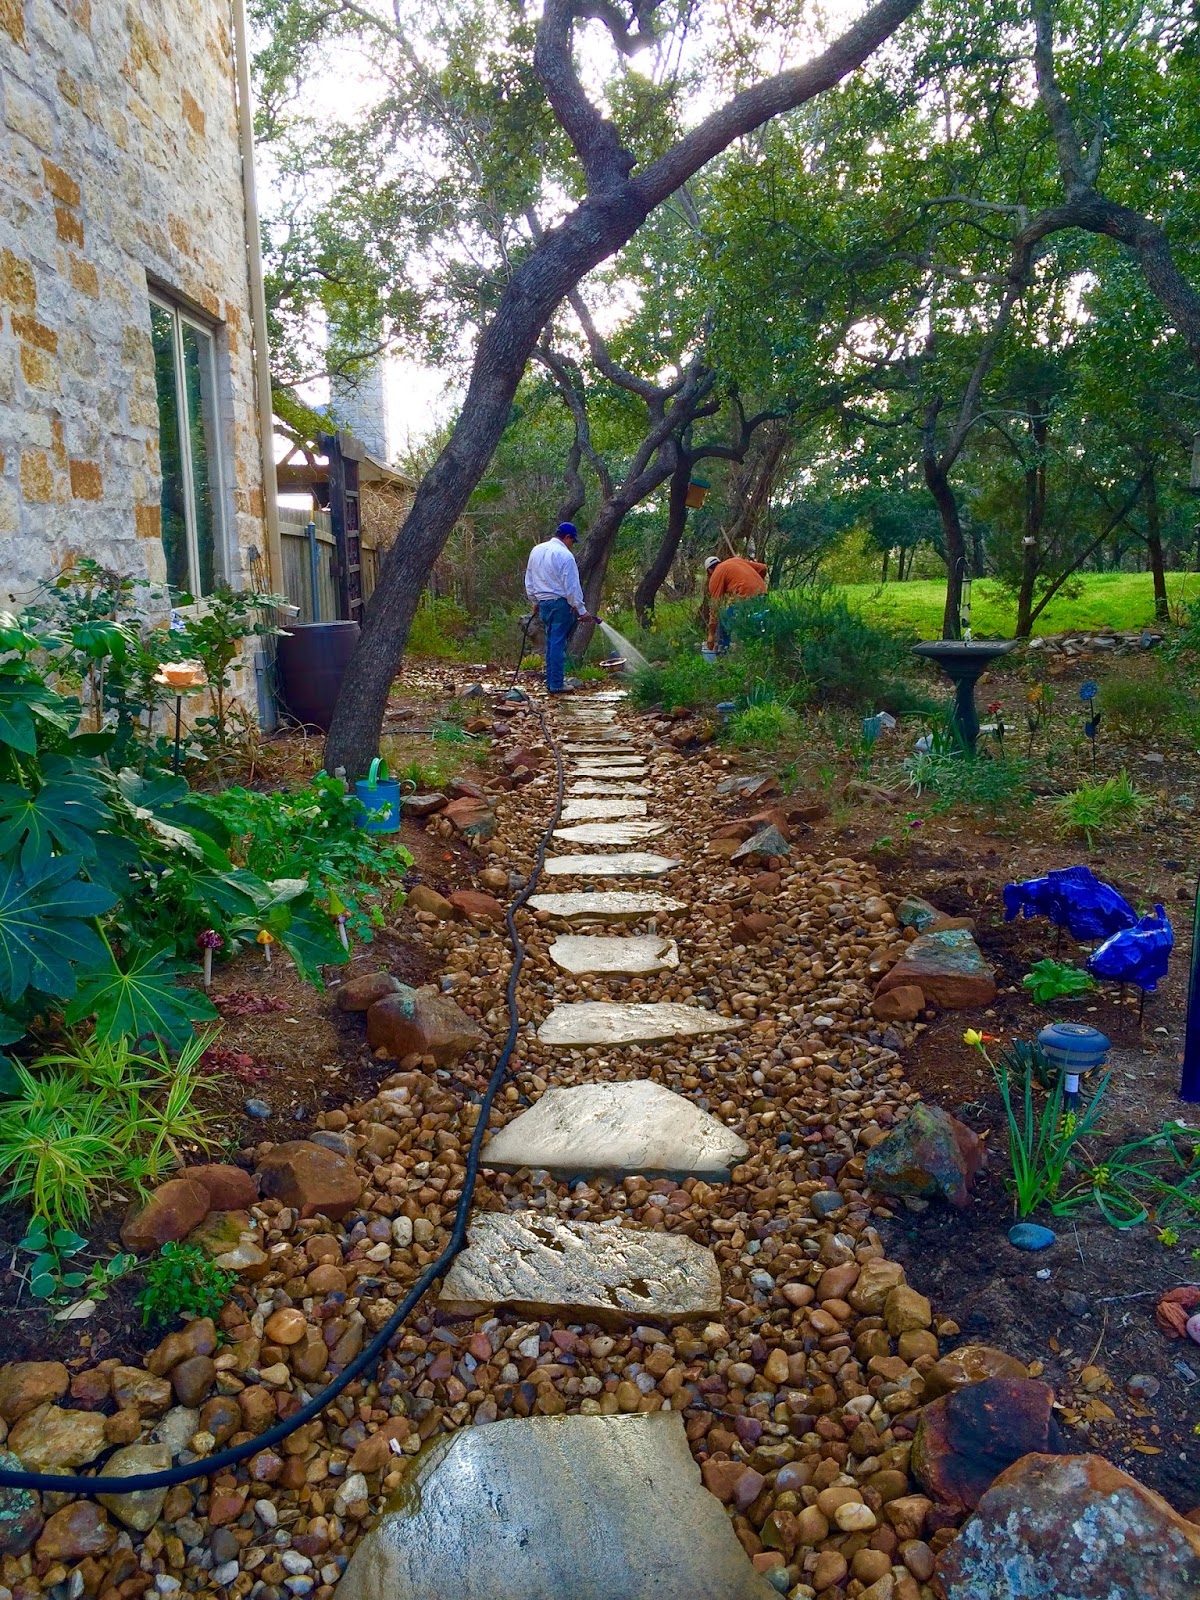
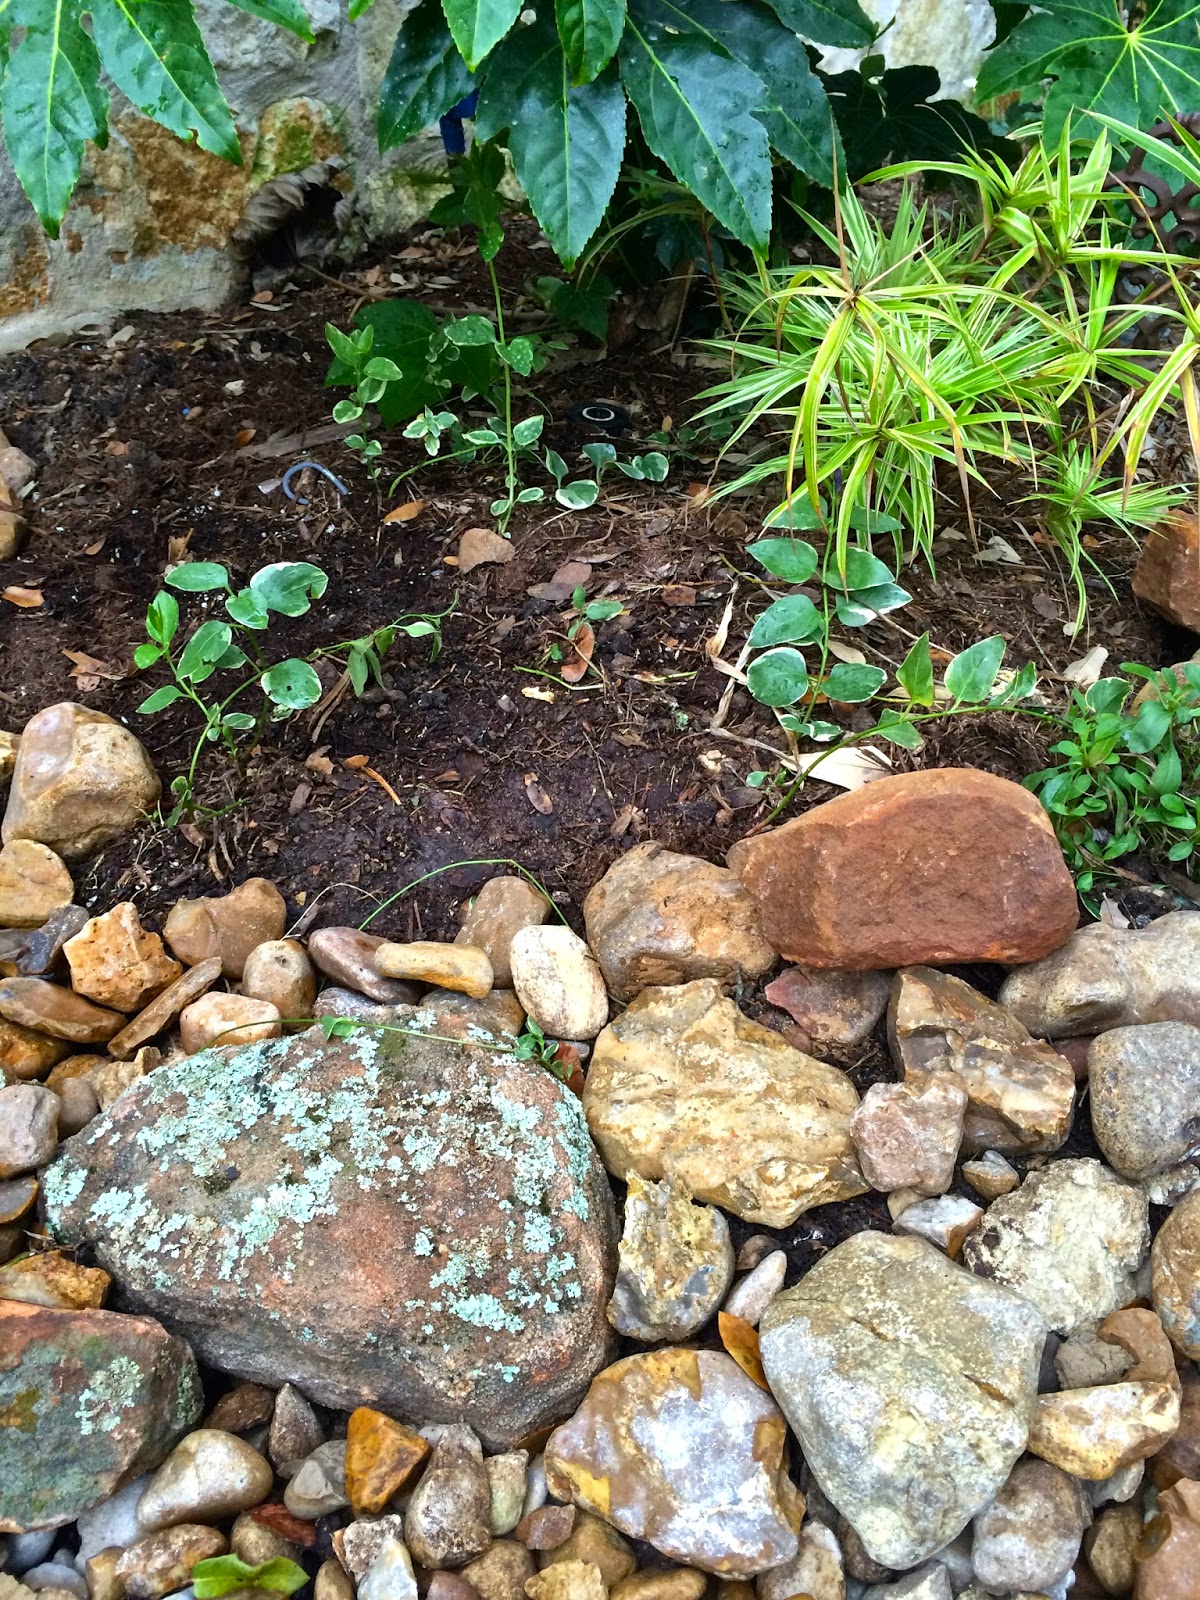
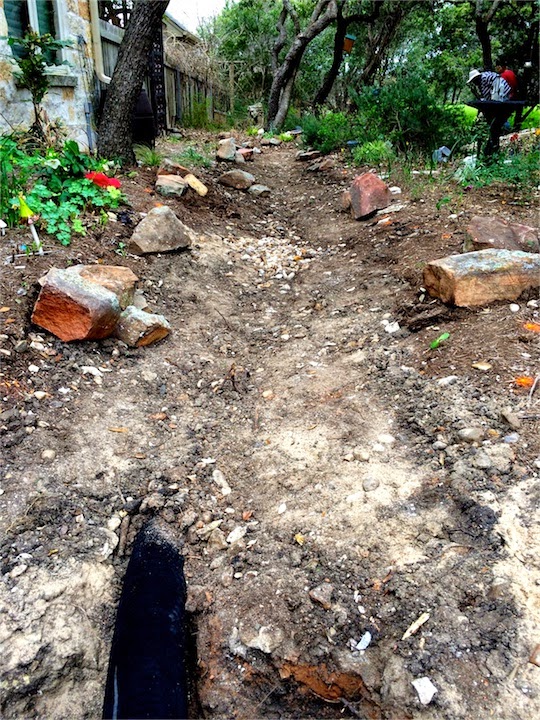
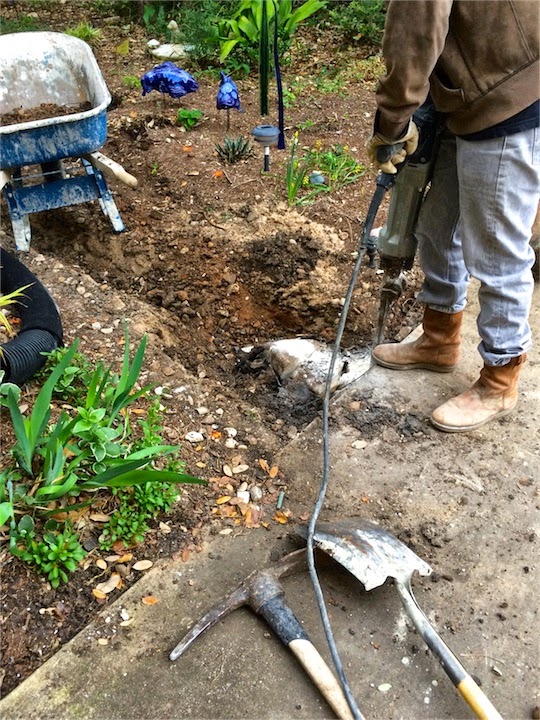
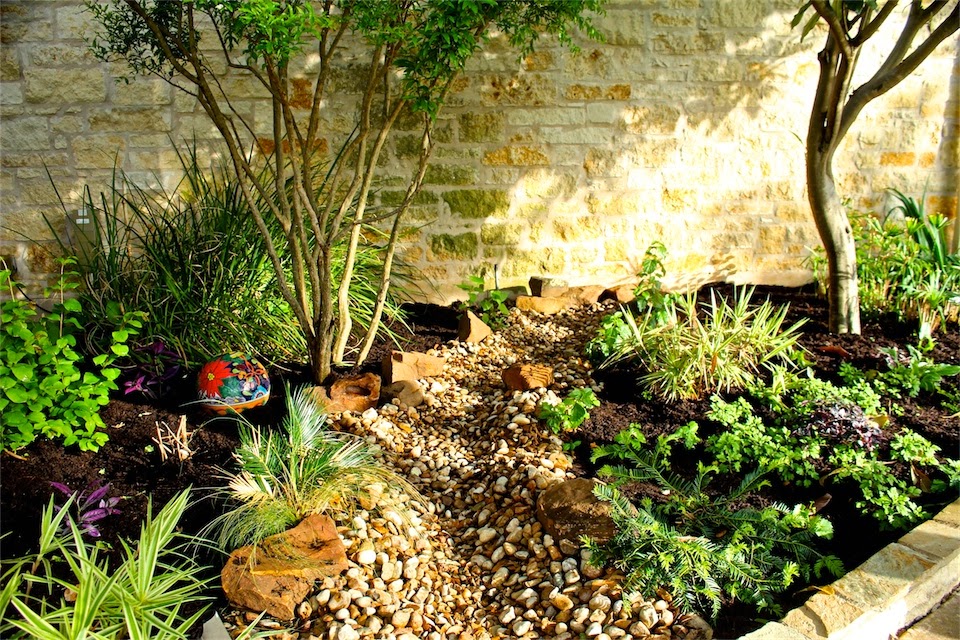
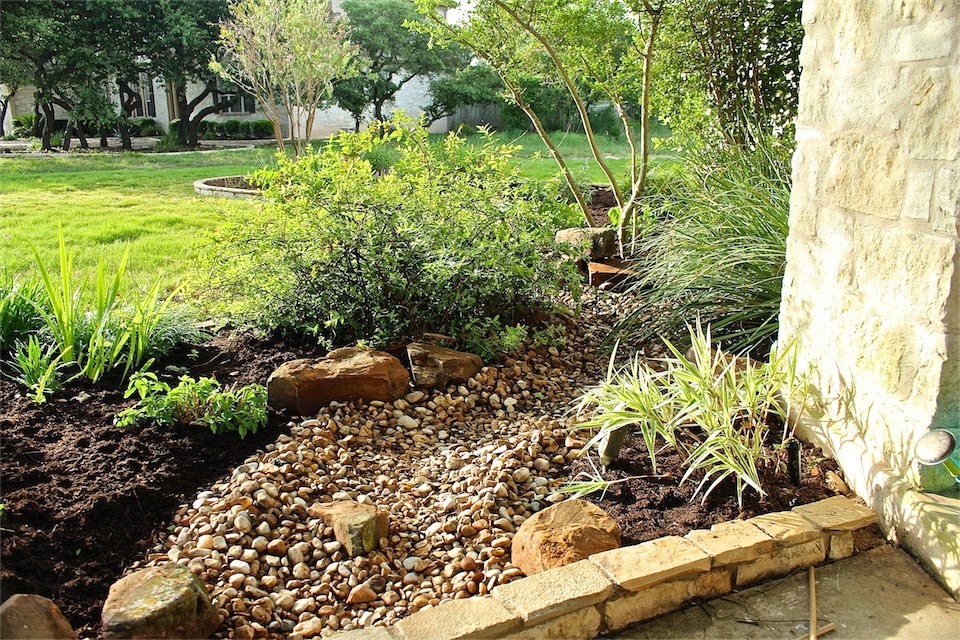
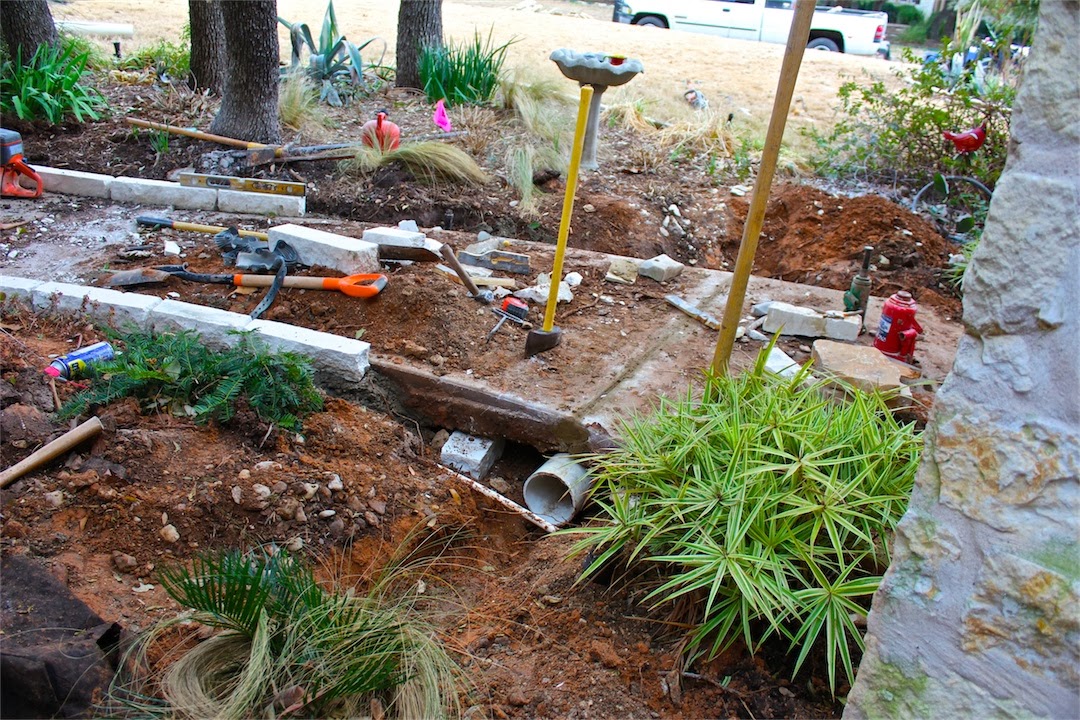
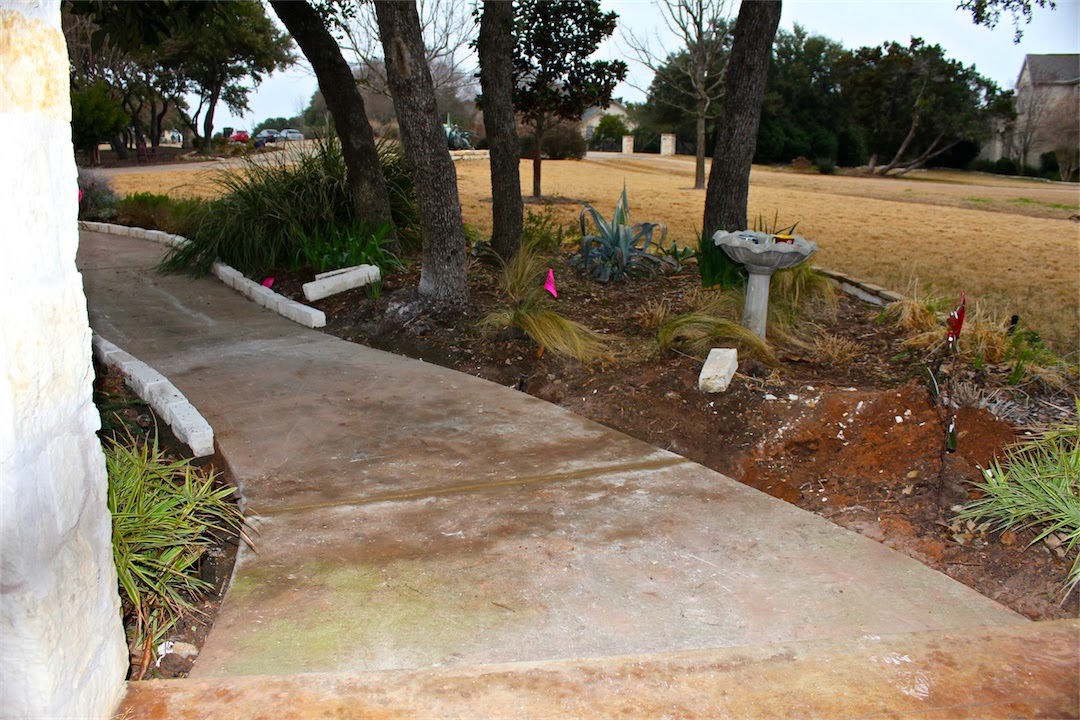
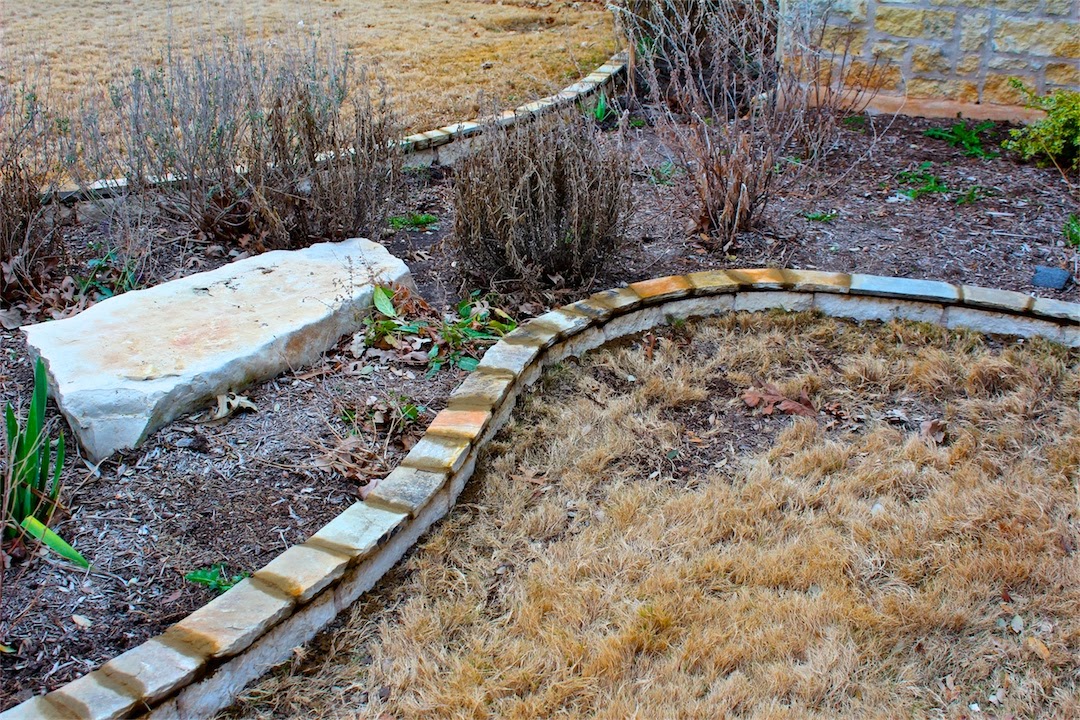
Located on approximately one and one third acre, this garden’s hills and vales are interwoven with ribbons of rock and drainage solutions that blend into the landscape. 

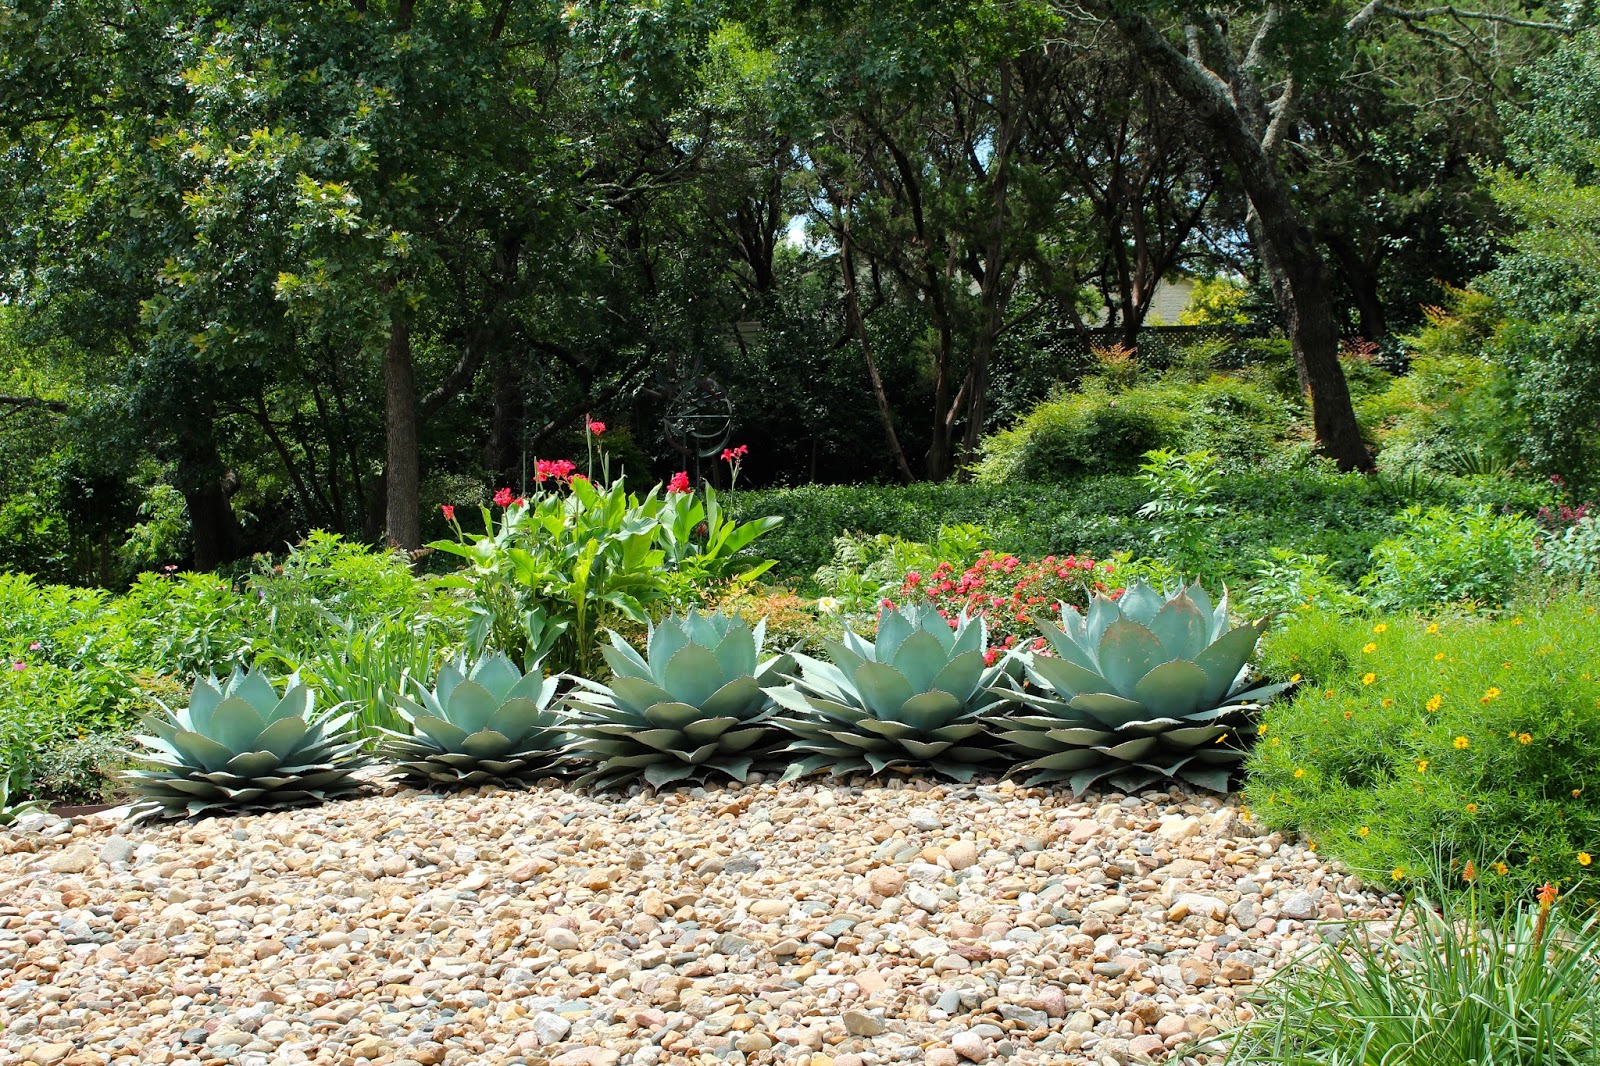
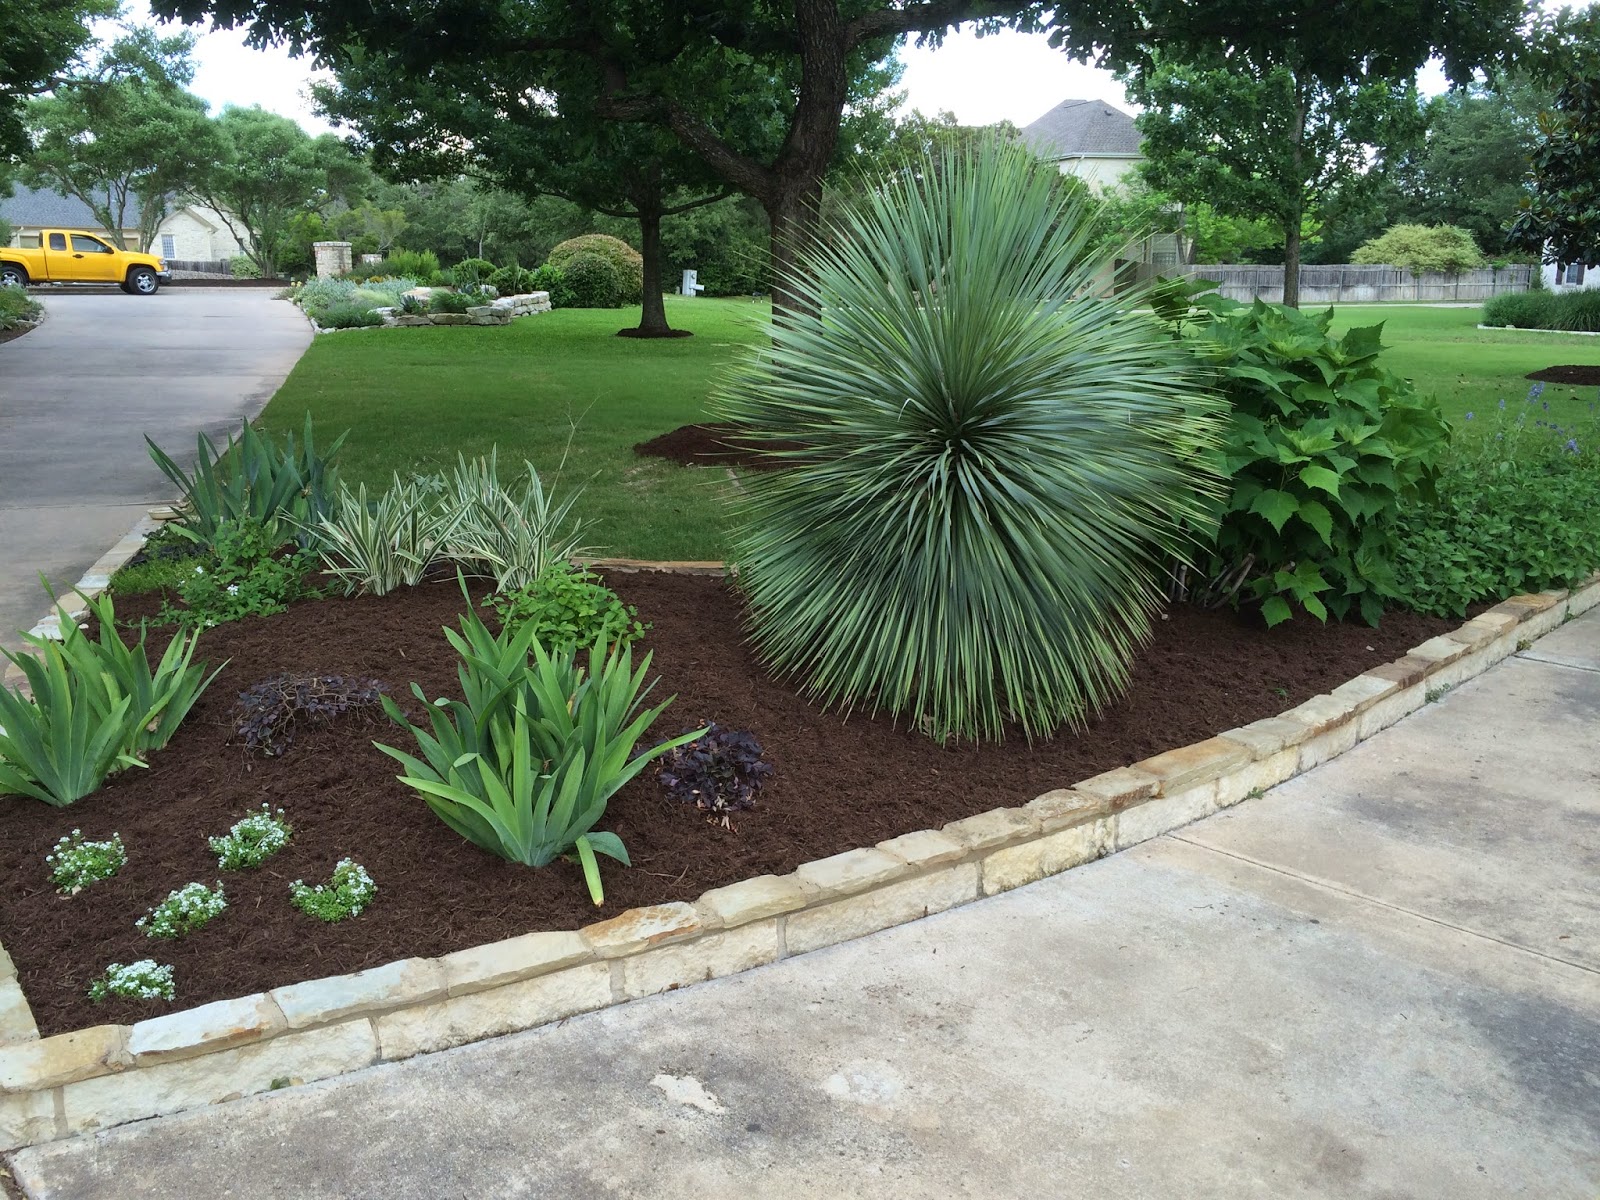
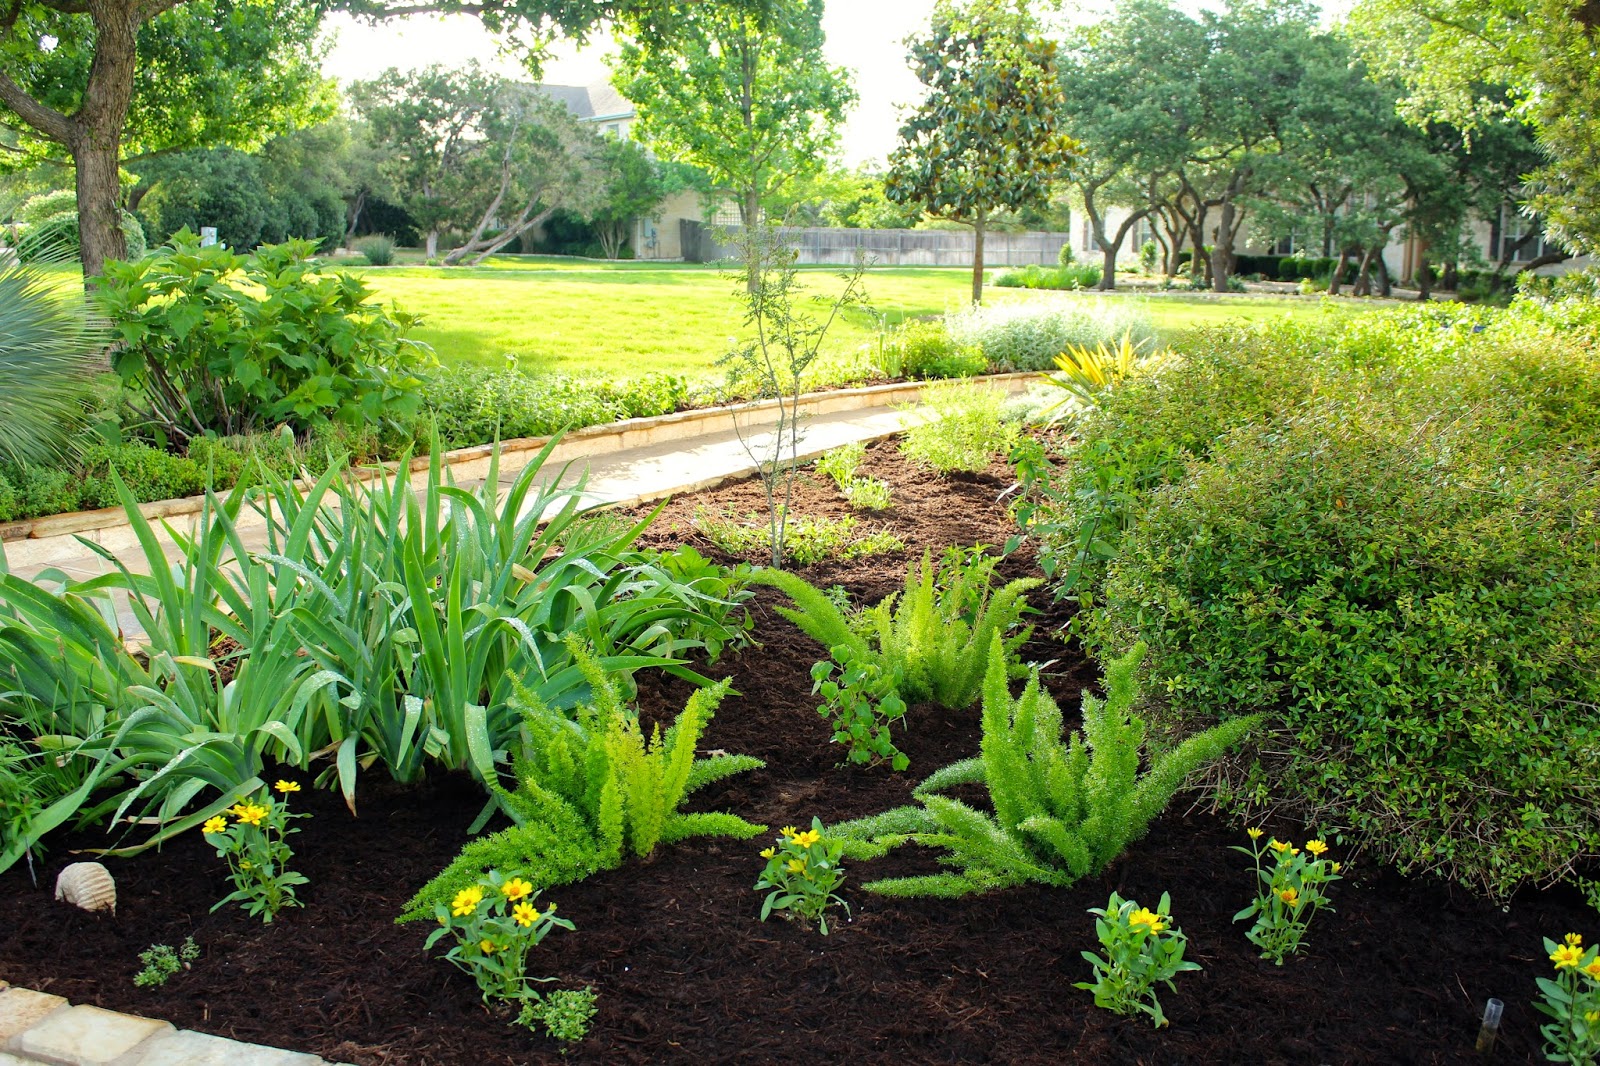
As we walked into the back yard, I was immediately drawn to this line of dramatic whale’s tongue agaves.  They sit perched atop a river rock berm, surrounded by softer foliage that draws the eye far out into the garden.

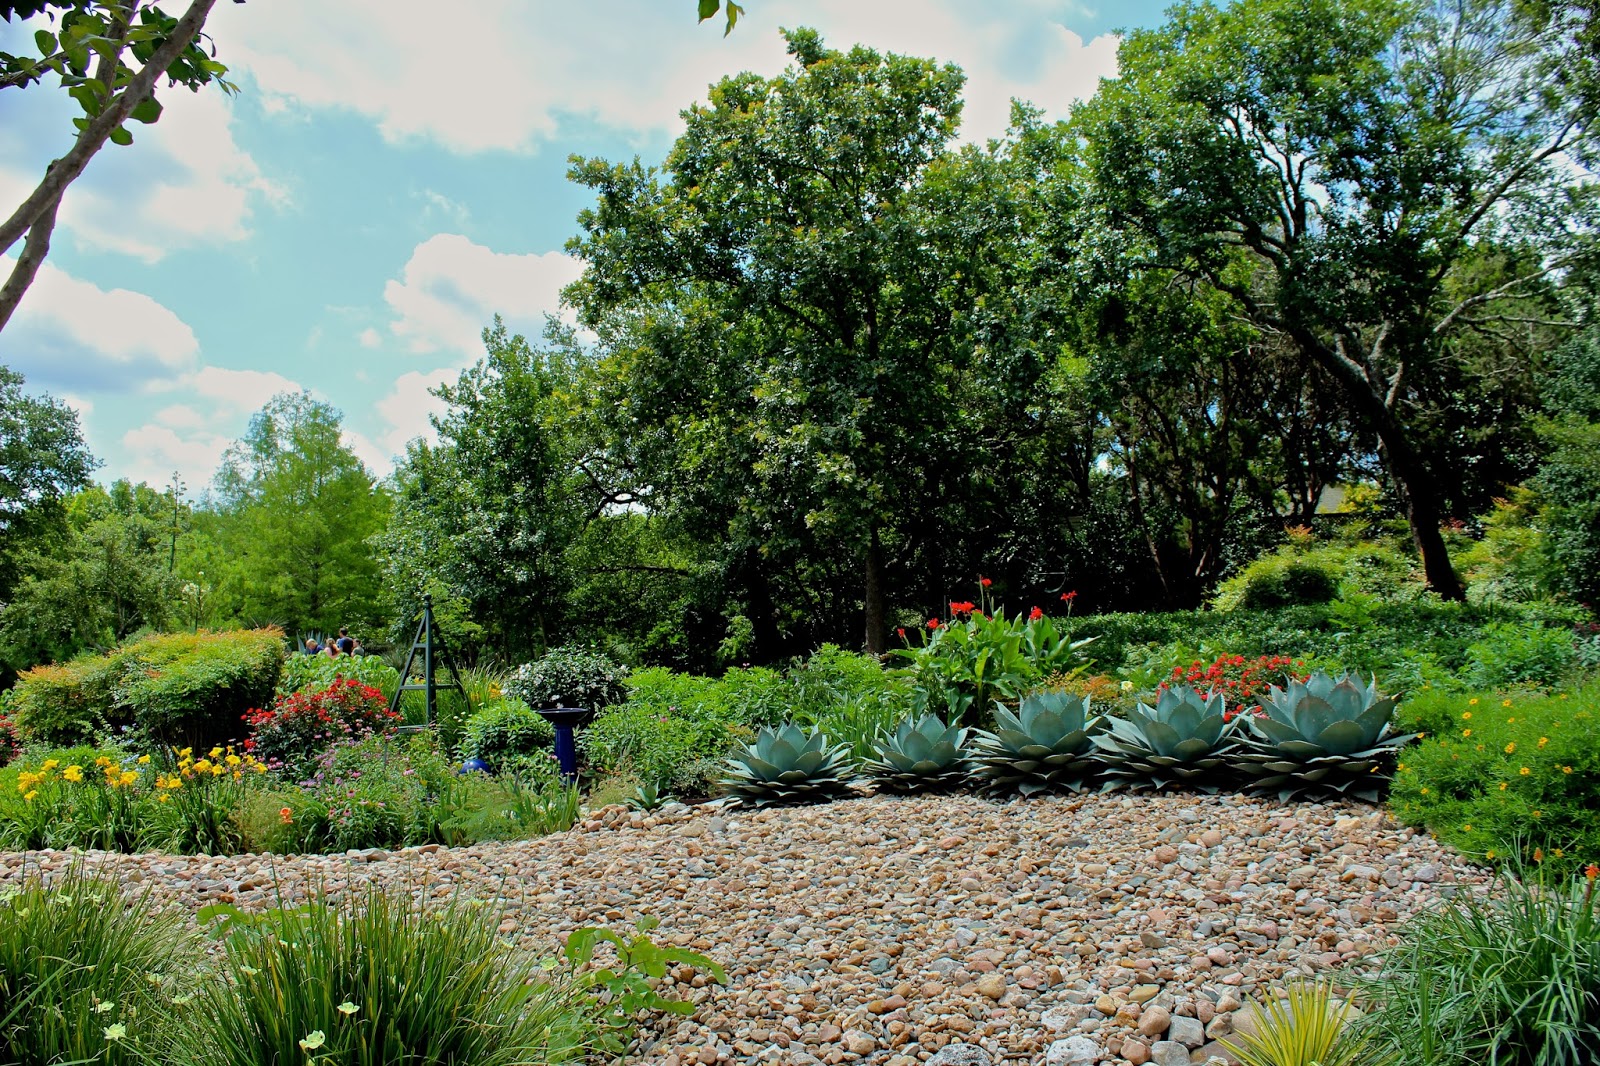
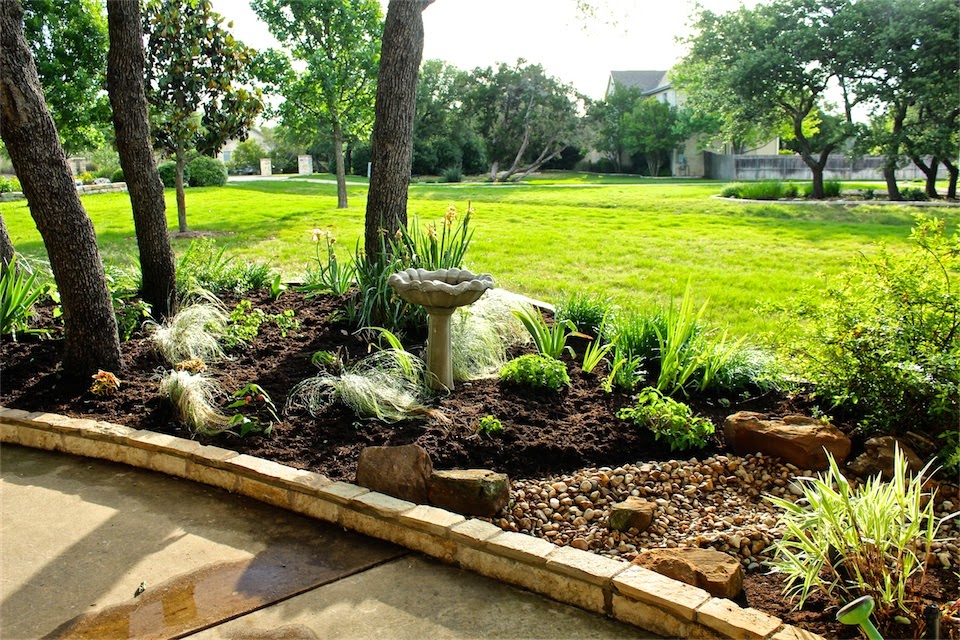
Here’s a longer shot of how they are incorporated into this first layer of the overall landscape.

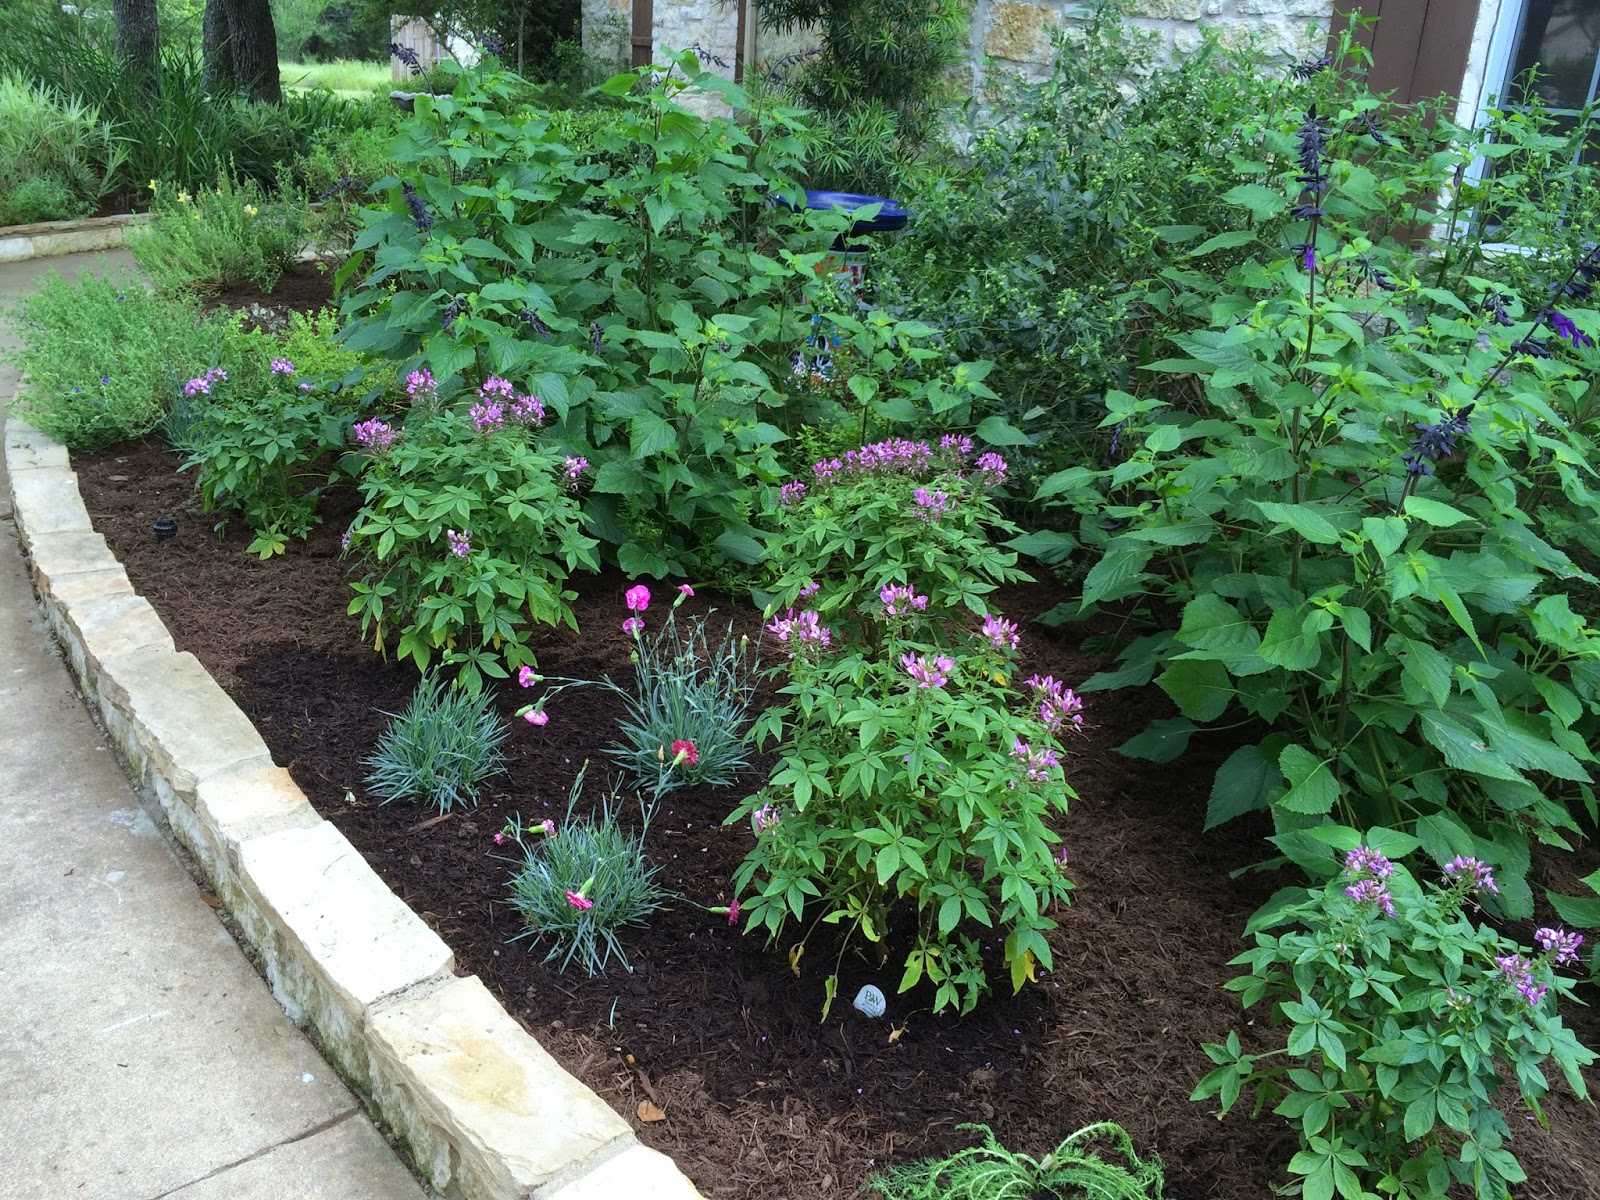
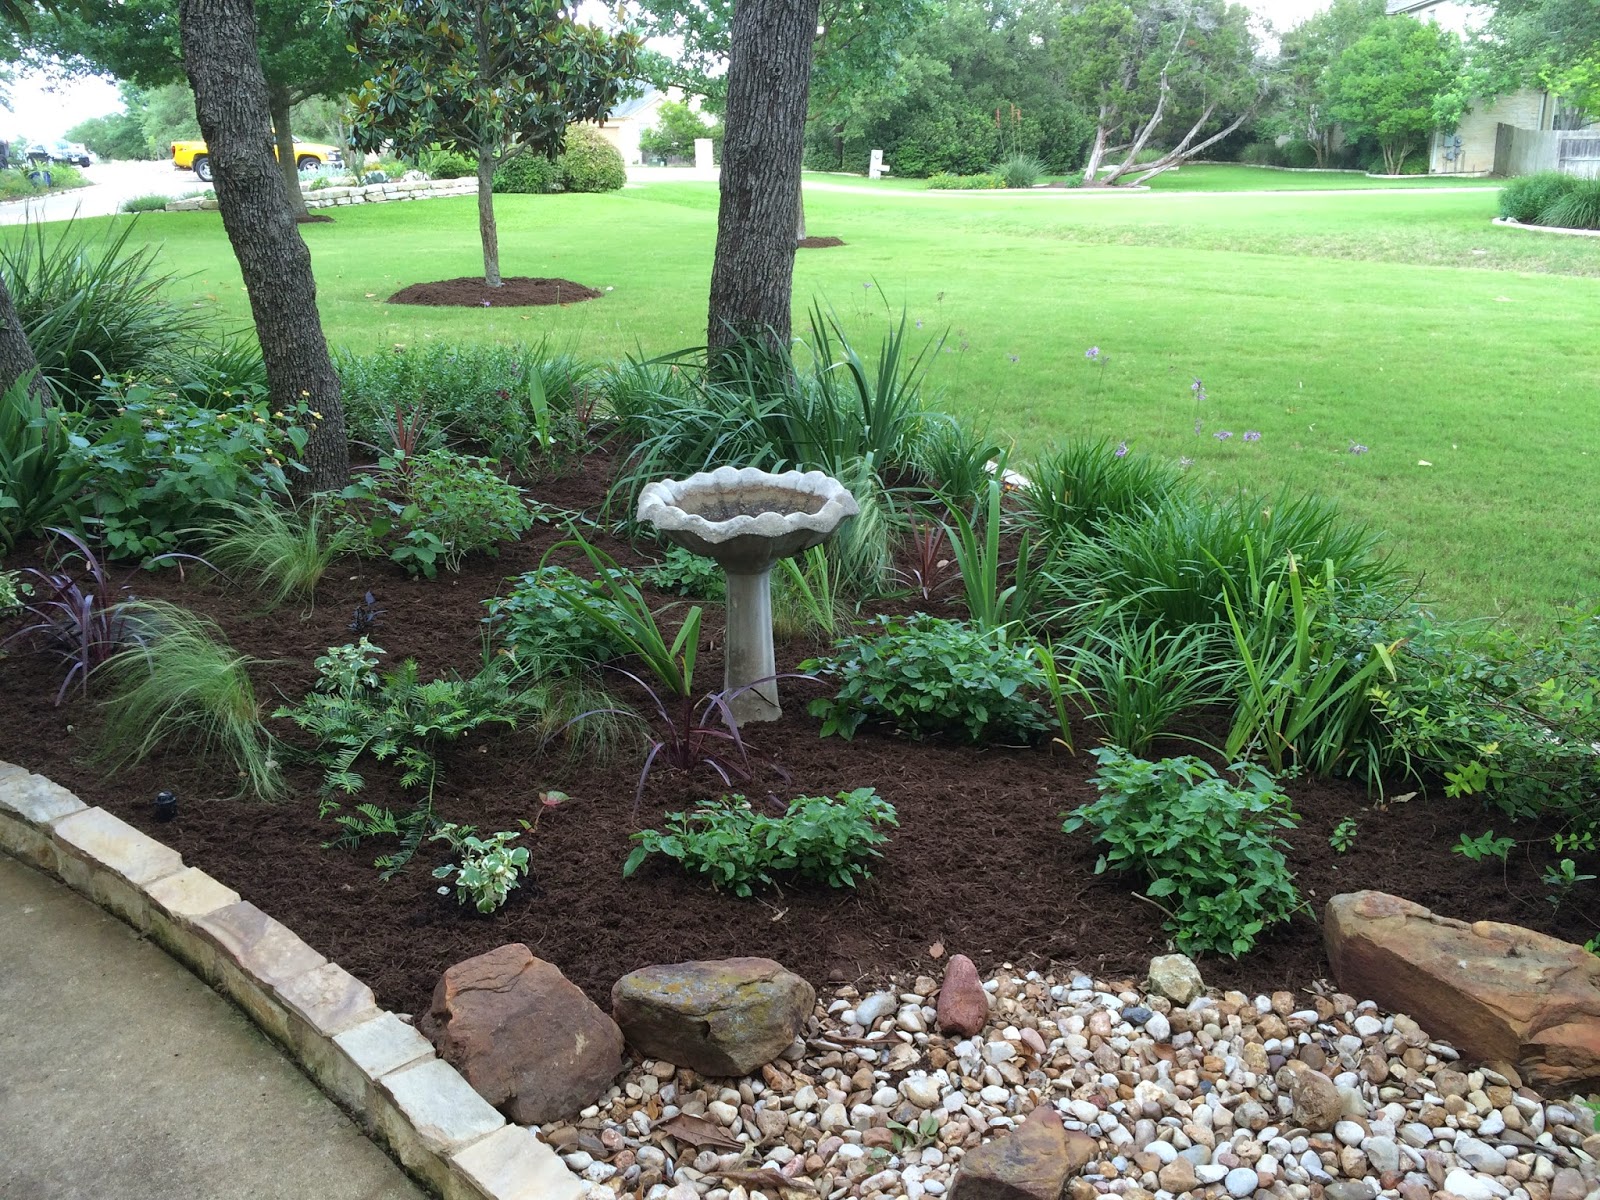
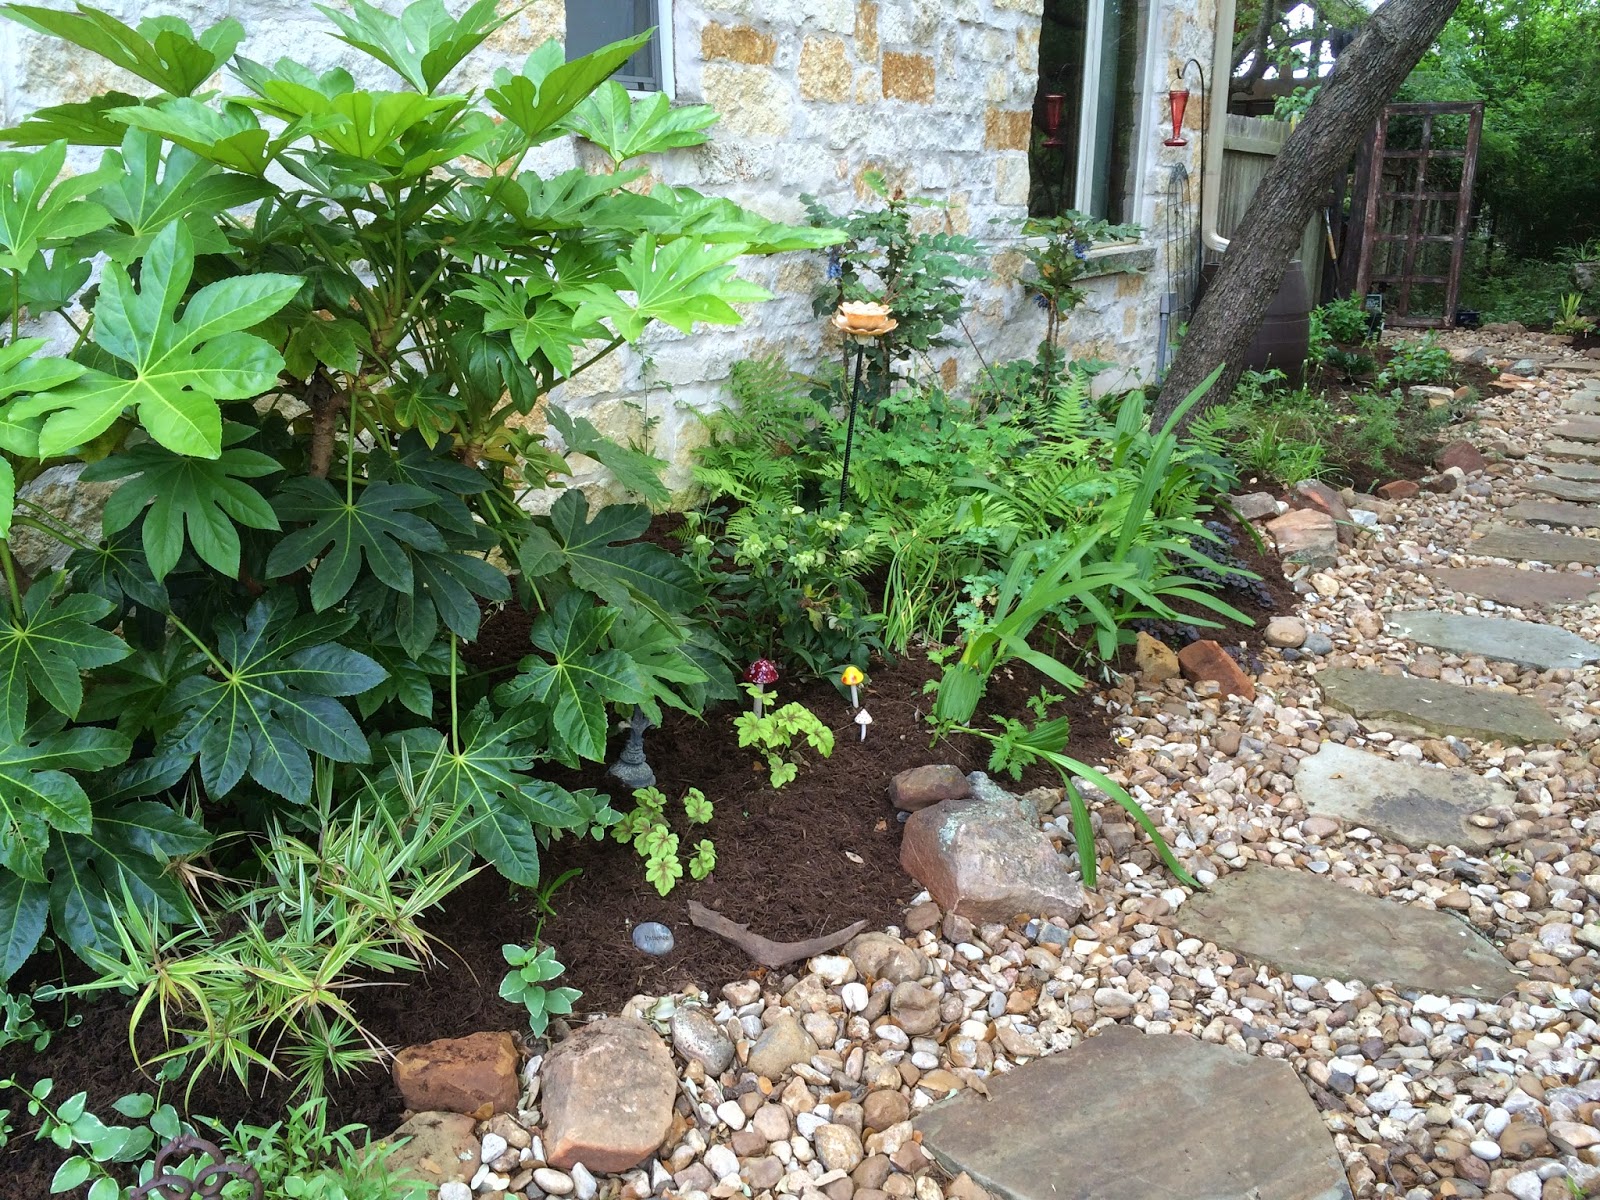
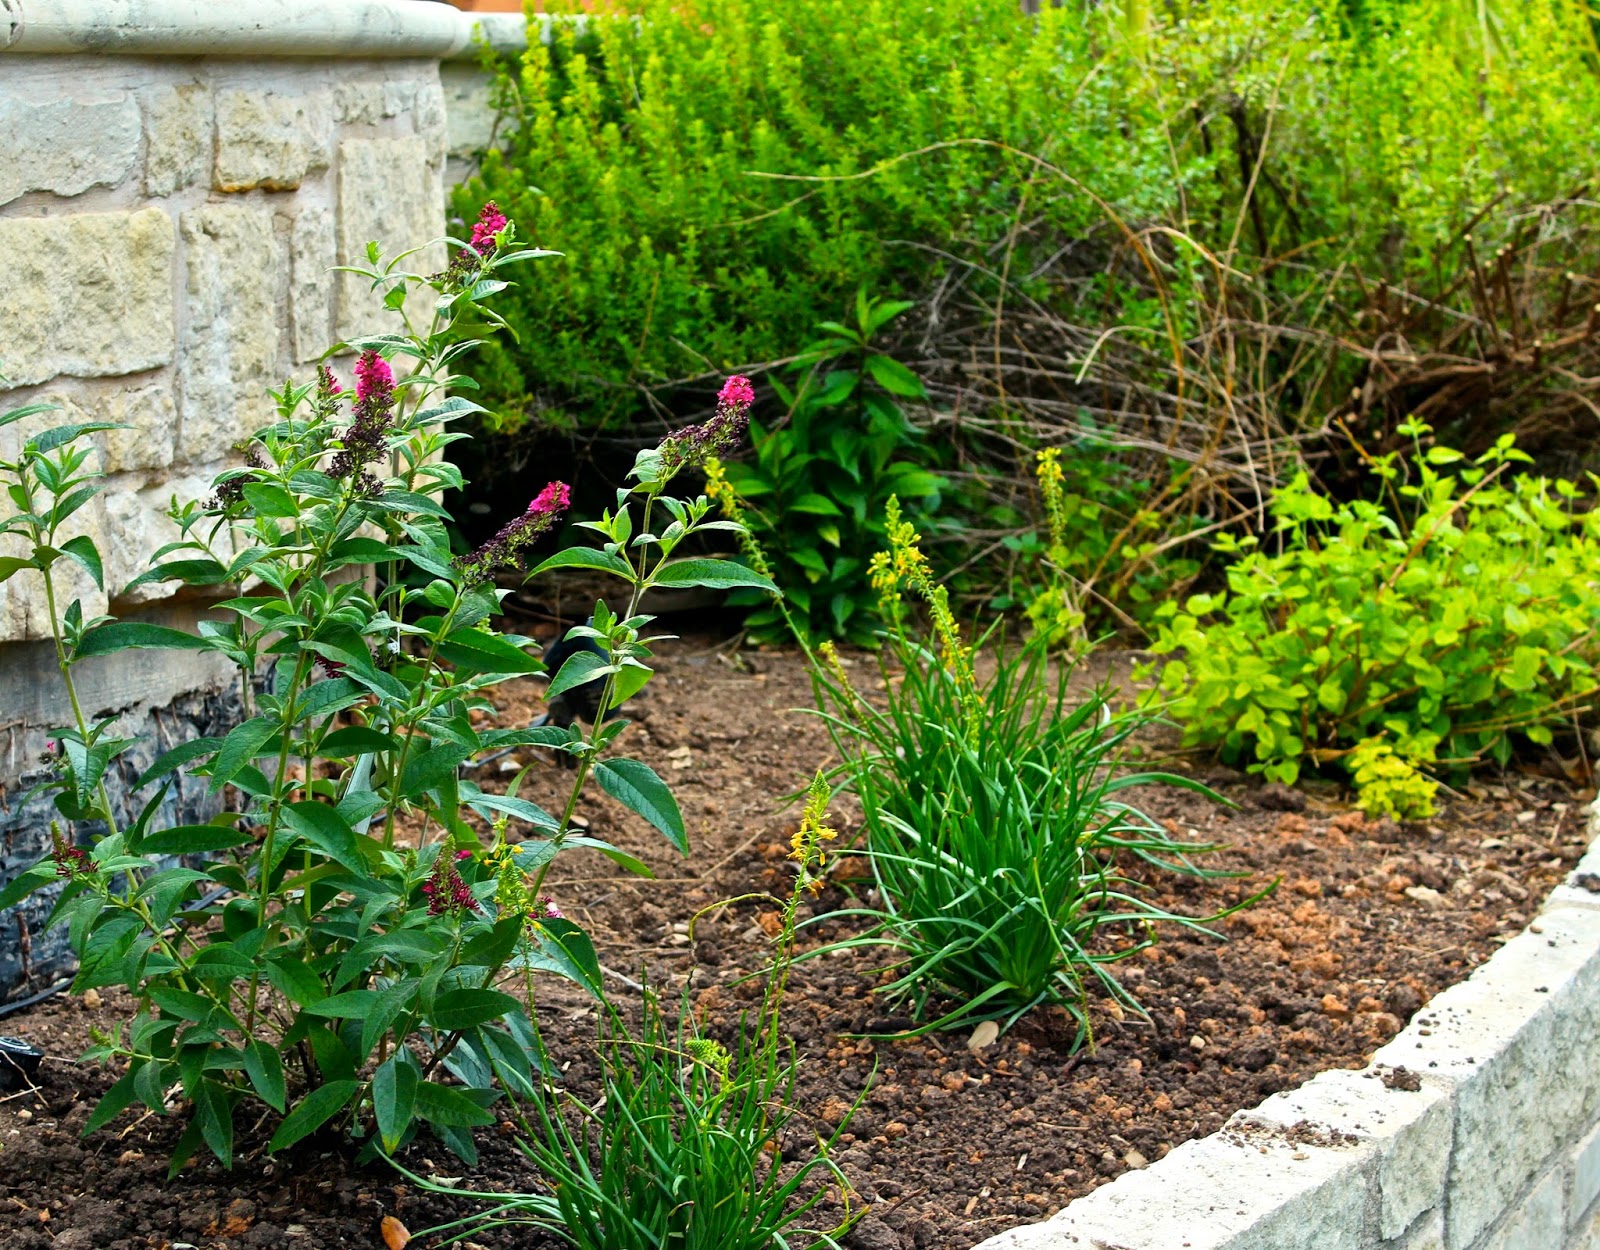
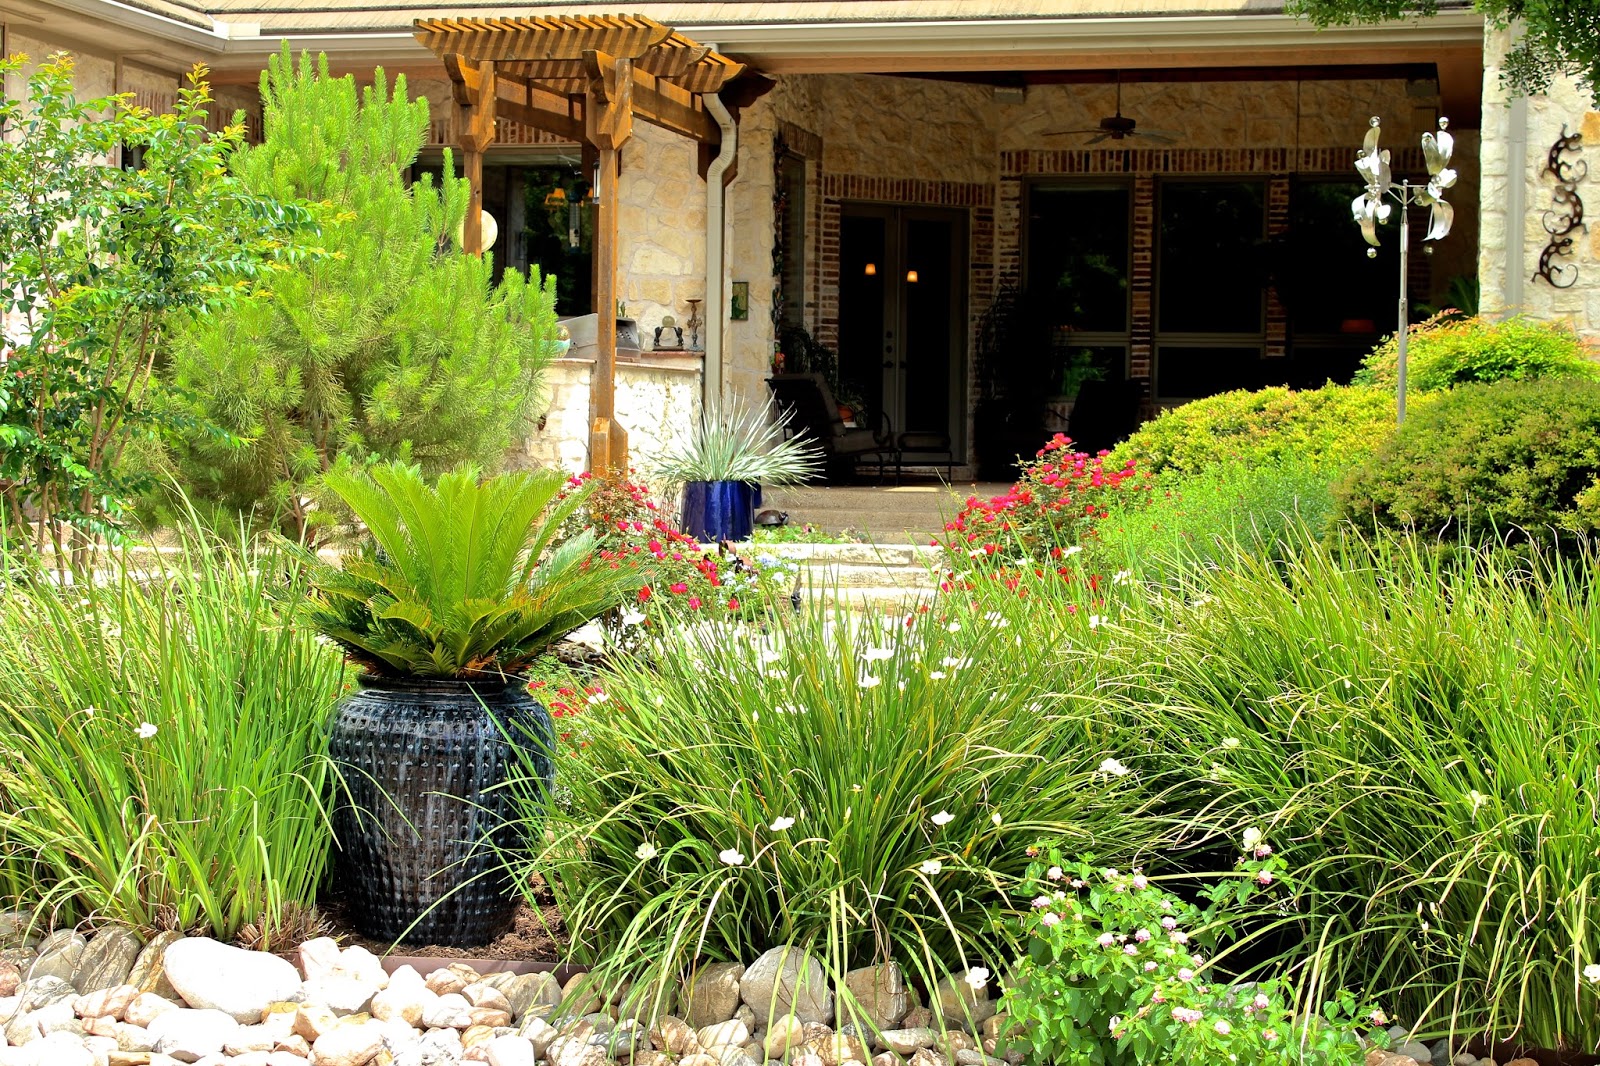
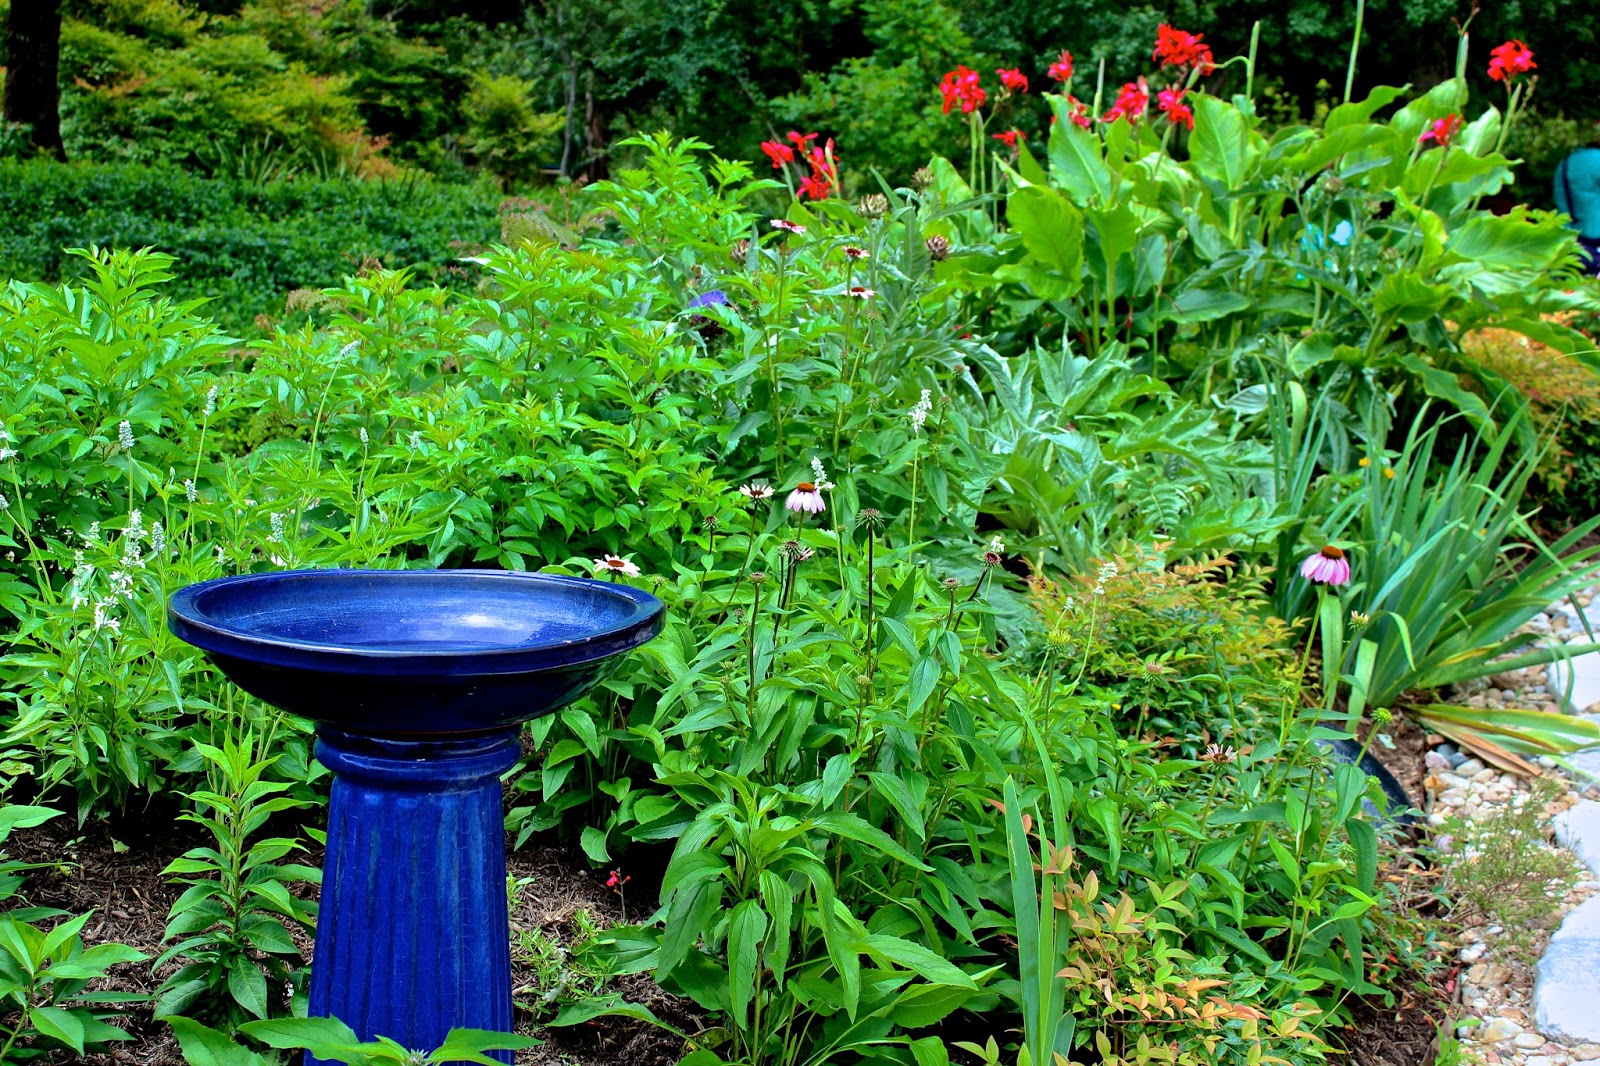
A closer look at the other plants reveals a cottage-like aesthetic, complete with a bird bath, gazing ball and obelisk to serve as focal points throughout the space.

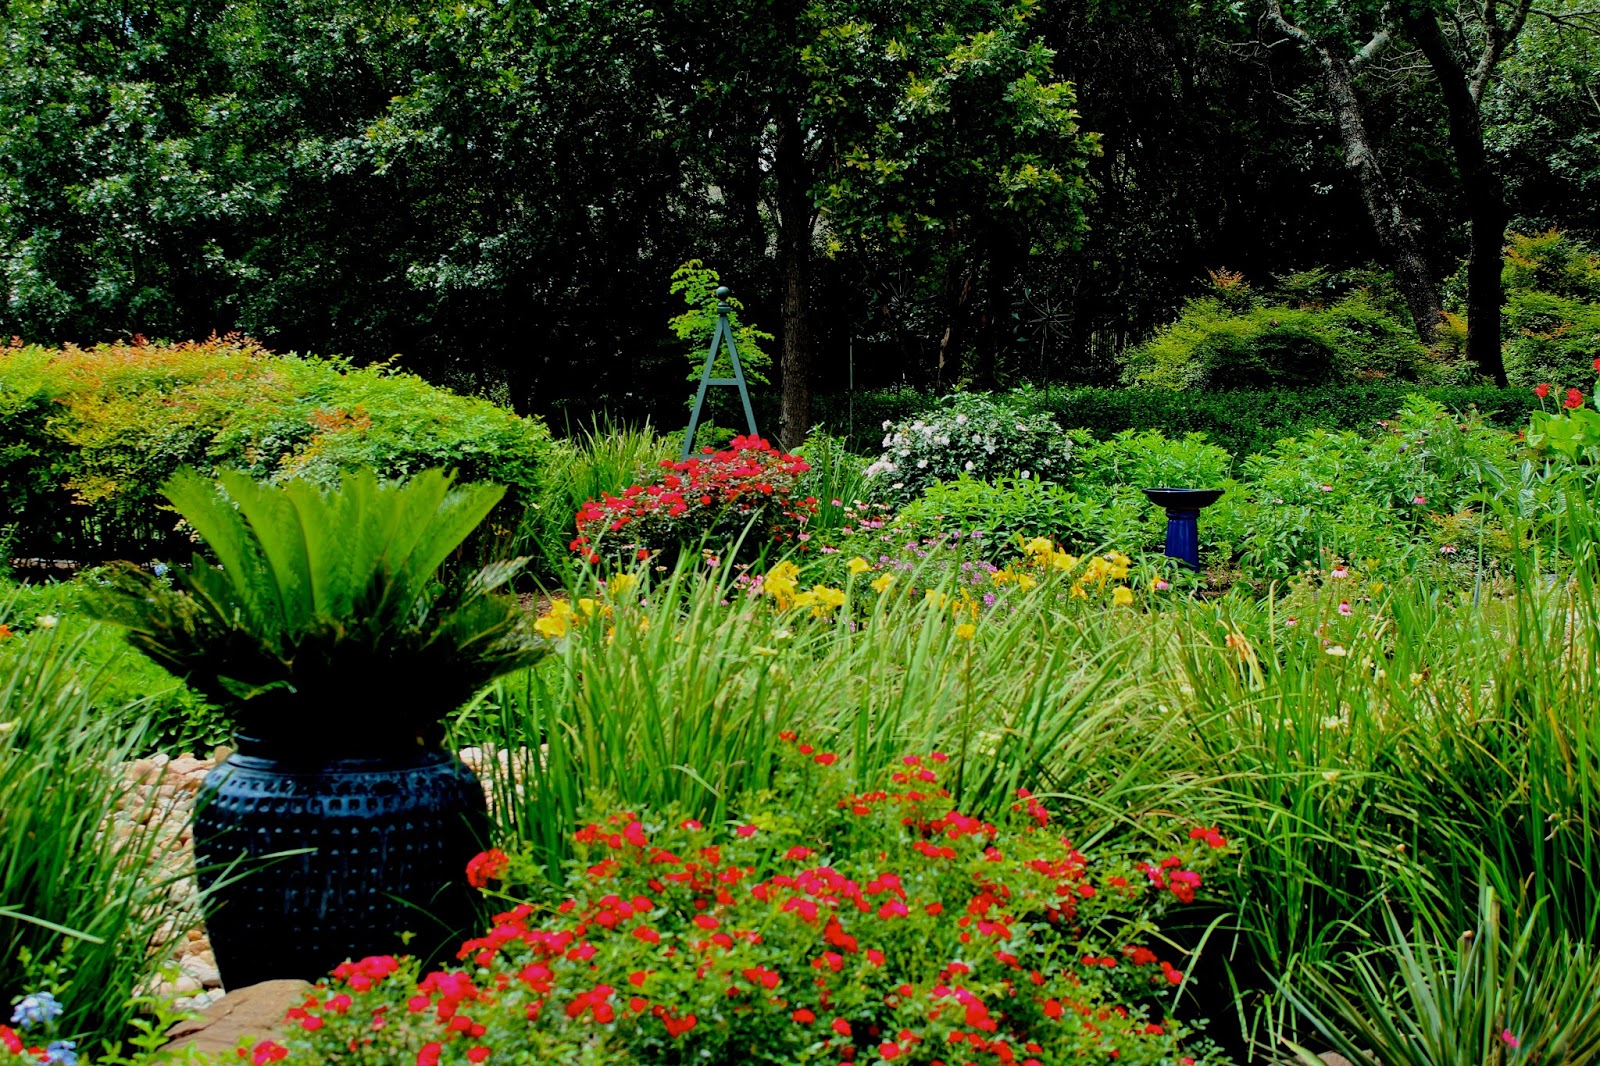
The blend of sun-loving plants crosses traditional garden style boundaries in some areas, making the garden more intriguing.

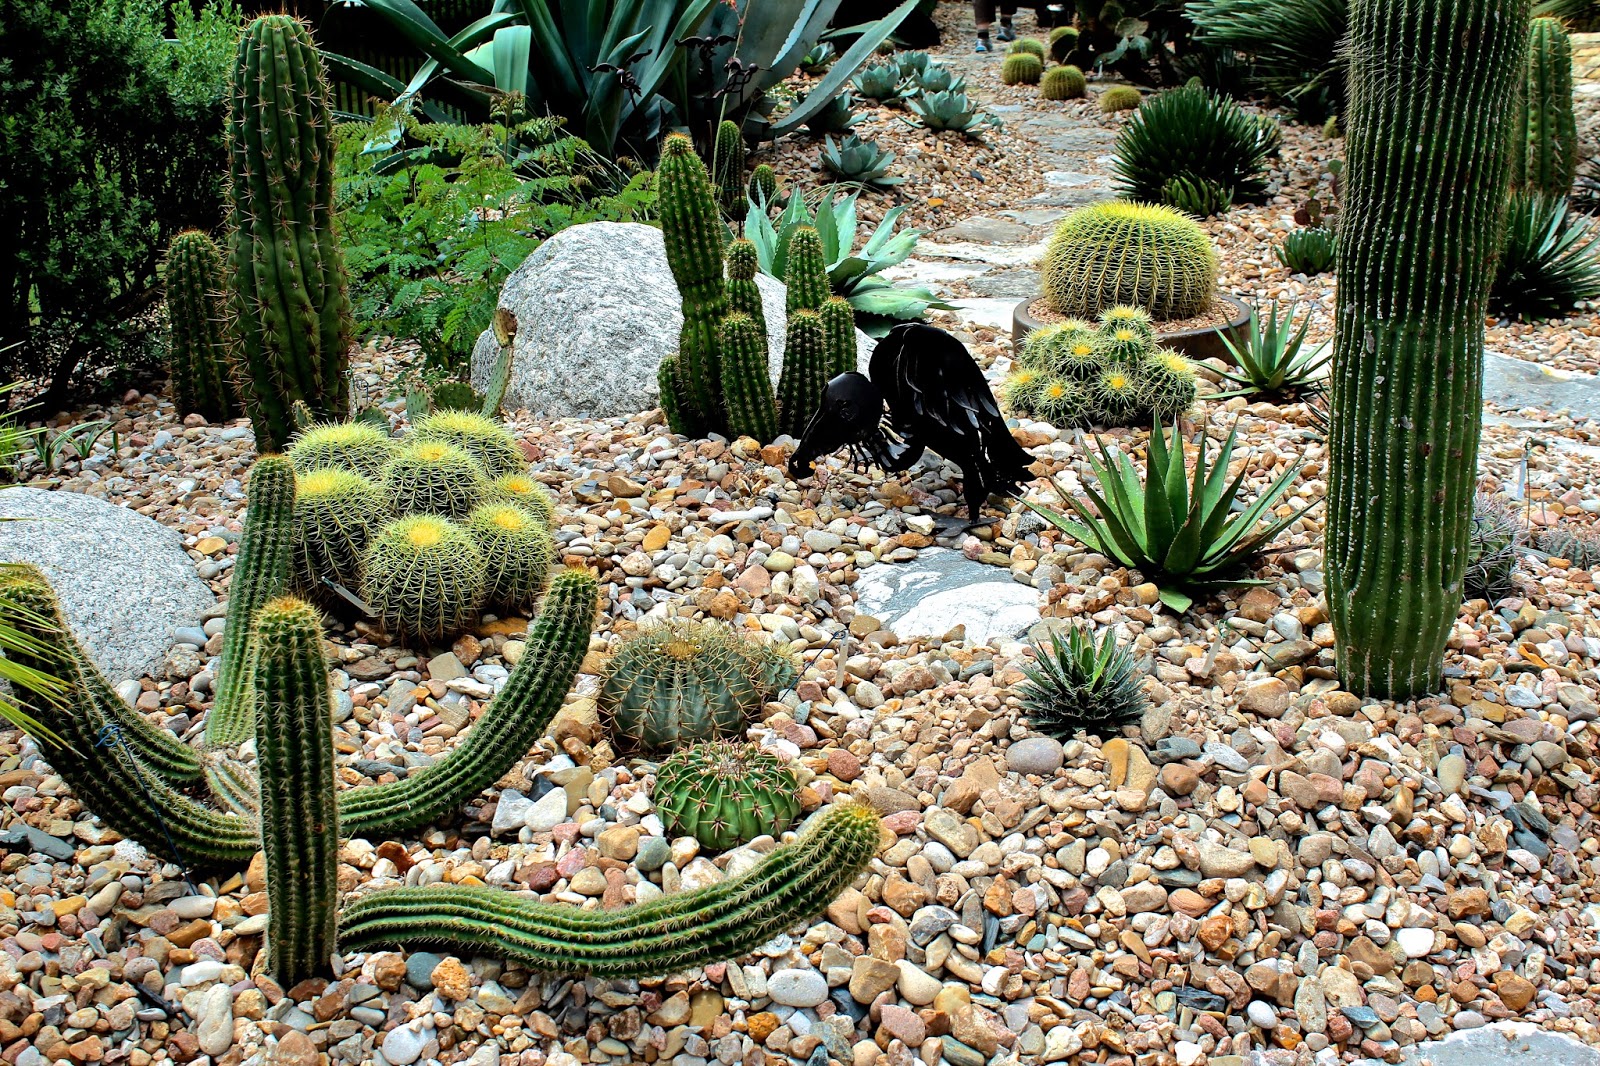
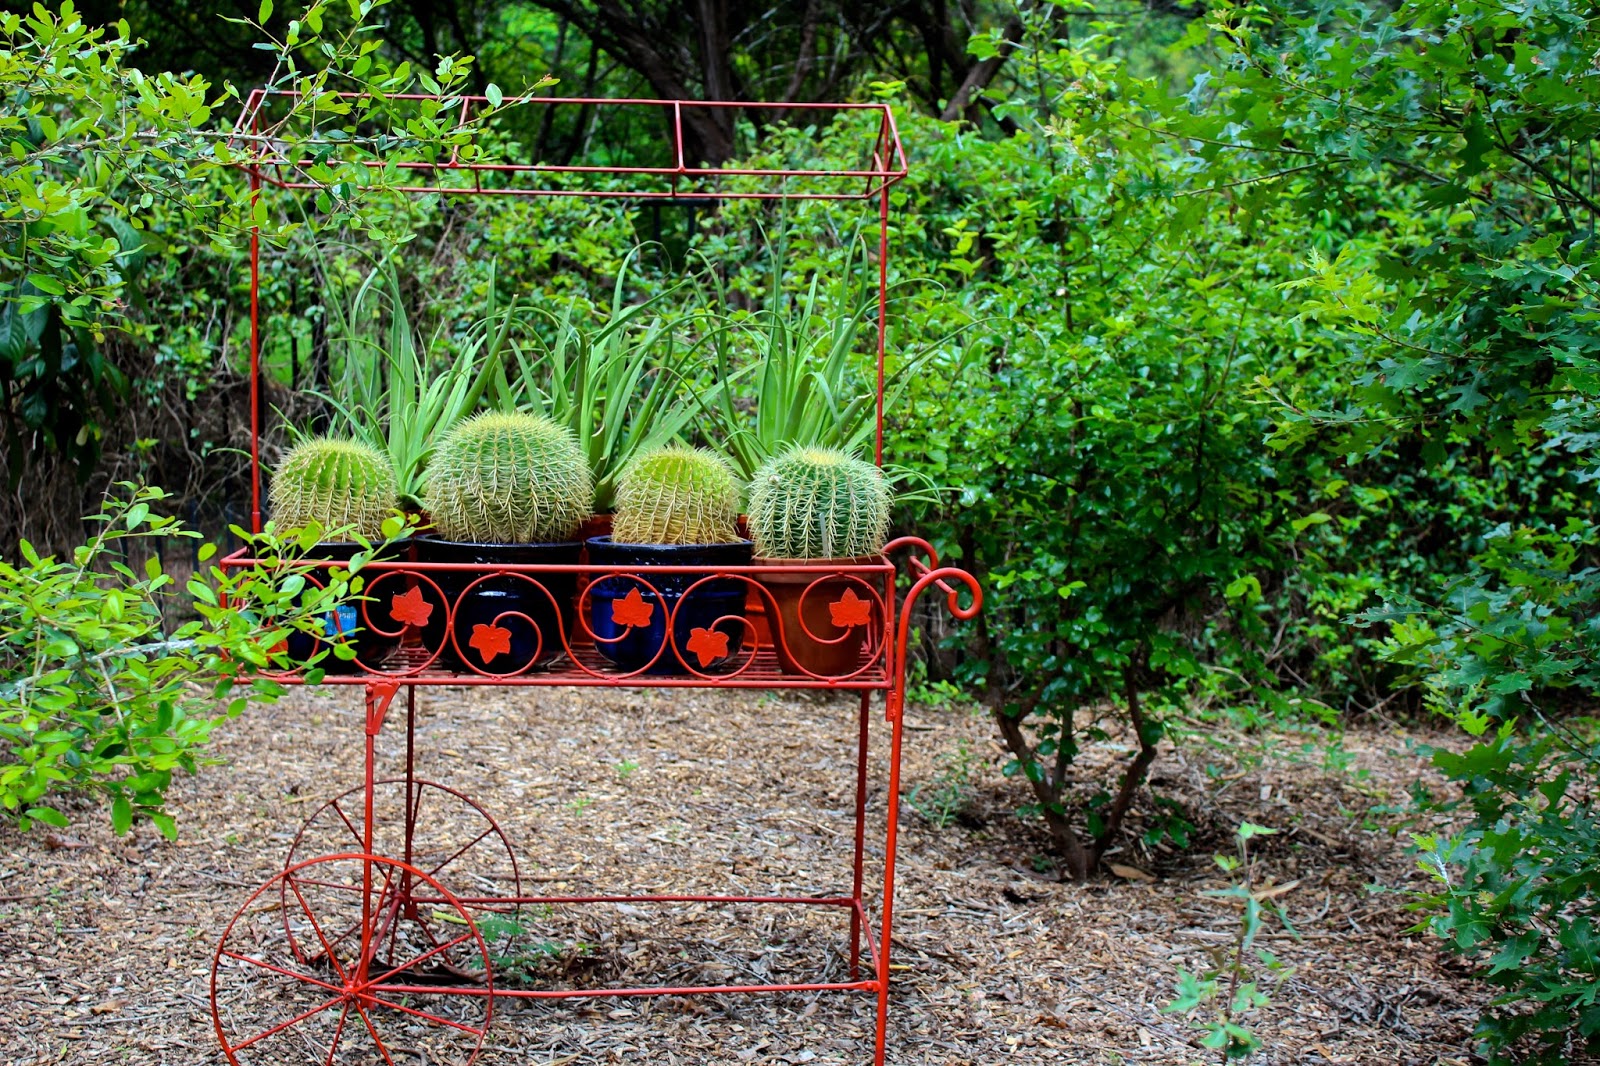
Then the path evolved into a more desert-like garden, filled with sculptural cacti and agaves and garden art.

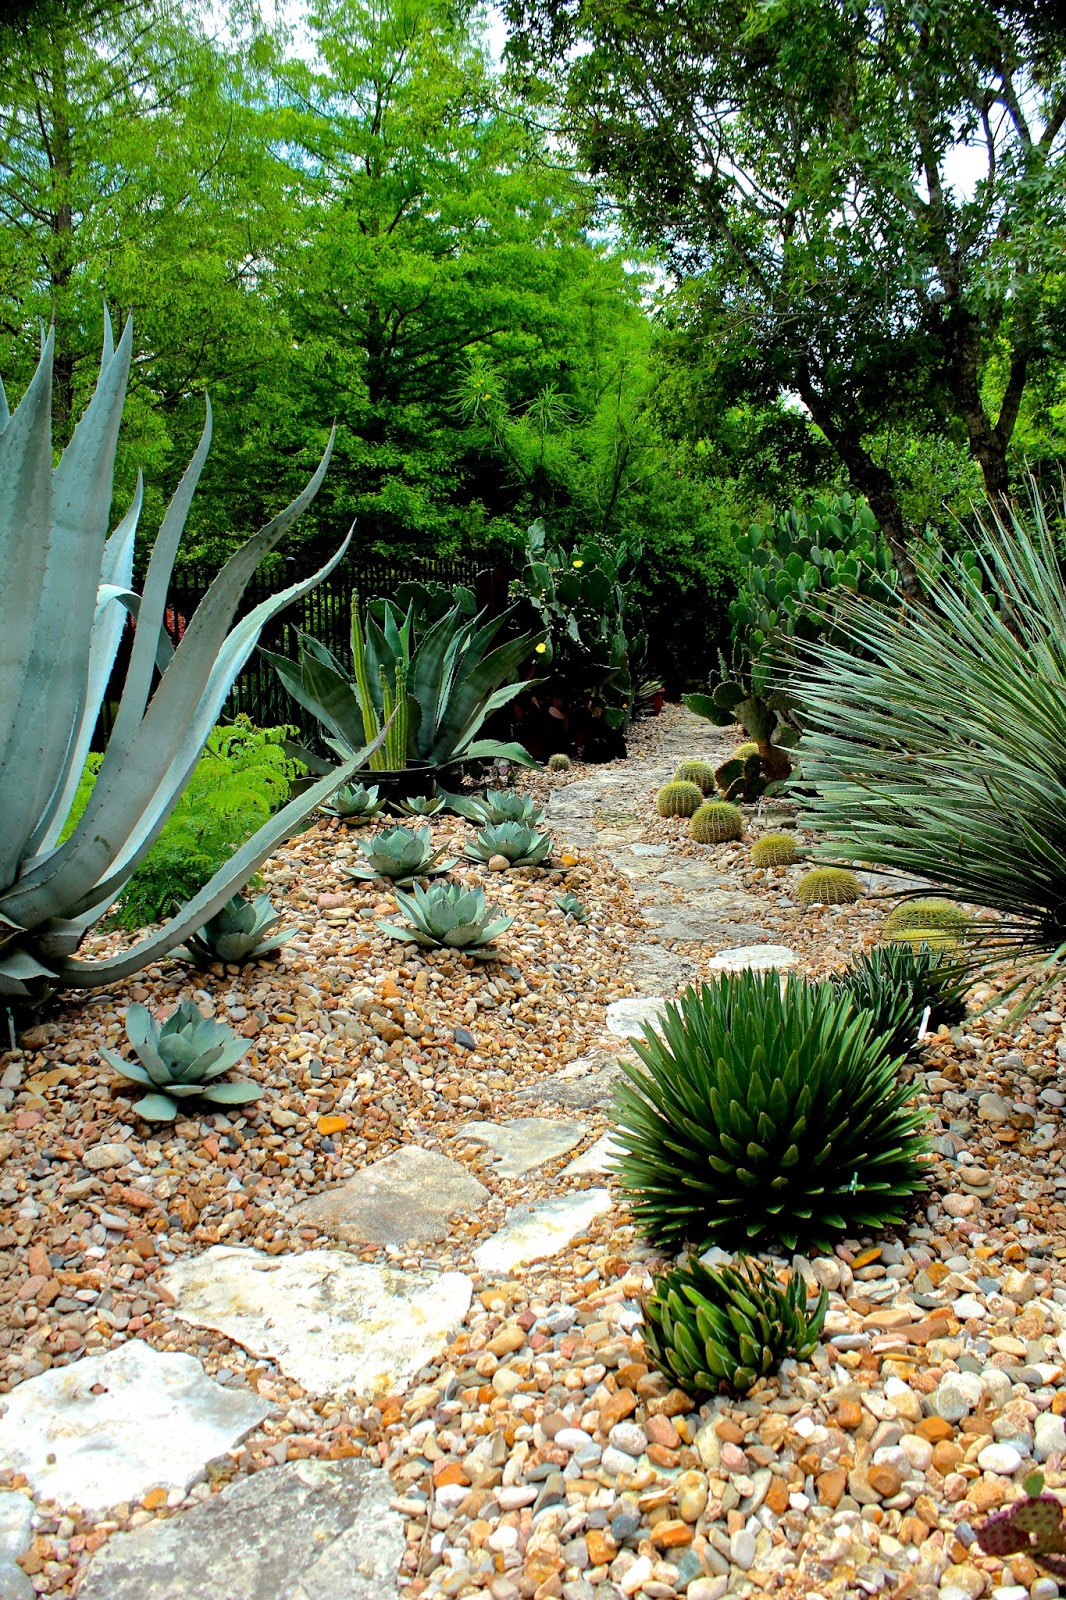
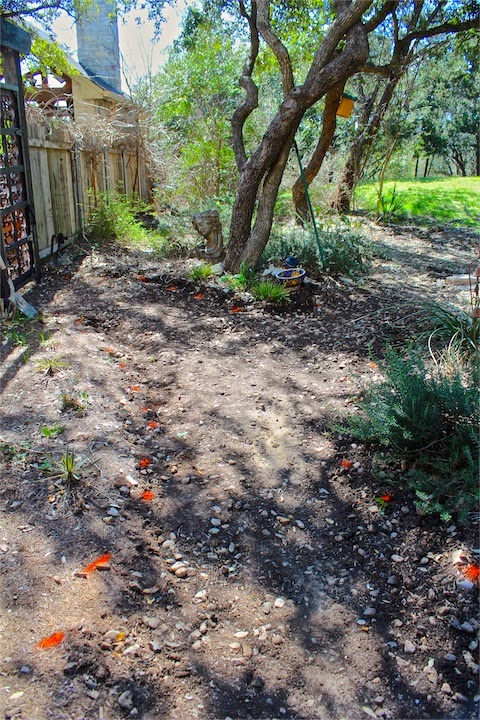
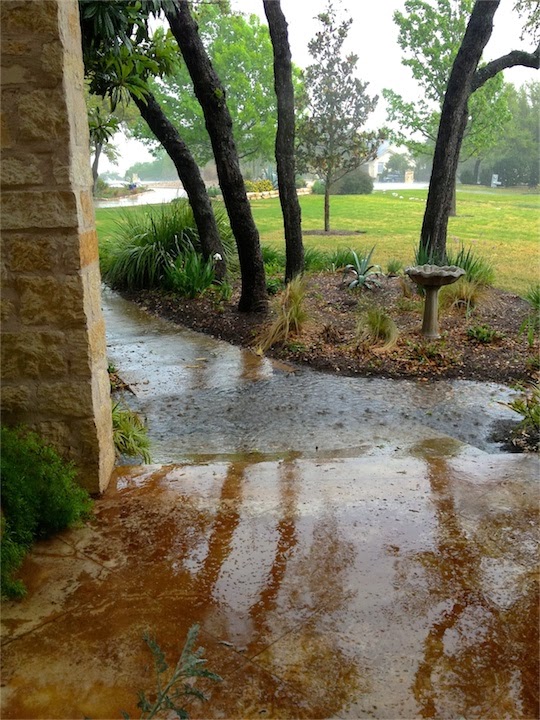
As dry as the garden appeared, it was hard to imagine the torrential rains that must have swept through these beds only days before.

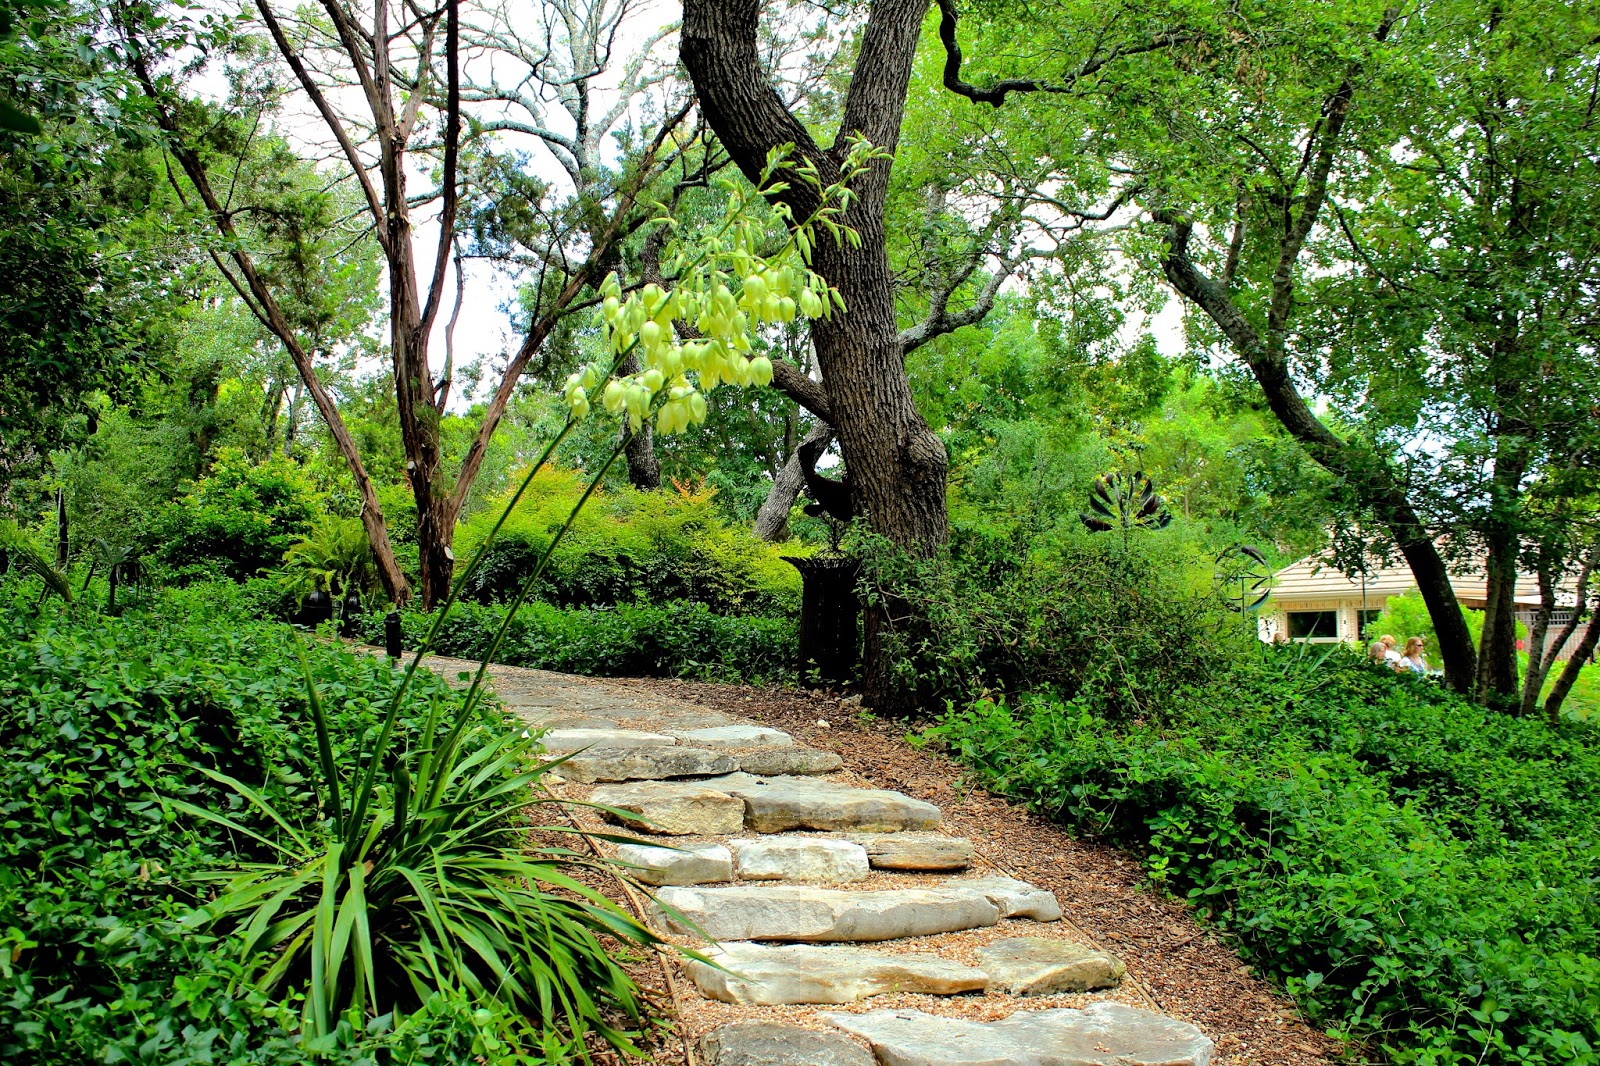
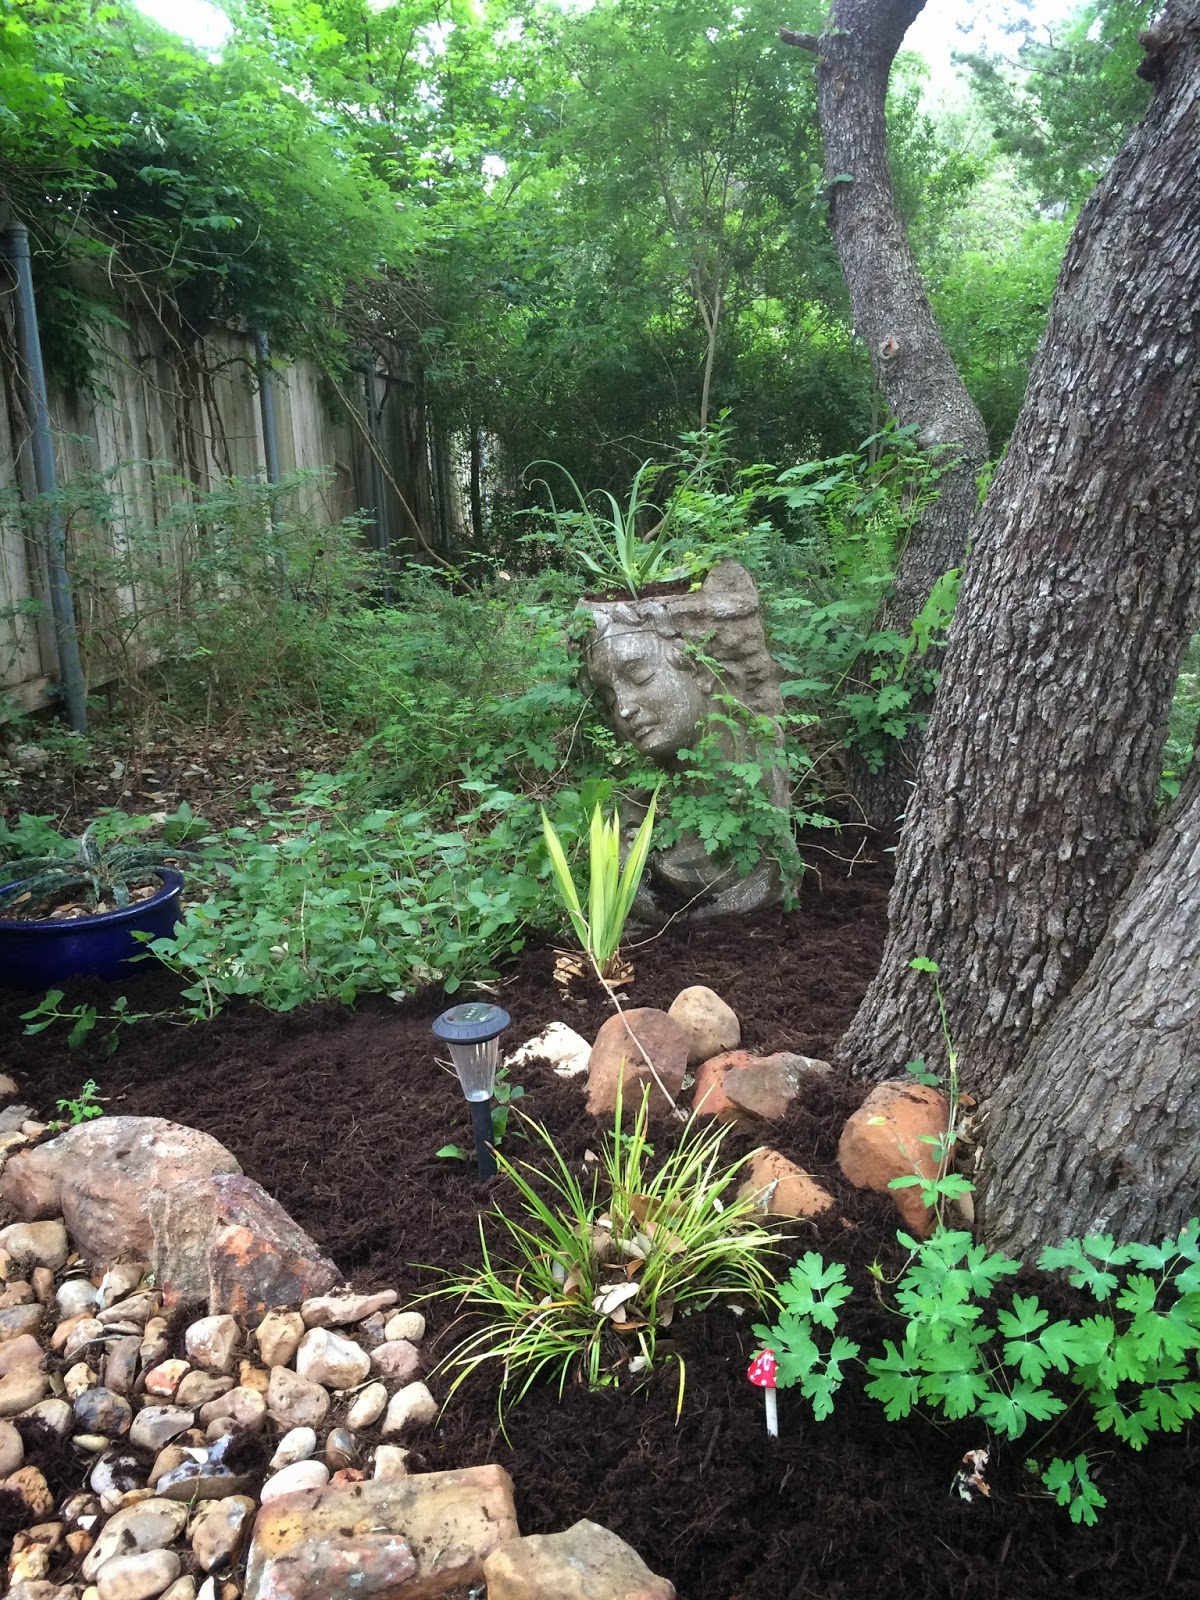
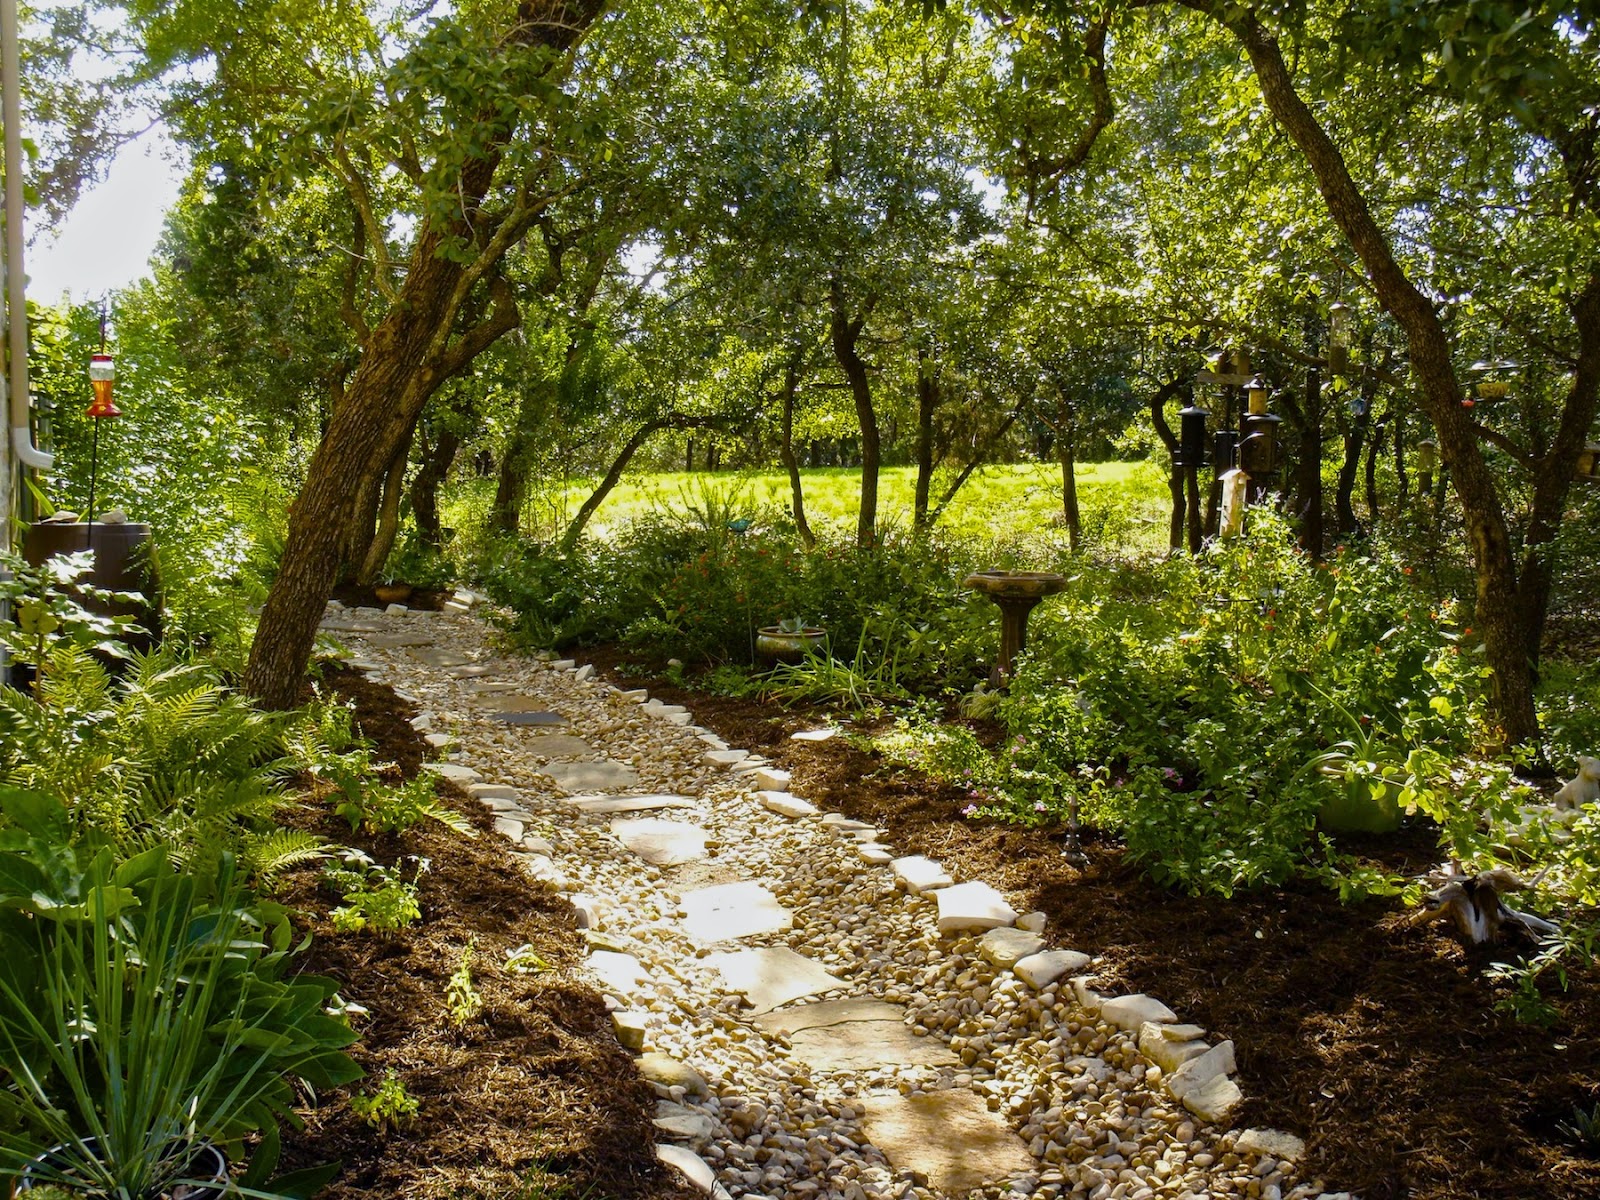
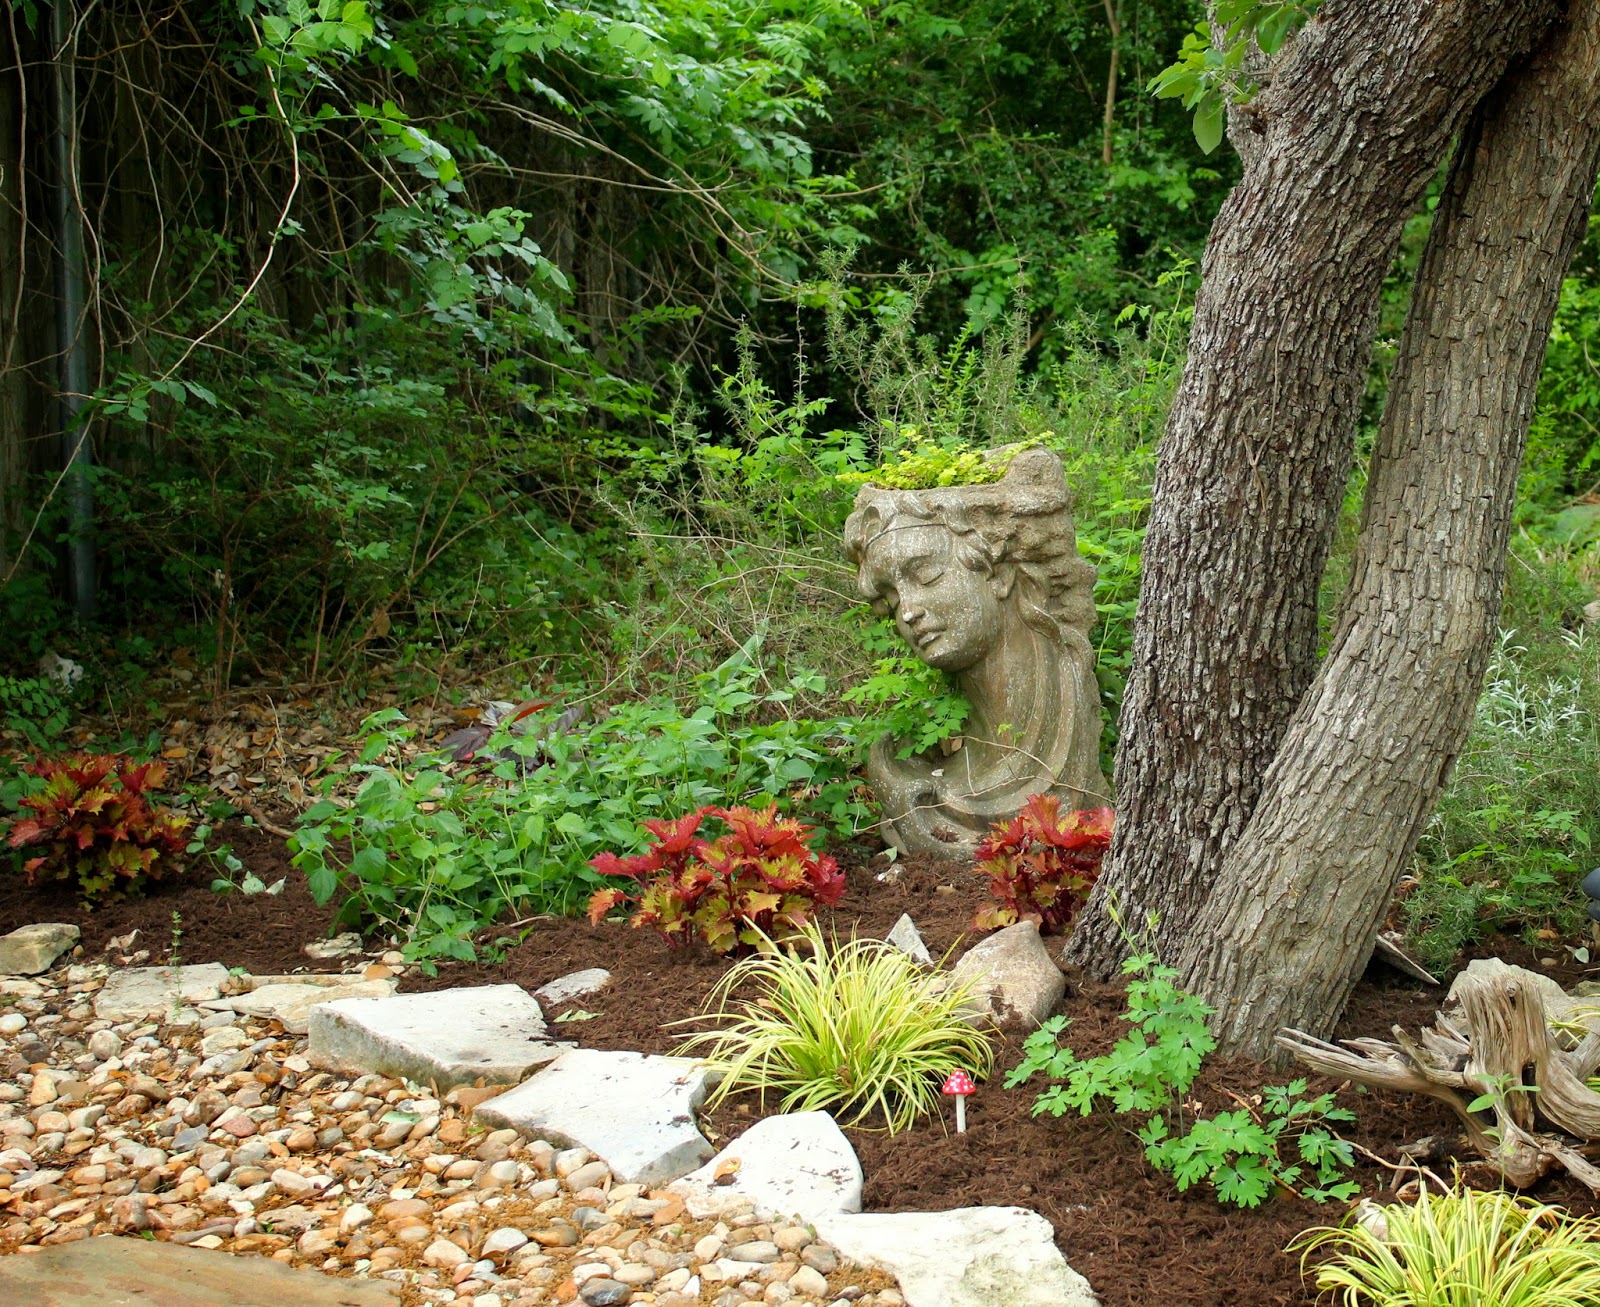
As you keep meandering through the back of the garden, you wind your way through a shadier, wooded pathway.

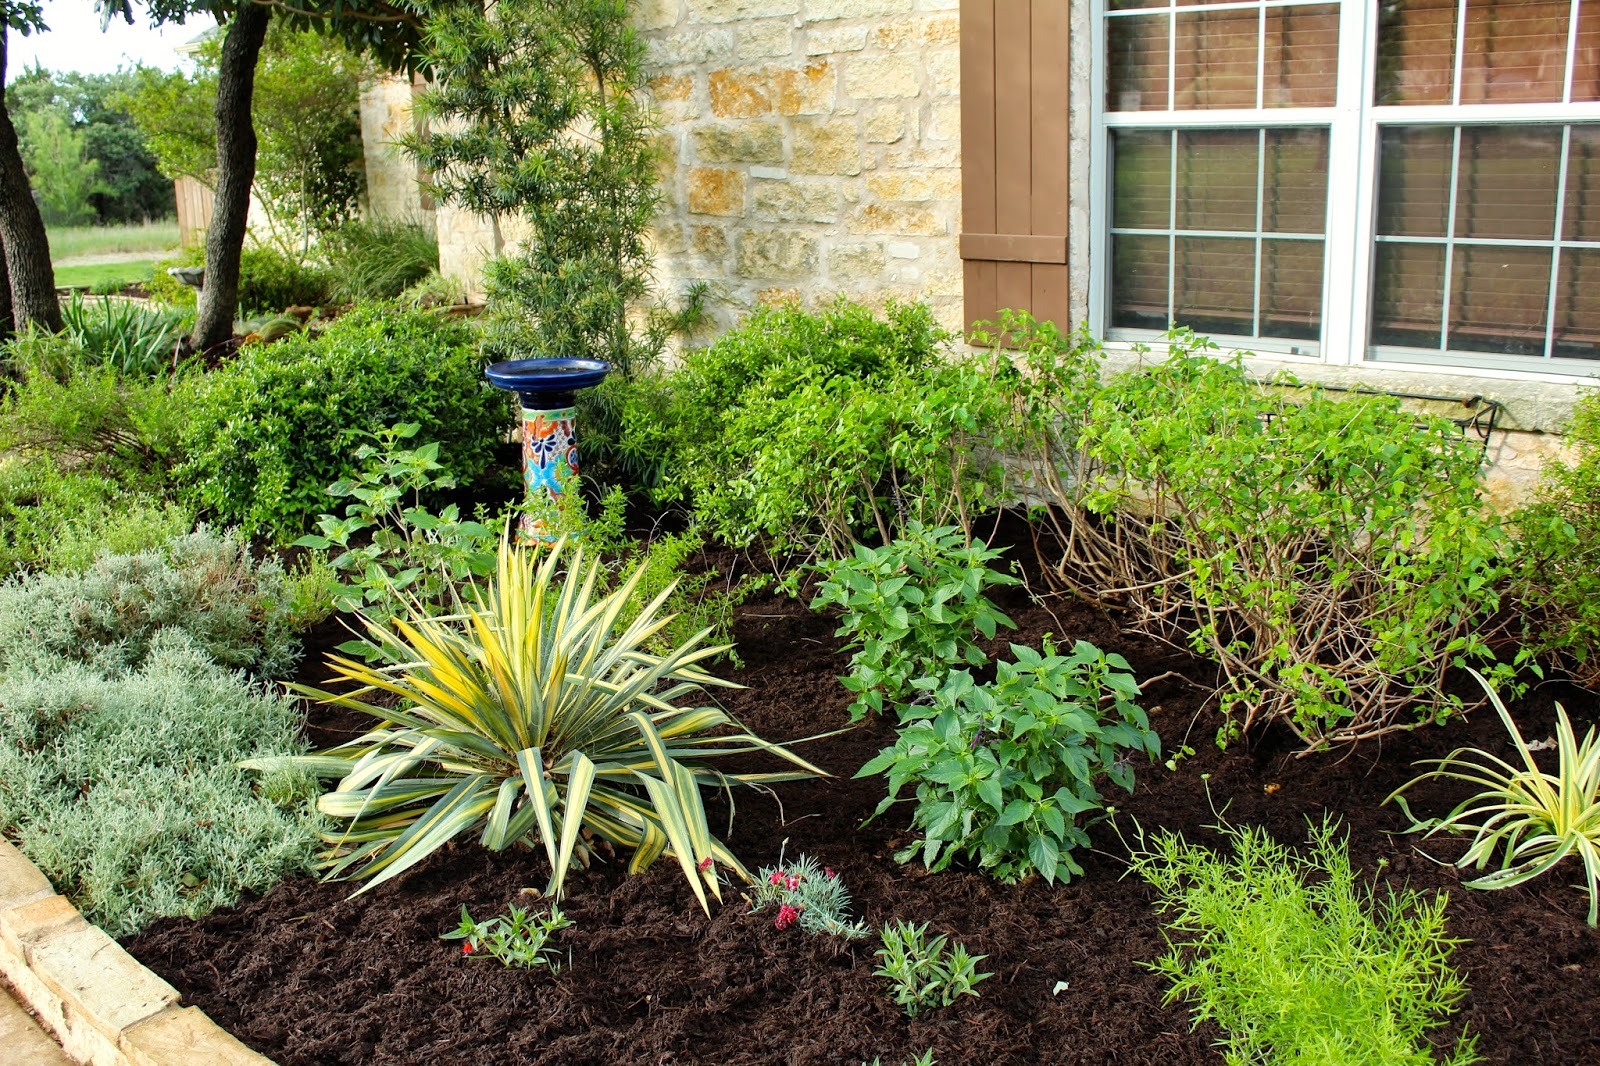
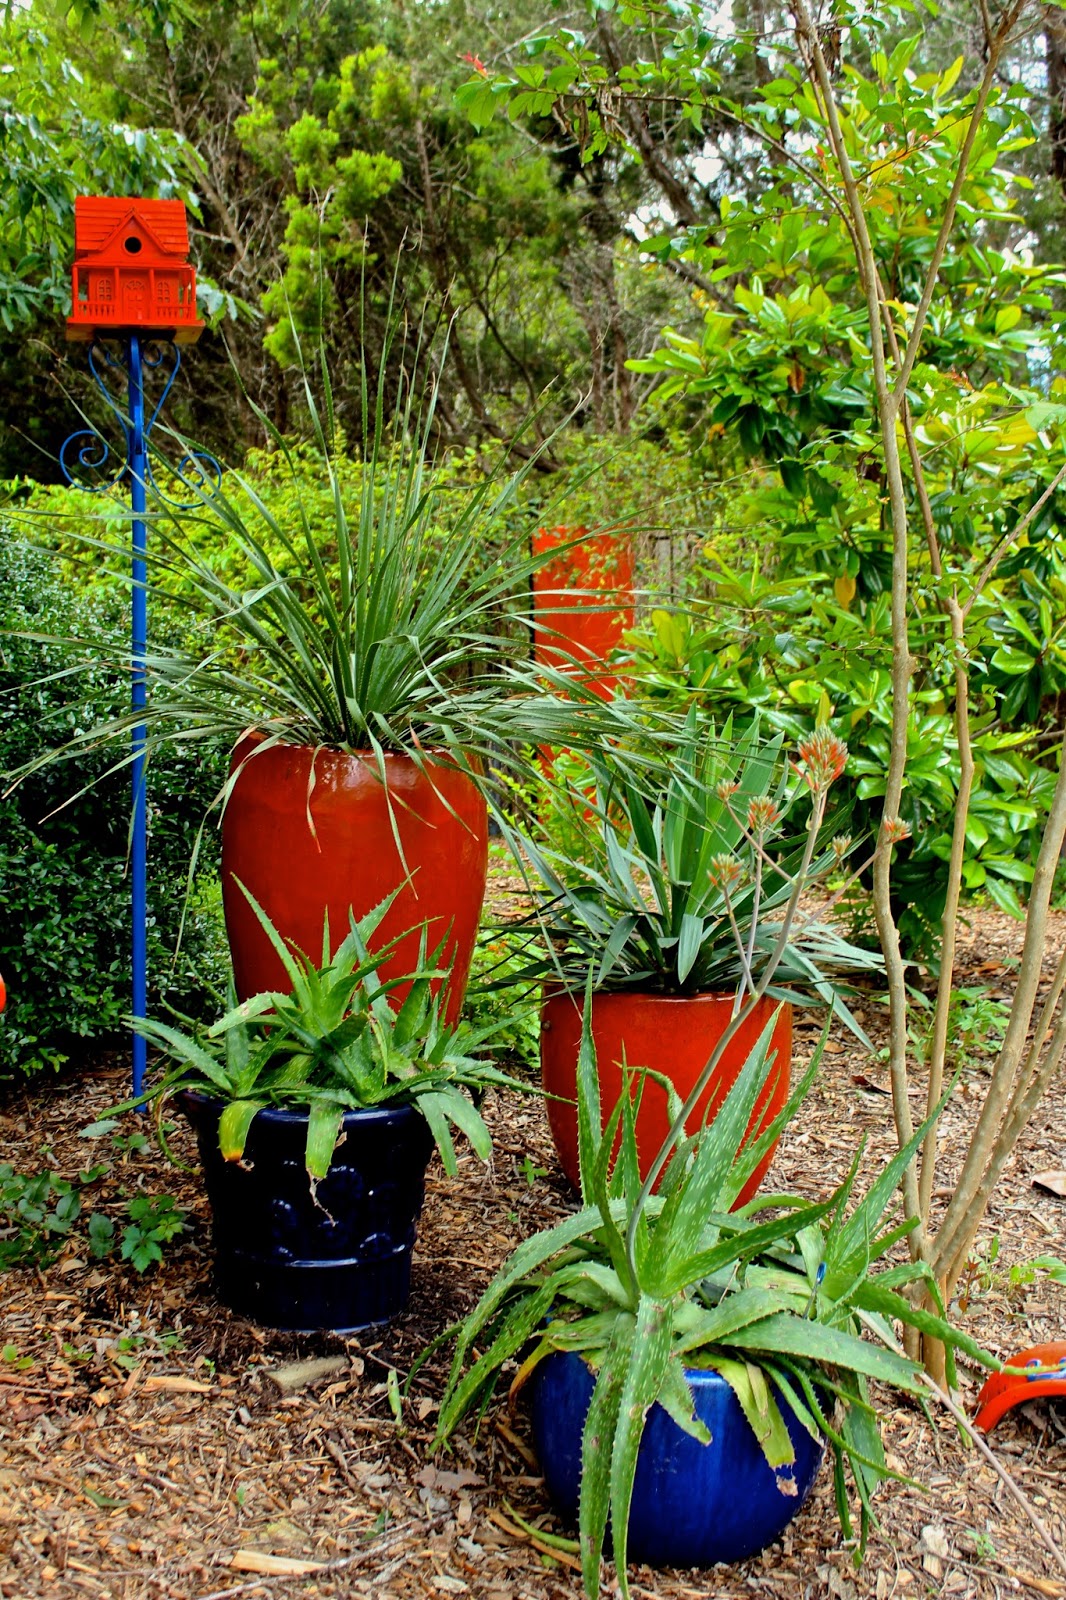
Just as the garden becomes sunnier again, so does the garden decor.  Brilliant pops of orange and cobalt blue are sprinkled throughout this section of the landscape.

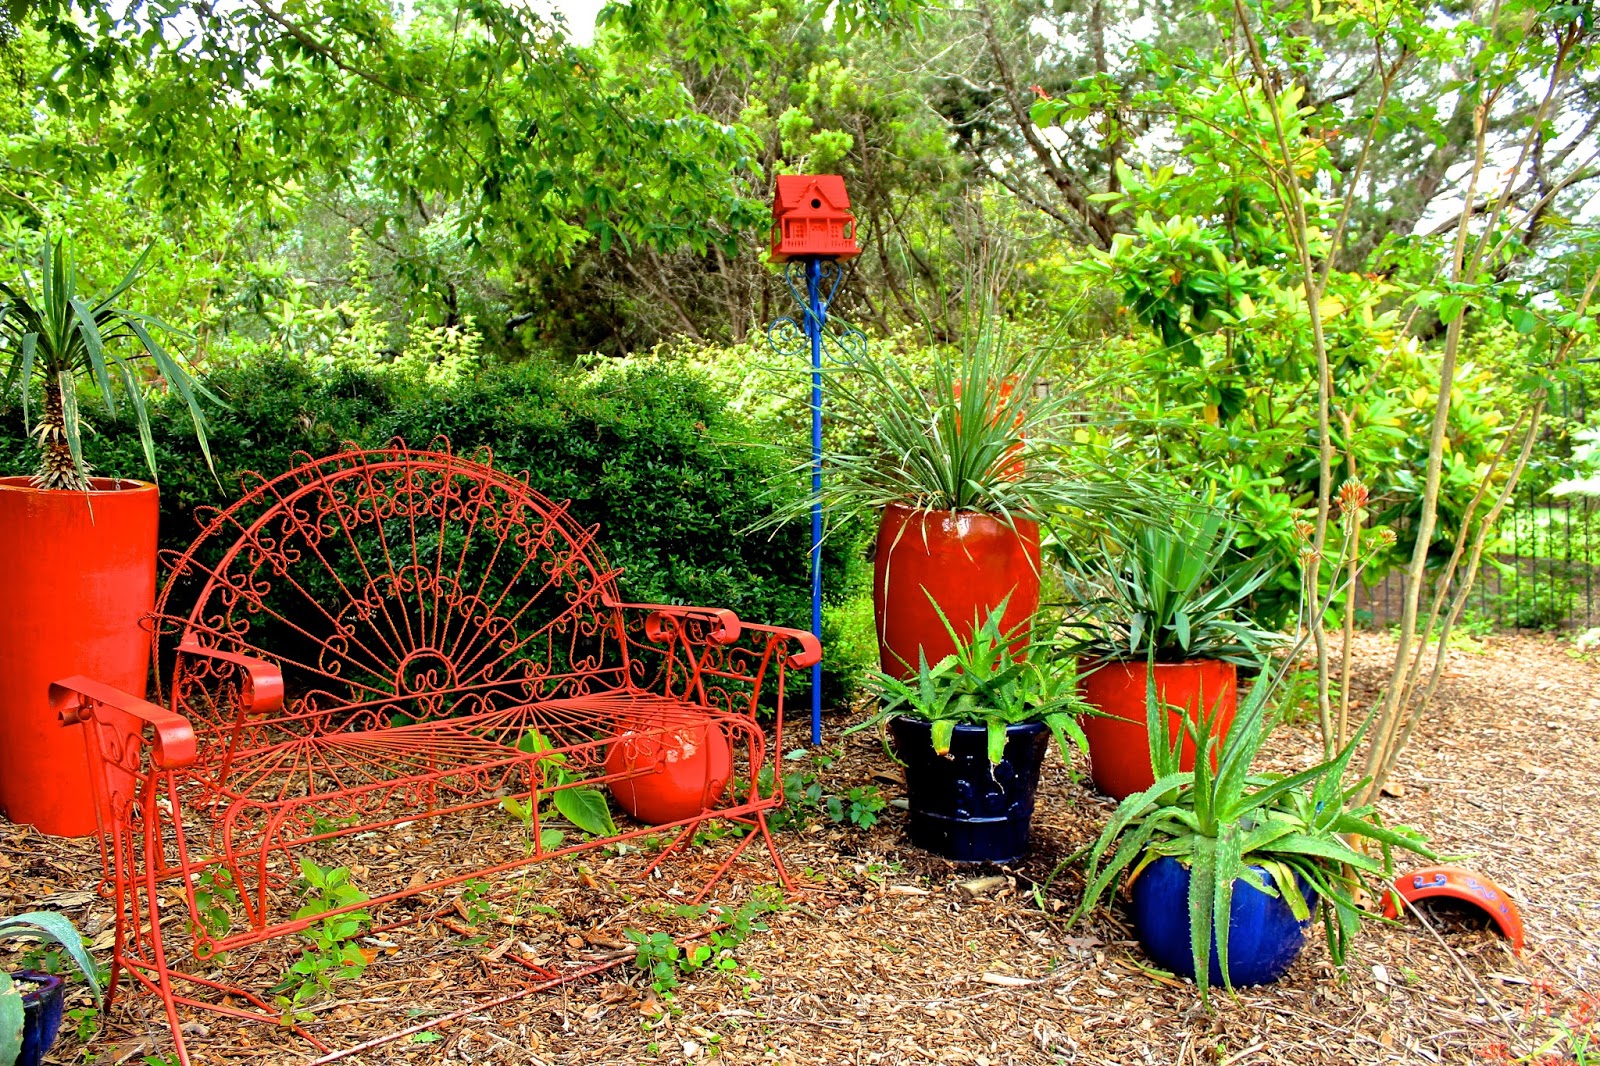
Hot garden plants fill the brightly colored planters.

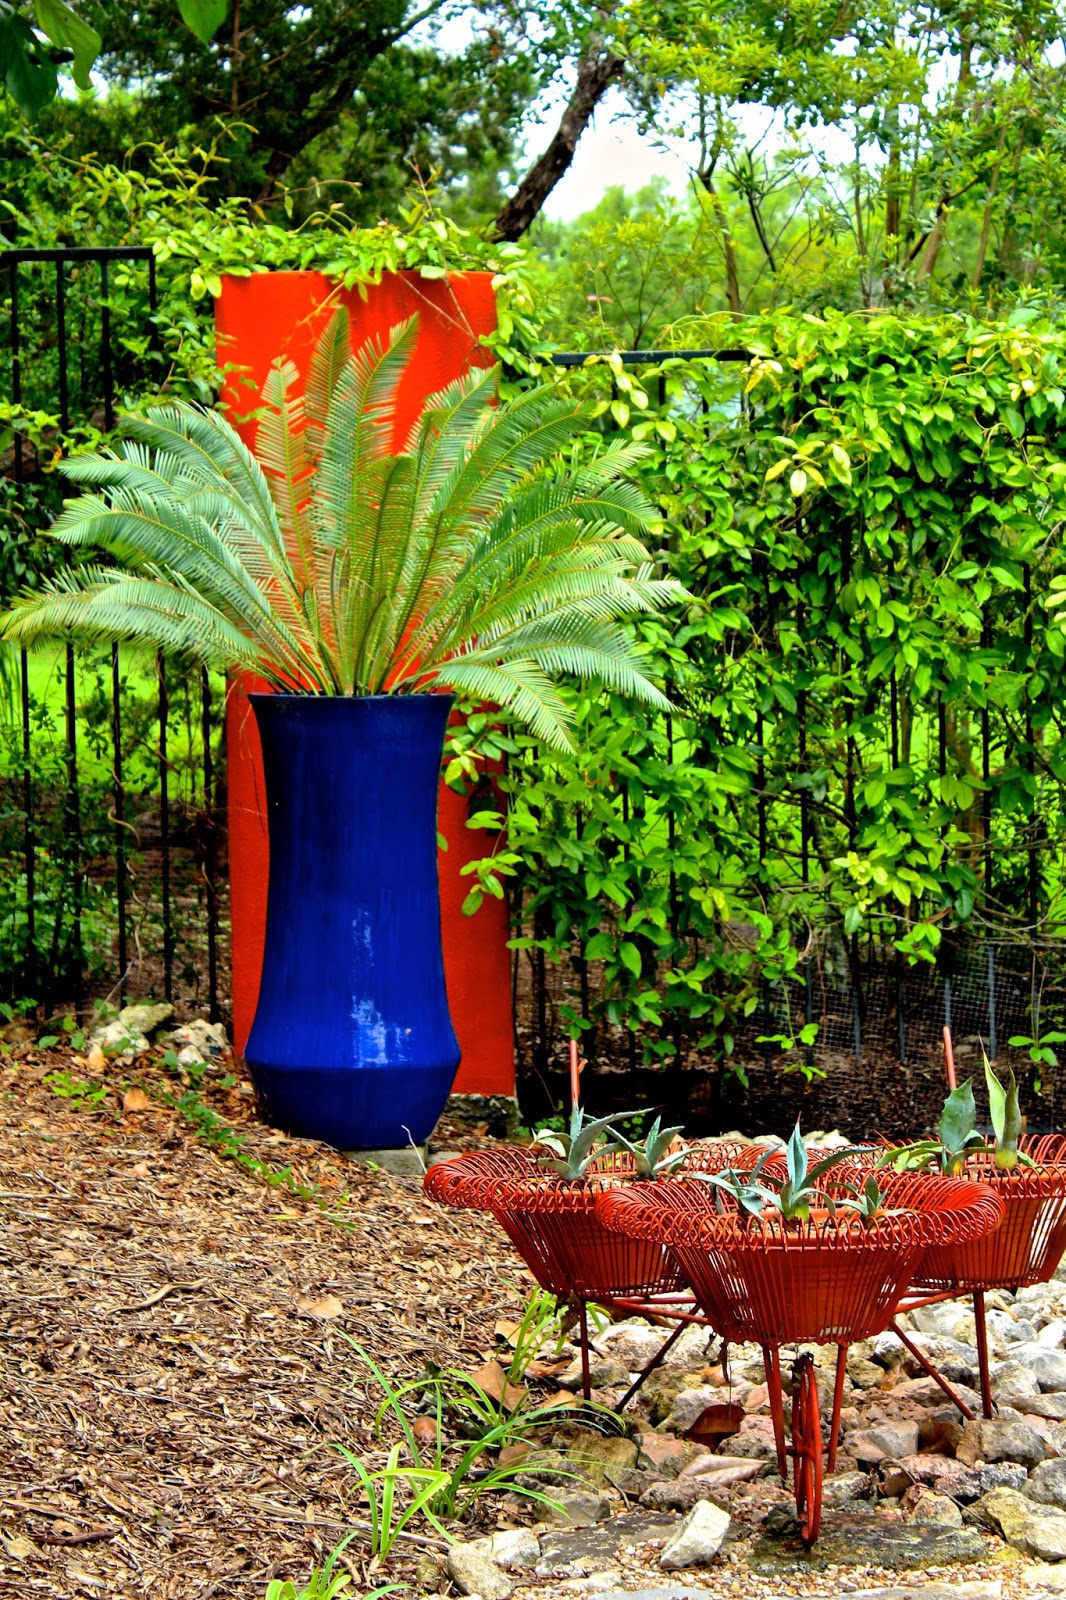
A single orange slice of wall acts as a backdrop for this dramatic planter, home to either a sago palm or a dioon edule.

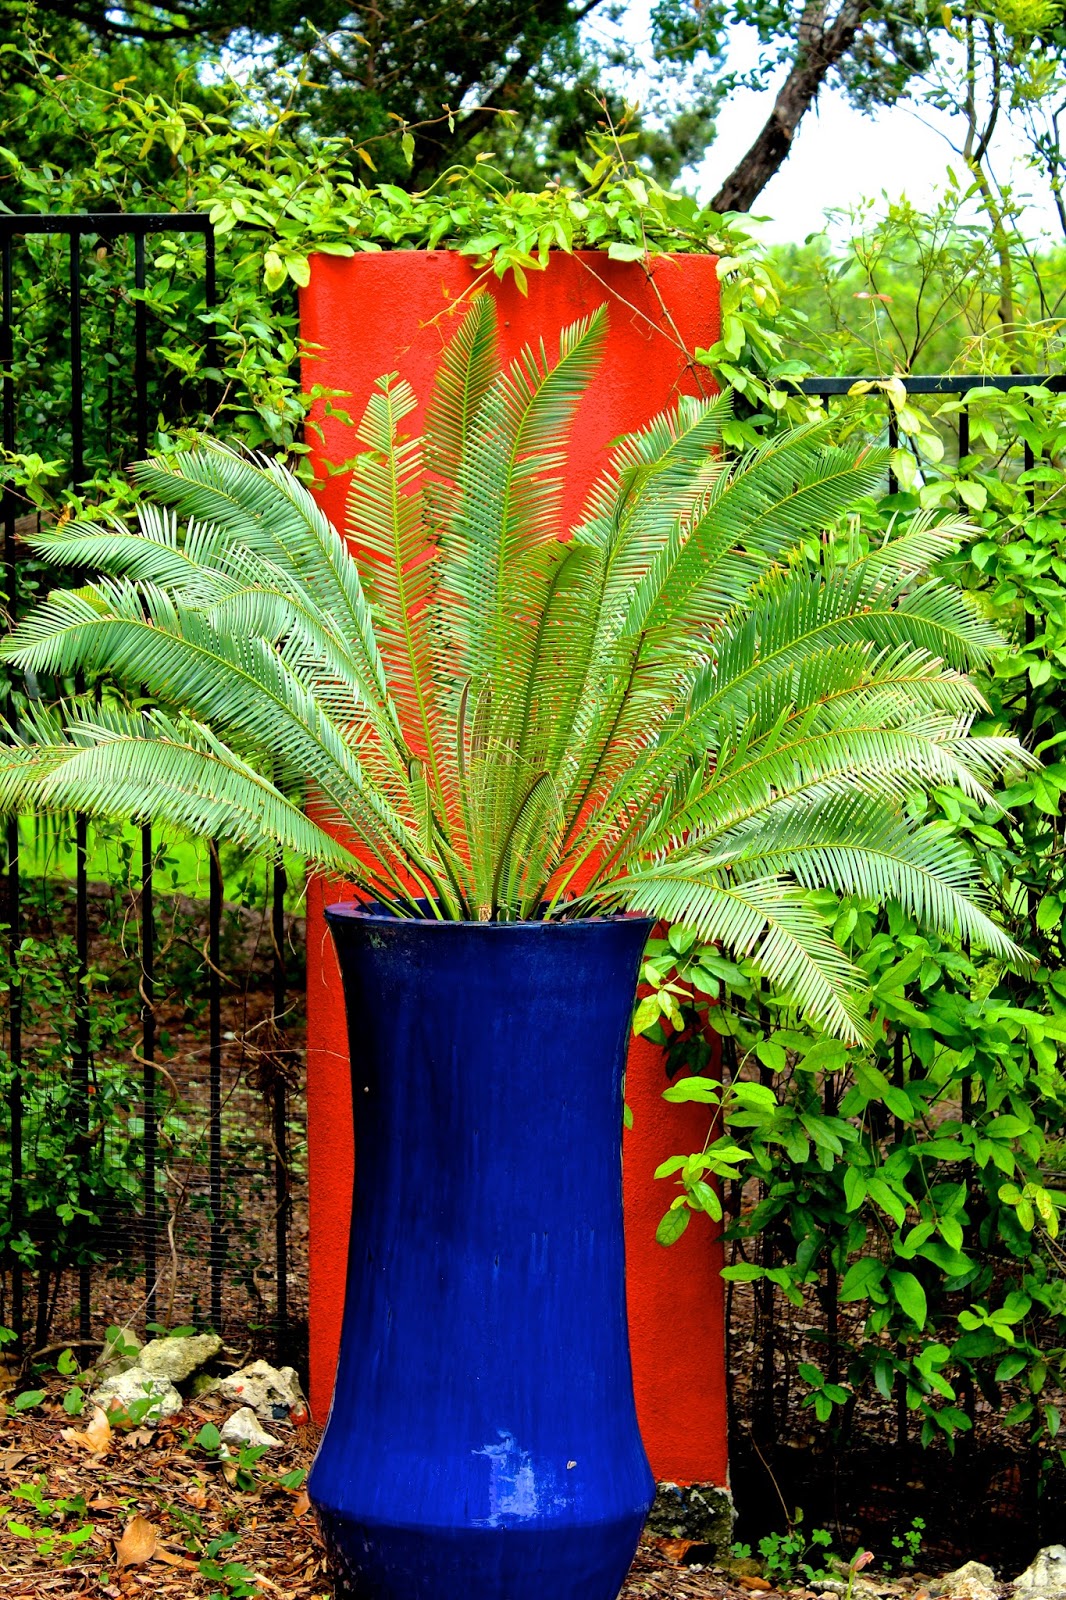
More beautiful tropicals.

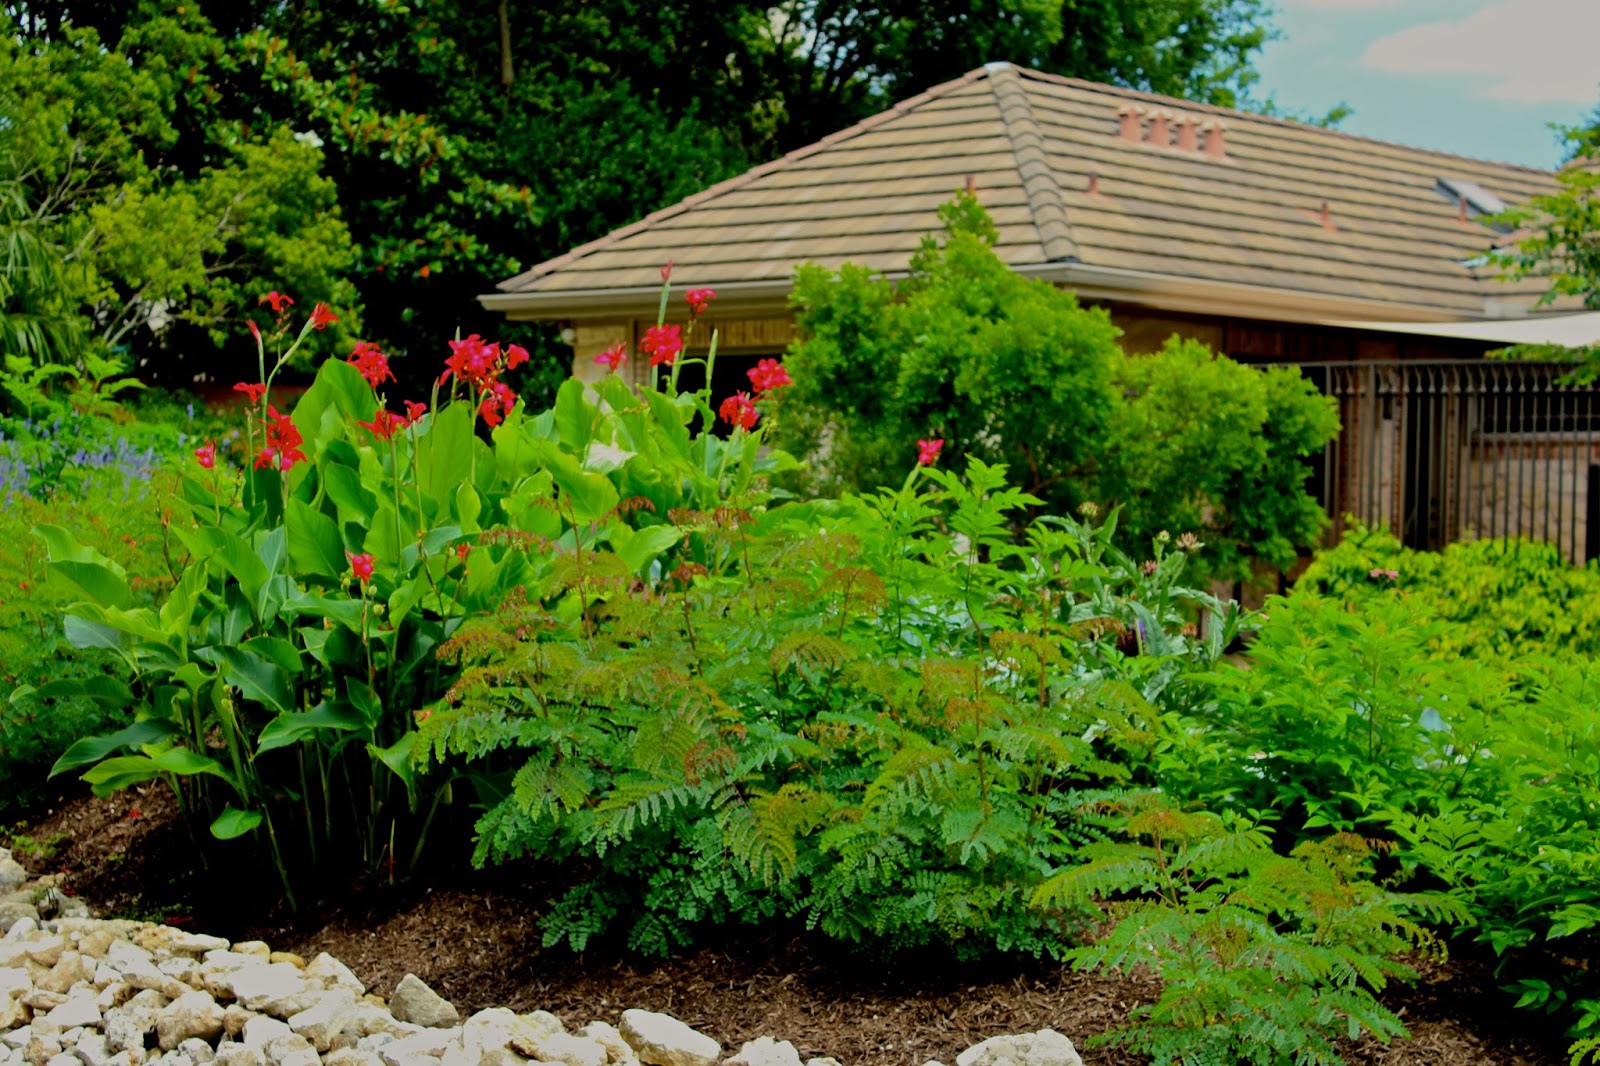
This is a view from the garden back to the house and a covered patio area. 

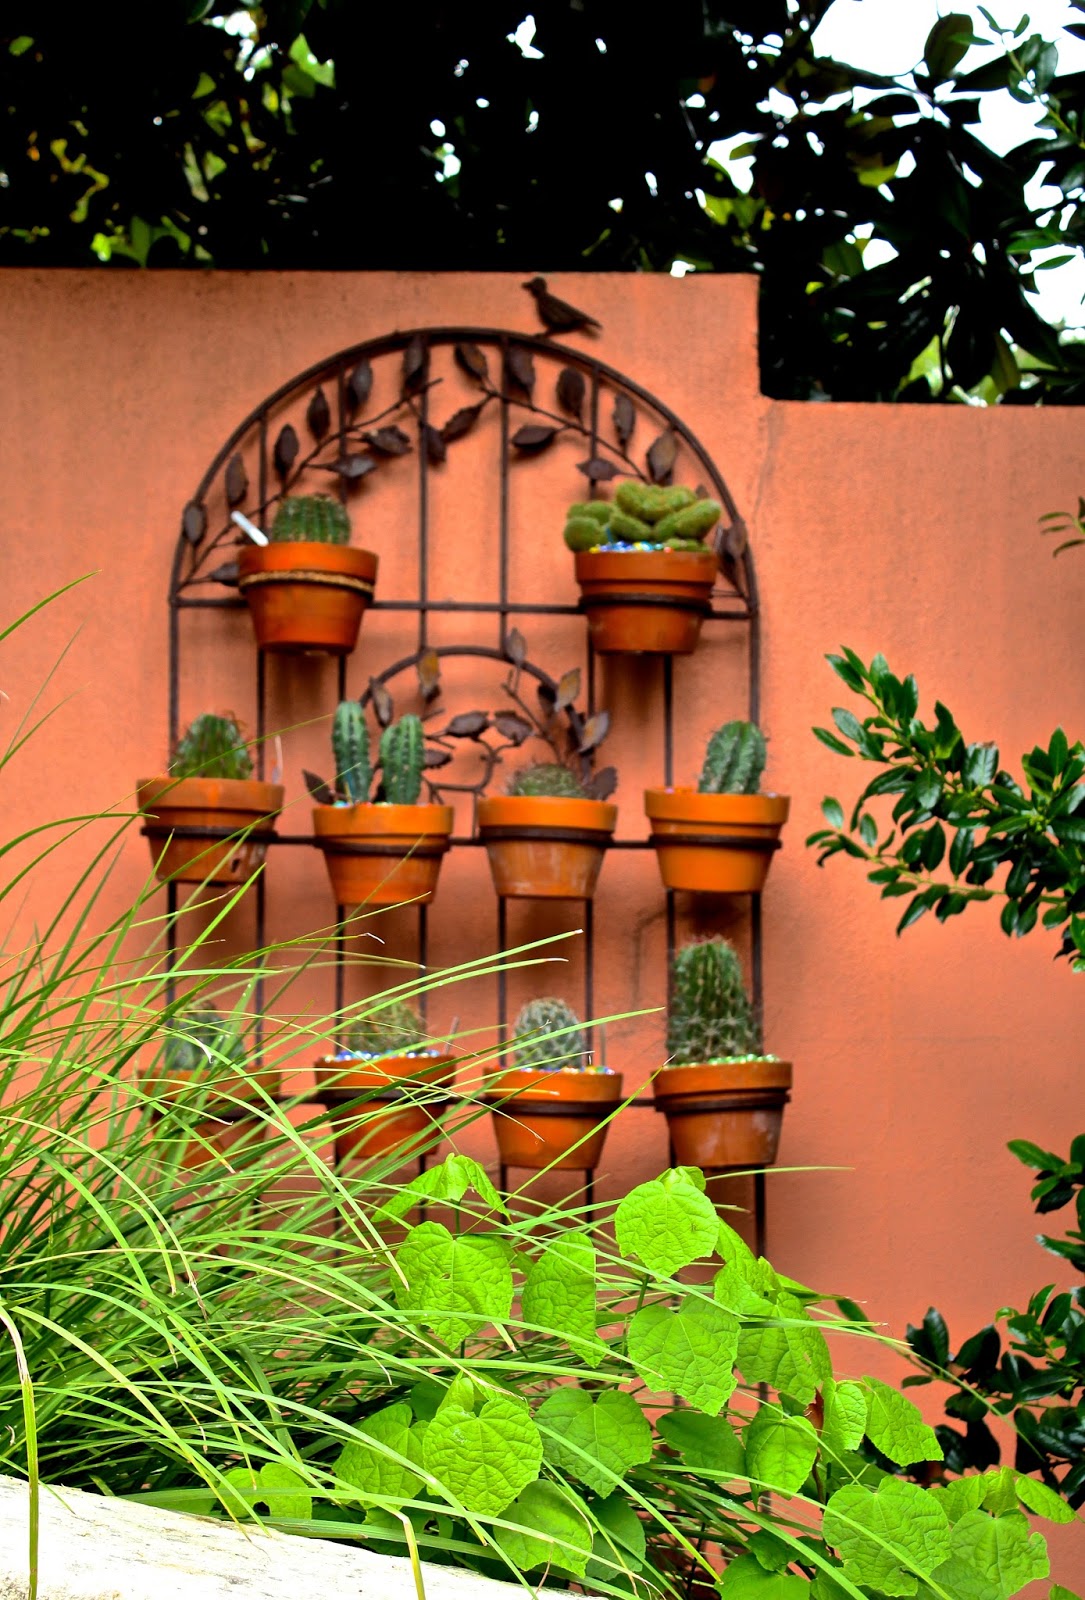
Another painted wall houses this creative trellis displaying an array of cacti in terra cotta pots.

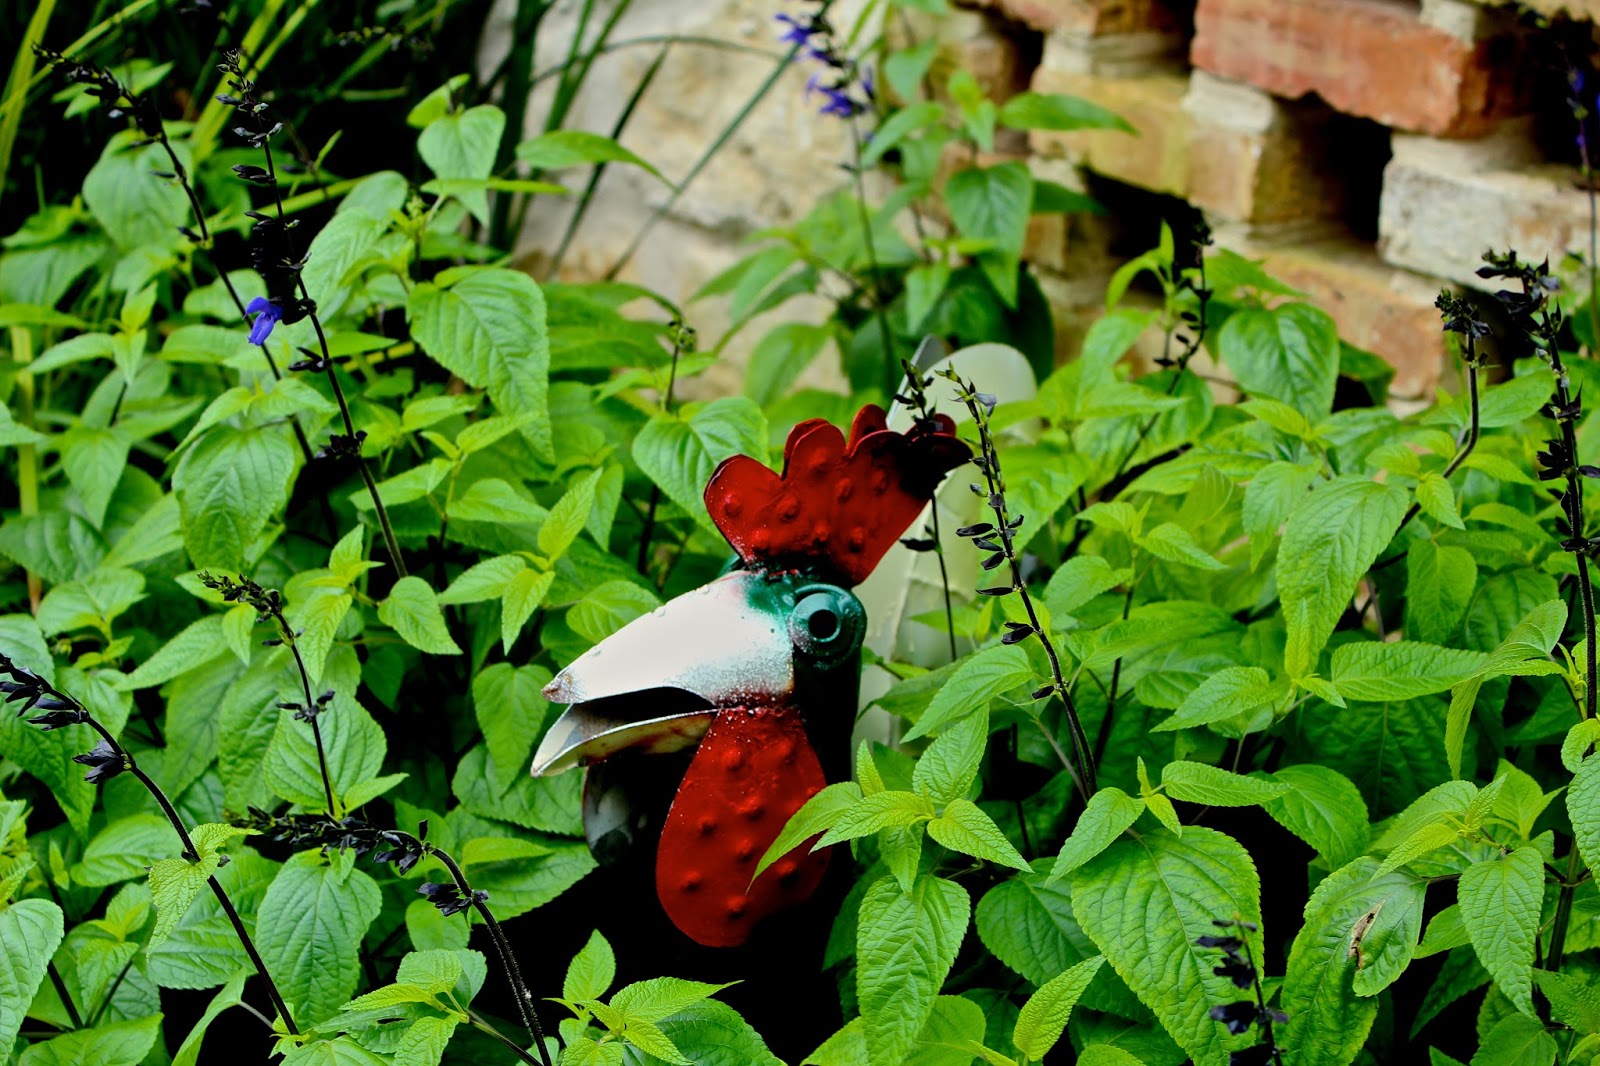
Just past the driveway, this colorful rooster seems to be peering through the salvia to spy on our group of gardeners.

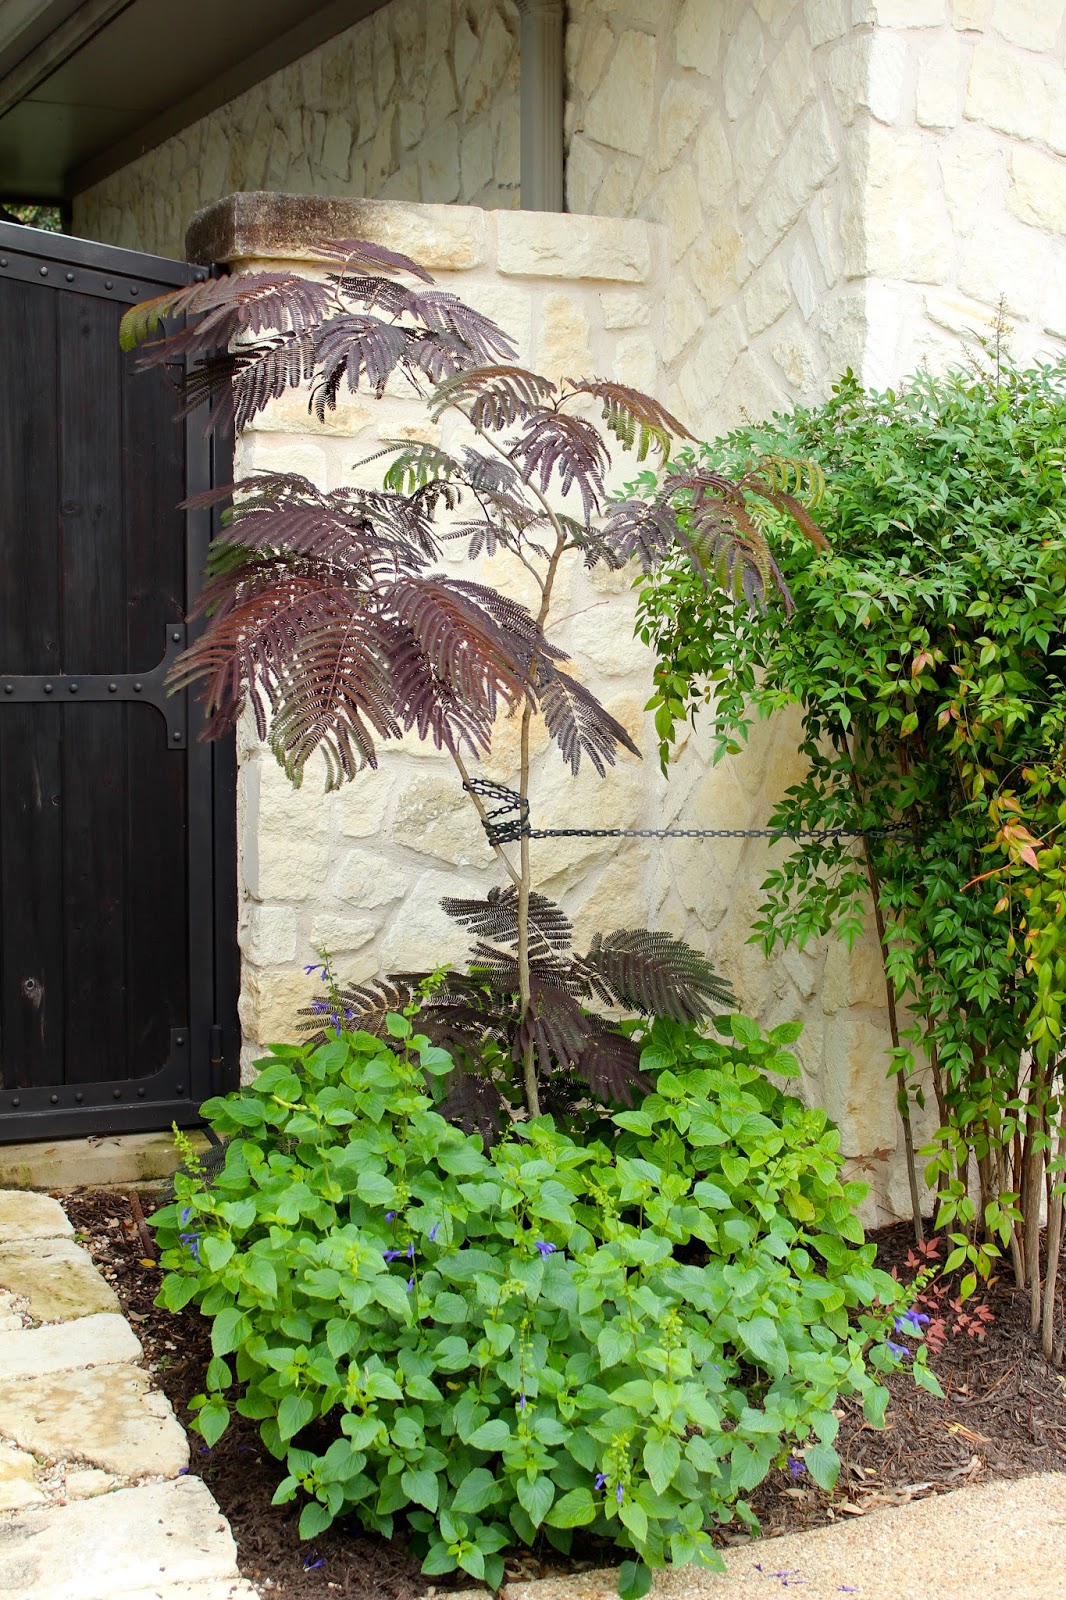
This chocolate mimosa makes a striking statement against this dark wooden gate the the bright limestone.

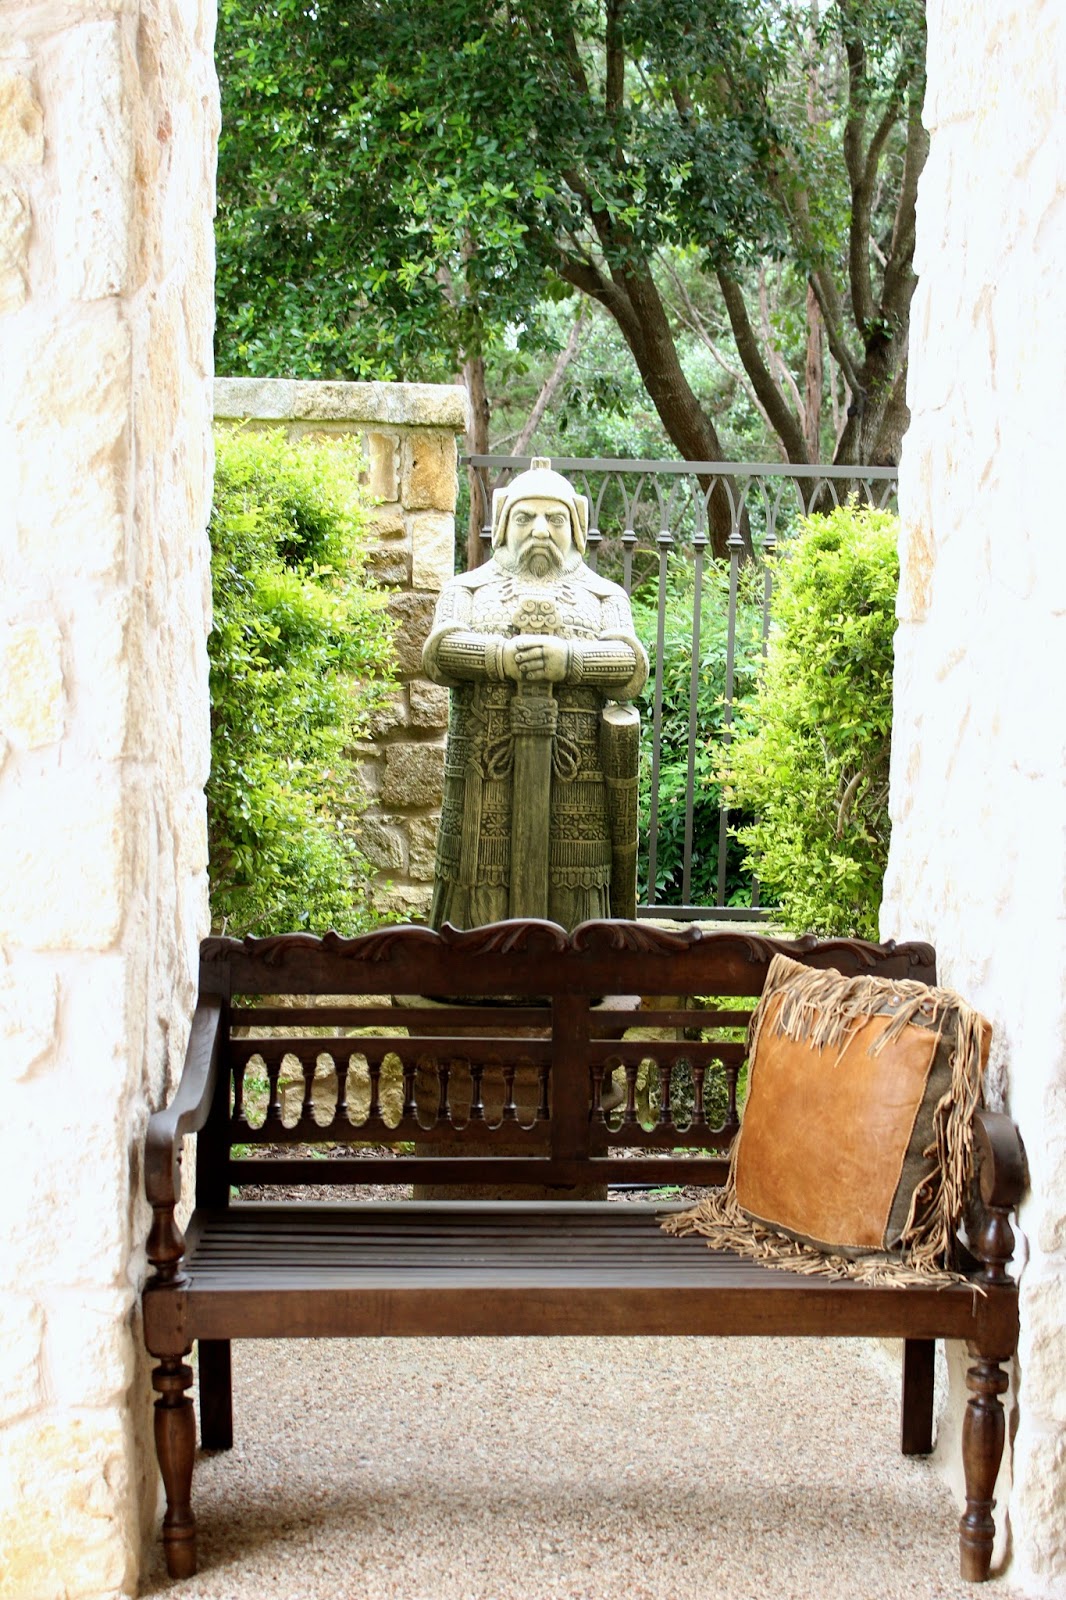
This Asian-style bench welcomes visitors as they near the front door — and just beyond — this imposing soldier seems to be guarding the entry area as well.

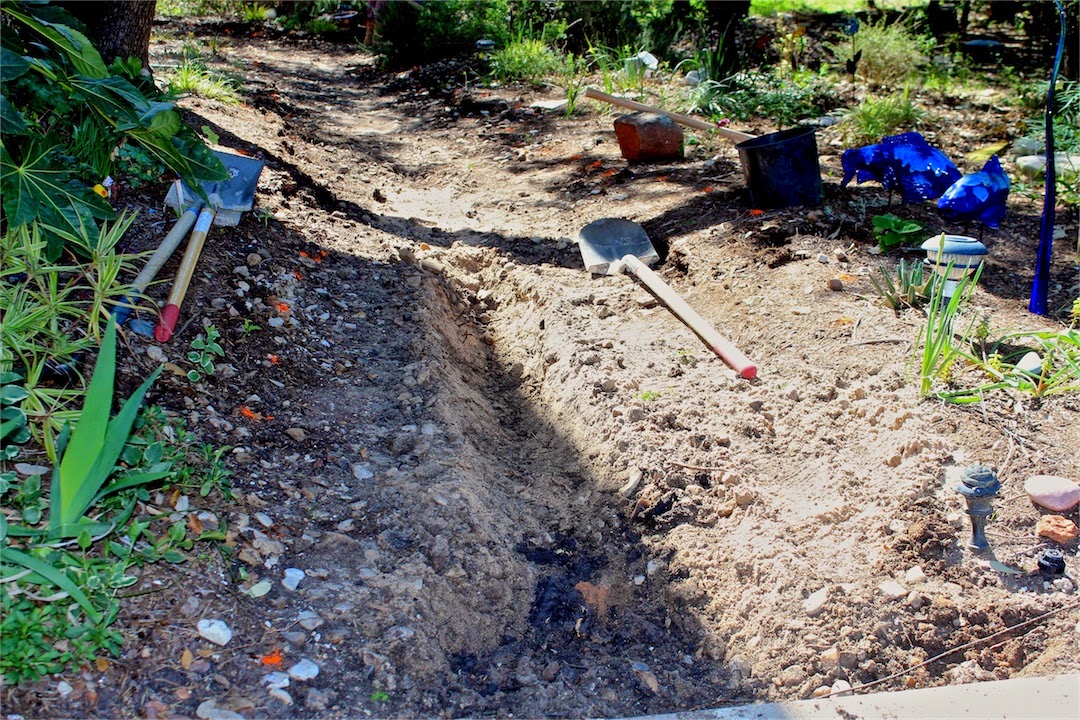
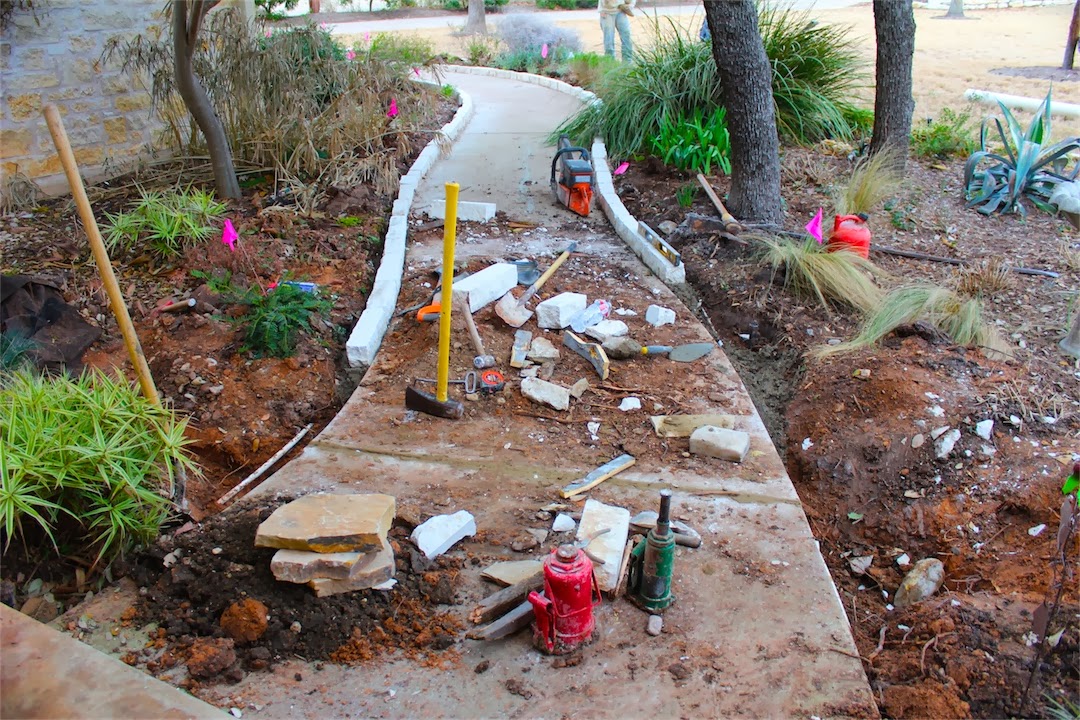
The garden was spectacular — I loved not only the collection of plants, but also the fascinating garden sculpting to address drainage issues.

Special thanks to the homeowners for inviting us to share in their beautiful space.

Magical mulch transforms the garden…

I love spring.  I love the first bulbs, buds and beautiful colors that emerge in the landscape.

Once pruning is done, new plants are planted and the garden is basically on its way,  I’m ready for the next color in the garden — brown.

That’s right.  Not dead brown, but bright, organic great-smelling mulch brown.  Native Texas hardwood much is my favorite.  It helps protect the plants from the heat and the cold, and it helps keep precious moisture in during the drought.

And it is another color in the garden — it provides a great deal of the contrast we want in our landscapes.
 

And there’s nothing like walking through the garden and reaching down to brush some of that fluffy, fresh mulch off a few leaves.

I think we’re over 9 yards now.  They had to go get another truck load of it, so I’m not sure what the final total was.

All the plants are happy, as is this gardener!

New dry creek project done and ready for rain!

The dry creek remodel is done and I can’t wait for it to rain so I can see how well it works.

I know that the very front of the dry creek already works because I washed all the dried dirt from the driveway puddle area into the creek bed and it just dropped down between the rocks like it’s supposed to, instead to swirling in the dirt and lapping back at me.

The moss rocks are gorgeous. (I know my crew thought I was crazy when I oohed and aahed over the great colors on them!)  They’re set for the most part, but I will adjust them some more so that they look random.  (I don’t really do random, so it will have to be a very carefully-arranged faux random.)

And, as always, one project begets another.  During these two days, I:

  1.  created another bed which begs to be filled,
  2. extended the path and opened up more area that needs to be planted,
  3.  removed rock from a bed that now needs more of the moss rock and Oklahoma to define it
  4.  put two new Oklahoma flagstones where old limestone steps were, so now I need a few more to make it look even nicer,
  5.  need to take all of the white/gray flat native stone that used to line the bed and move it to the back of the property to make a path to the shed so we don’t have to walk in the mud back there when it rains.

Then there are the plants.  It’s time to move a few things, say good bye to a few things and go nursery trolling for some fabulous new additions to fill holes and begin new experiments.

This week’s lows in Austin range from 44 to 31 and next week’s lowest point only gets down to 39, so I will go ahead and start planting.  We can most certainly have another freeze as far out as the next 4 weeks, but isn’t that what gardening is all about?  Testing Mother Nature!

After the last two wonderfully warm days, I am eager to get into the garden – and glad to be done with digging and moving rock.  Plants are much easier.

What tops your garden to-do list for this spring?  Happy Gardening.

Winter is perfect for spiffy new hardscaping to satisfy gardening urges

It’s almost planting season here in Central Texas, but to keep me from jumping the gun, I’m starting my winter hardscaping project.  Winter is the perfect time to work on the bones of the garden — getting everything ready for the fun to come.


This was the path/dry creek when it was at its best with native stone that we collected from our property.  But over the years, the rock has been kicked around, gotten buried with soil and mulch and the side rocks  have moved out of place and gotten scraggly looking. So, yesterday my crew came here to start on this year’s main hardscape project.

They moved the existing flagstone and river rock and I outlined the new, curving shape.

Then they dug a deep trench and put in a French drain – perforated pipe with a sock on it to prevent soil from getting inside of it.  A flood of rain water comes across our driveway from our neighbor’s house and we have two downspouts that empty onto the driveway.  We (that would be the royal we) also buried the one downspout at the entrance of the creek.  This will allow the water to rush on down the path and empty into the end of the path in the woods.  This is where it normally puddles, because there isn’t much of a slope down the creek, it also backs up onto the edge of the driveway by about 4 feet by 4 feet, leaving a dirty, wet mess when it rains.

I also brought in moss rock to match the two most recent dry creek projects that we’ve updated the last two years.  You can see those projects here and here. The big, beautiful rocks along the sides are moss rock – they have great markings and lots of character and color and, yes, some mossy stuff.

At the beginning of the path, the crew had to use a chipping hammer to get out some big rocks to create a large rock basin that will help absorb the leftover water when it’s a light rain or it stops flowing.  Now it will be in the creek bed instead of in the dip on our driveway.  (Don’t get me started on the architect/builder that created this problem by not adequately assessing the drainage issue!)

Today we’re putting in some more pipe, placing some medium-sized Oklahoma stone and the final 1-3″ river rock and flagstone stepping stones.  I’m out digging and placing the decorative rocks, because they have to be just so to give it a more natural look.

So much for having the day off!

Spring garden spruce up…

While the weather was cold and before it was planting season, I started a project at my house to add a chopped limestone edge and an Oklahoma flagstone cap to the beds along the front walk.  It turned out great and I was very happy with the result.

But then the nice weather came, and with it, clients.  Clients who wanted designs and hardscaping and landscaping and the items left unfinished on my project remained unfinished.  Until this week.

An unexpected opening for the crew found them at my house with 4-1/2 yards of great soil – Thunder Garden Soil from  Geo Growers.  That was worked into the front beds, which are now, in essence, raised beds.  Miscellaneous volunteer seeds – zinnias and salvias and other random plants were hoed out and given the boot.

I stood back and took stock of my bed and tried to view it as I would a client’s.  I’d been unhappy with it for a while.  So off  I went, three days in a row, to the nursery to load up every inch of my car with plants.

We filled the holes and created structure and contrast and texture (all the things I preach about!) These are the plants I added:

  • Foxtail ferns
  • Variegated agapanthus – these are way cool!
  • Persian shield
  • Sparkler Sedge
  • Purple pixie loropetalum
  • Mexican bush sage
  • Amistad salvia
  • Bat-faced cuphea
  • Blackfoot daisy
  • Mexican honeysuckle
  • Purple skullcap
  • Yellow zinnias
  • Skeletonleaf goldeneye
  • Sun coleus
  • Copper plant
  • Helianthus maxmilliani
  • Whale’s tongue agave
  • Miss Molly buddleia
  • Yellow bulbine
  • Hibiscus
  • Mexican bird of paradise

These didn’t all go into the walkway bed, I filled holes in other beds, too. I finally replaced my critically-wounded franzosini agave with a whale’s tongue.  It will never be the same, but it also won’t make 30 pups a month that have to be cut out and it won’t get 20 feet tall and it won’t freeze as easily.

I love the new plants and the new mulch that followed, but one of the things I’m most excited about is that they finally brought me moss rocks to put in the section of dry creek right by the front door.  After lots of — no, tilt it this way, no, bury that end, no turn it around, not this way, that way — I am happy with the placement of the rocks.  They add so much to the natural look of the entire area.

Though they are still small, the Persian shield and loropetalum will add a nice purple to the lime spikes of the sparkler sedge and the hot gold Cuban duranta that’s now just emerging from dormancy.

My new passalong bronze iris from Robin at Getting Grounded went into this bed along with some coleus to mirror the lime and purple on the other side.

These foxtail ferns (my first ever) will provide some structural contrast for the rock rose volunteer in the center that I babied over the winter.  The yellow zinnias will coordinate with the yellow skeletonleaf golden eye and the bright edge yucca further down the bed.

I can’t wait to see the brilliant purple Amistad savlias bloom next to the bright edge and the agapanthus.  (It’s still hard to envision it all since almost nothing is blooming quite yet.)

This vignette is at the end of the path – yellow columbine, golden grass, sun coleus, creeping jenny, a yellow lantana and hidden – a copper plant that will grow to become a nice tall bronze backdrop on the left.

This is just a little slice of the bed behind the pool.  The ginormous Maggie roses used to live here.  Now the center piece will be this Miss Molly buddleia, surrounded in front by a semi-circle of pure yellow bulbine.  On either side of the bed are phlox paniculata and lavender trailing lantana and Mexican oregano.

I moved the Amistad salvias from behind these bright edge yuccas last fall.  They just didn’t do well in this bed – I think it was too hot for them here.  The stock tank I painted holds an evergreen wisteria planted in the fall – check out the amazing bloom color here.  So now between the two I have three Mexican honeysuckles with their hot orange blooms to play off the purple, yellow and lime.  Love those combos.

So, now I wait, and water a lot by hand.  Bought a few new expandable hoses (yes, I love them and will do a post soon).  And I’m using rainwater from the tank, so that feels great.  I think there are probably 200-250 gallons in there and that’s going to go fast if it’s going to be 90 every day.

I’m happy with the result and enjoyed walking through the garden tonight with gin and tonic in hand, surveying all the new things and appreciating my garden.

Landscaping project solves drainage problem…

We’ve lived for 10-1/2 years with a terrible drainage problem on our front sidewalk.  When we get a good rain, a lake forms in front of the front door, making it impossible to come into the house without wearing galoshes or looking for a ferry.  (Well, that might be an exaggeration.)  If you look carefully, the edge of the stained concrete porch stops and you can see a tiny sliver of the sidewalk on this side of the puddle before you step up to the porch.

This is only a moderately-sized lake.  When we get gully washers it’s much bigger.

I try not to think about the builder and the contractor who thought it was ok to build a sloping sidewalk that comes down the hill, and then goes back up with the next piece of concrete, making a V in which water will always puddle.  They did the same thing in front of our garage doors as well, making a 3-car trench over which we also have to leap when it rains.

But I digress.

So, in addition to addressing our sprinkler/rain drainage and erosion problems in the beds that line the sloping sidewalk, we are fixing the entire sidewalk.

My crew dug the sides of the sidewalk out, separated the two pieces at the angeled joint and placed a BIG ‘ol pipe under it.  They then deepened my dry creek trench (the first attempt to fix the problem, but it was inadequate). 

I could not believe how meticulous they were with the cement pieces as I was sure they would crack in the process – the sidewalk is 14 years old after all.  They cut it to fit together so it is perfectly level and far above the trench that will carry away the water.  Before, the two pieces of cement met at an angle roughly down where the pipe has been laid.

It’s hard to see, but it’s all nice and level now!

And they made great progress today on the Oklahoma flag stone cap for the limestone edging.  In this photo the mortar is still wet and they haven’t finished cleaning and brushing the excess off.  But you can see where it’s going.

It was cold and windy and damp and they worked really hard today.  And it all looks great.  I’m proud of my crew and their skills, but I really was in awe today.  Craftsmanship.

Oh, and did you see all that beautiful red clay they dug out around the sidewalk in the first pictures?  I’m happy to say that it is officially basura (Spanish for trash) and is going away, to be replaced by 3-way garden soil and covered with fresh native Texas hardwood mulch when the edging is all done.

It should all be finished this week.  I can’t wait to see it.  And I really can’t wait for the warm sunshine of spring so I can start planting in it.

Go to Top