Diana C. Kirby

About Diana C. Kirby

Diana Kirby is a lifelong gardener and longtime Austinite, who loves the Central Texas climate for the almost year-round opportunities it offers for active gardening and seasonal splendor. Known as an impassioned and successful gardener, Diana began by helping friends design and implement their landscapes. Soon, she was contracted as a professional designer by a popular local landscaping installation firm, where she designed landscapes for residential and commercial clients for several years. In 2007, her new passion blossomed with the launch of her own firm, Diana’s Designs. ... Diana is a member of the Association of Professional Landscape Designers, the Garden Writers Association of America, and she writes a monthly gardening column for the Austin American-Statesman. Diana teaches the Landscape Design classes for several county Texas Agrilife Extension Service Master Gardener certification programs and speaks about gardening and design for garden centers and other groups. Learn more about presentation topics, availability and speaking fees.

New bed well on its way…

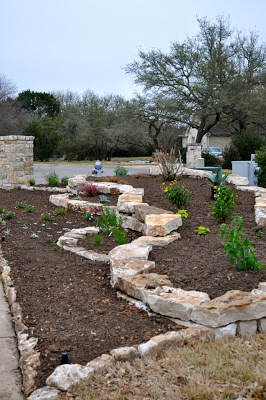
On Friday, many of the plants for the new bed went into their new homes.

I wasn’t able to get several of the things on my list, but I did get most of them, so this is a good start.

And I was able to transplant all of the plants from the preious bed — either to more appropriate spaces to fit the design of the new bed, or into other beds where I had holes.

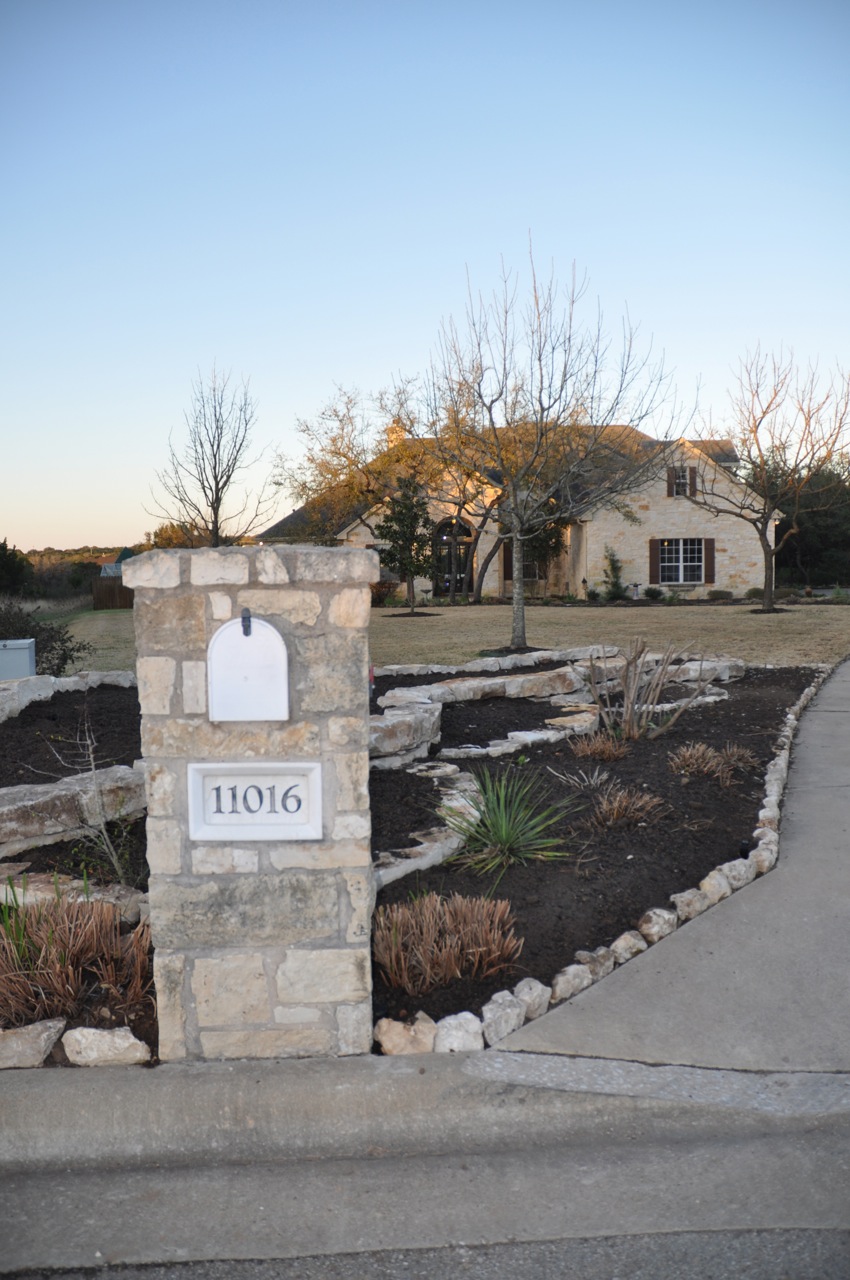
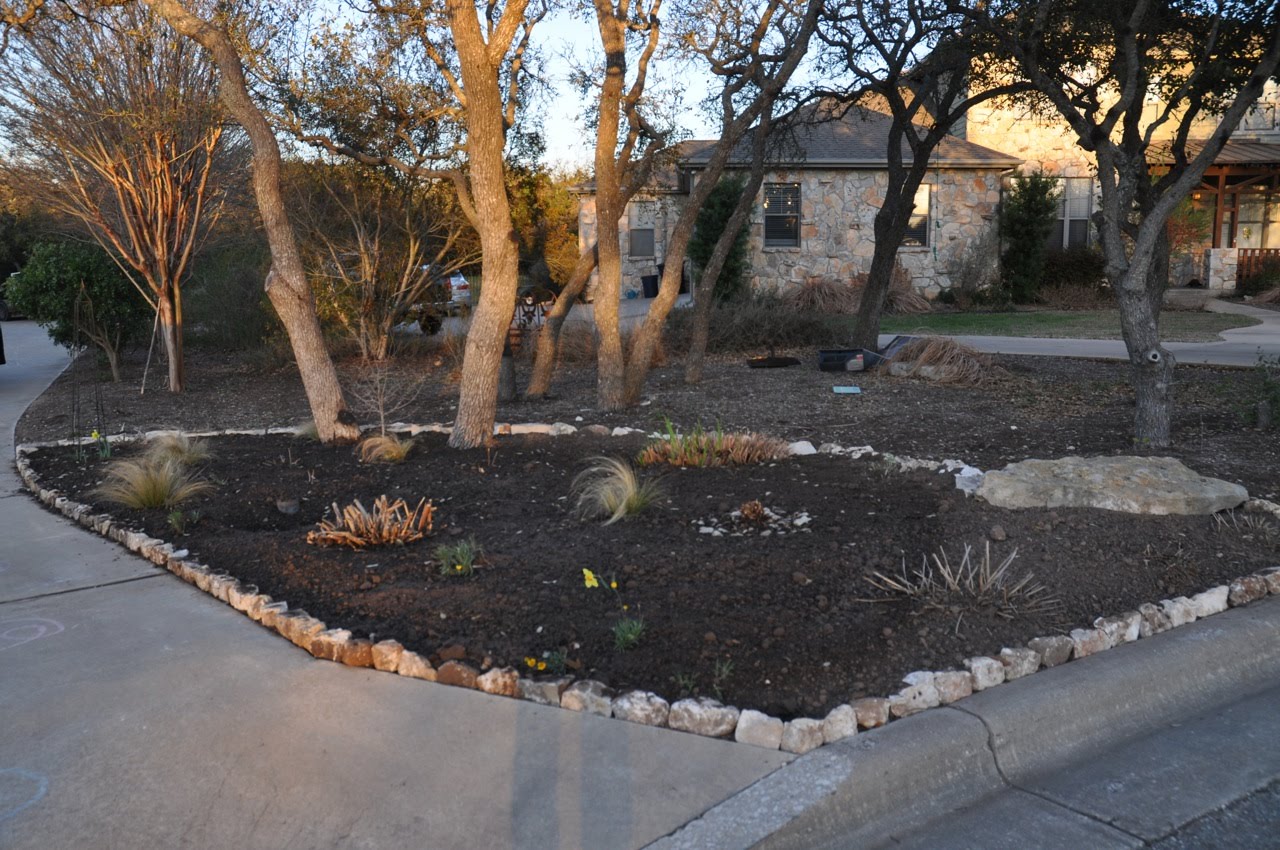
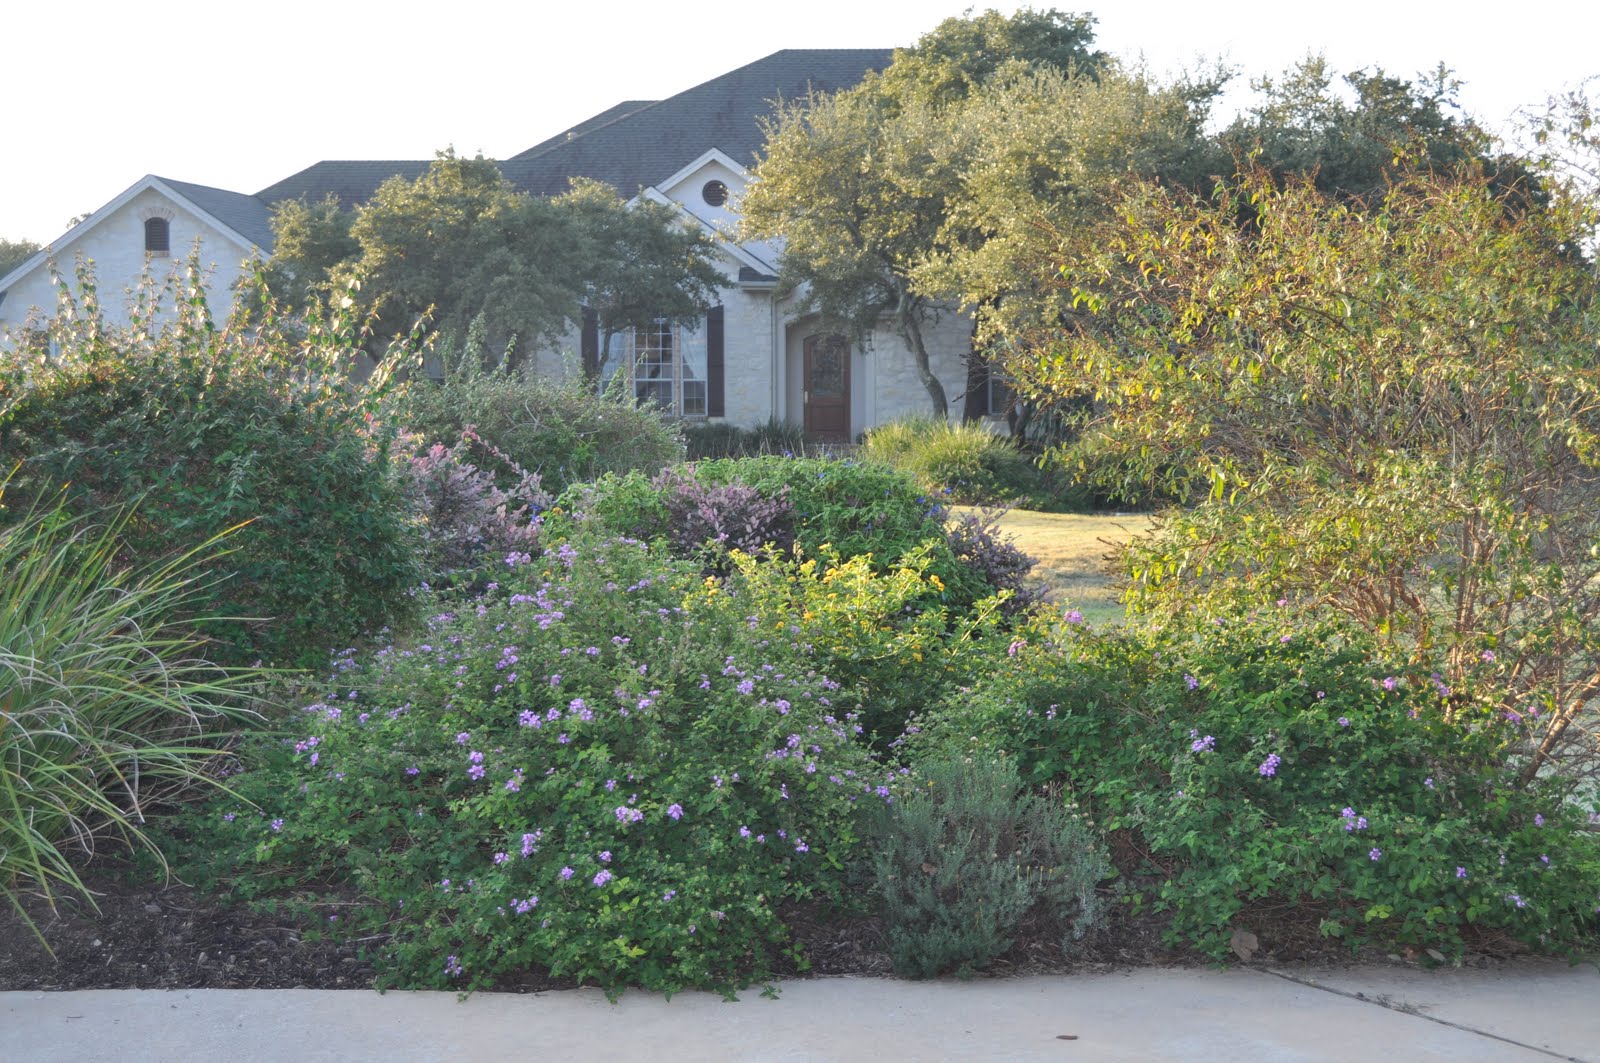
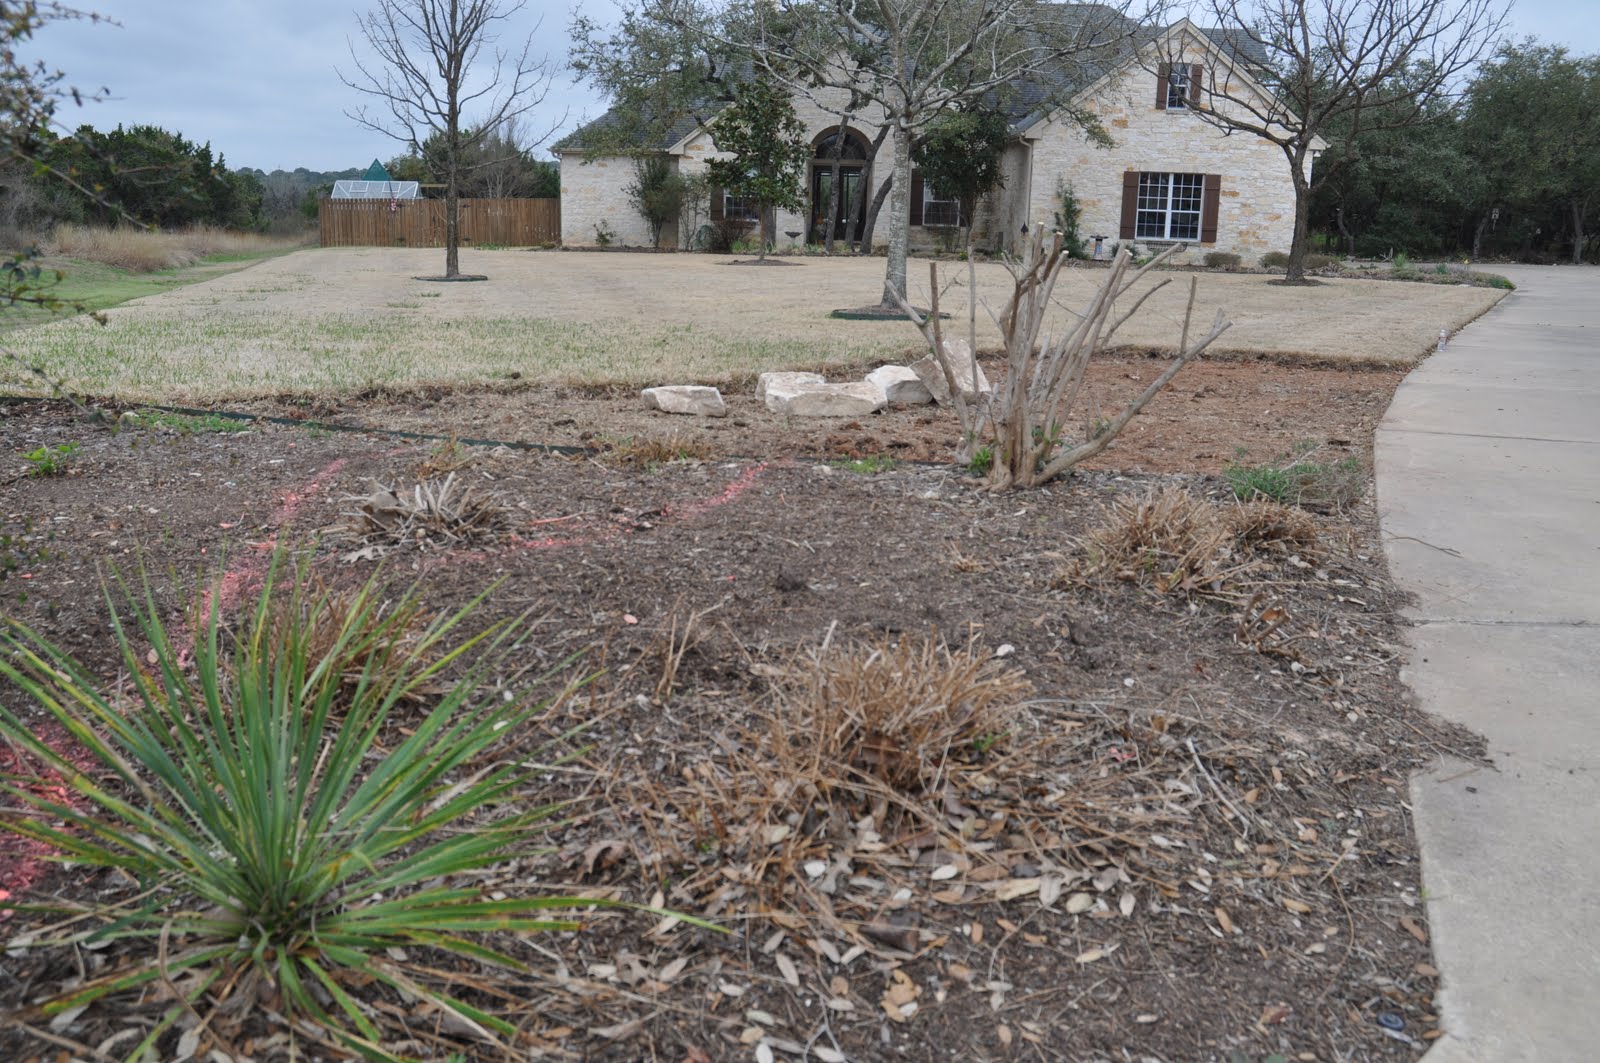
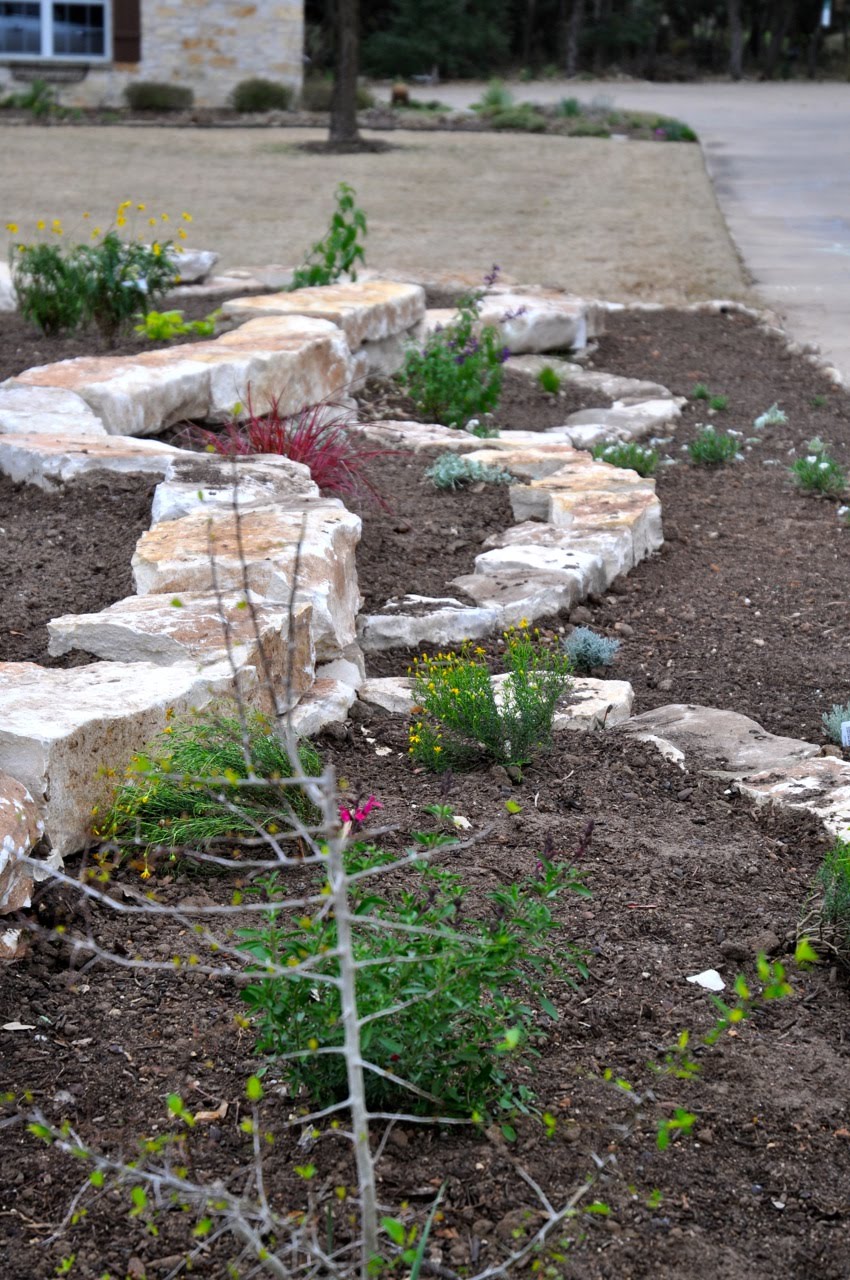
I’m also very excited that I was able to harvest from my own little volunteer ‘incubator’ of Lamb’s ears. They threw off seed from their blooms and new babies started growing in the playscape gravel next to the cutting garden. More than 20 of them were pulled from the gravel and put into the new bed. If you get out your magnifying glass, you can see them on the lowest level of the bed next to the Blackfoot daisies. The are the silver dots in this photo! What you can’t see just below the Lamb’s ears are several mounding Pink Texas Skullcaps, Skutellaria suffrutescens.

Visible only in this photo in the very back is my transplanted Butterfly Bush, Buddleja, which may or may not be ‘Black Knight.’ It is a deep royal purple and very vibrant. (In the process of researching the botanical name for my variety, I learned that is isn’t spelled Buddleia, which is how I’ve always spelled it, but Buddleja. Saw it first on Wikipedia and didn’t trust them as a horticultural resource, but then I confirmed it with Dave’s Garden, which I do trust! Thought that was interesting trivia.) Around the base of it, I transplanted several Lantana montevidensis, ‘Trailing Purple.’

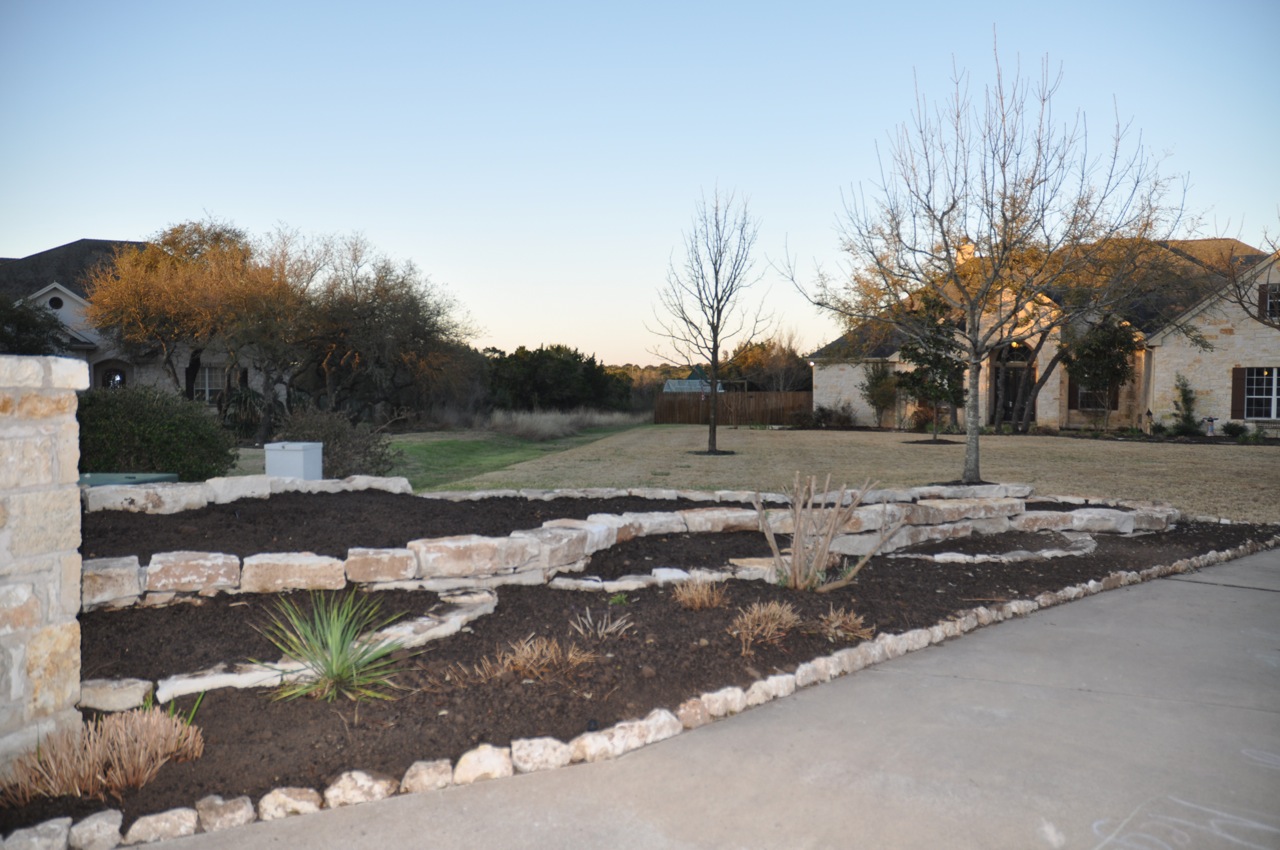
The pinkish grass is Fireworks Purple Foutain Grass – Pennisetum rubrum ‘Fireworks.’ Next to it, Silver Ponyfoot, Dichondra argentea.

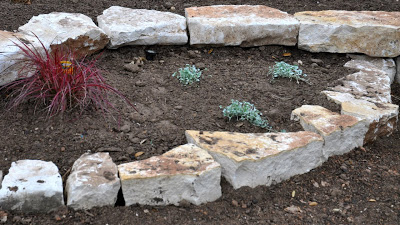
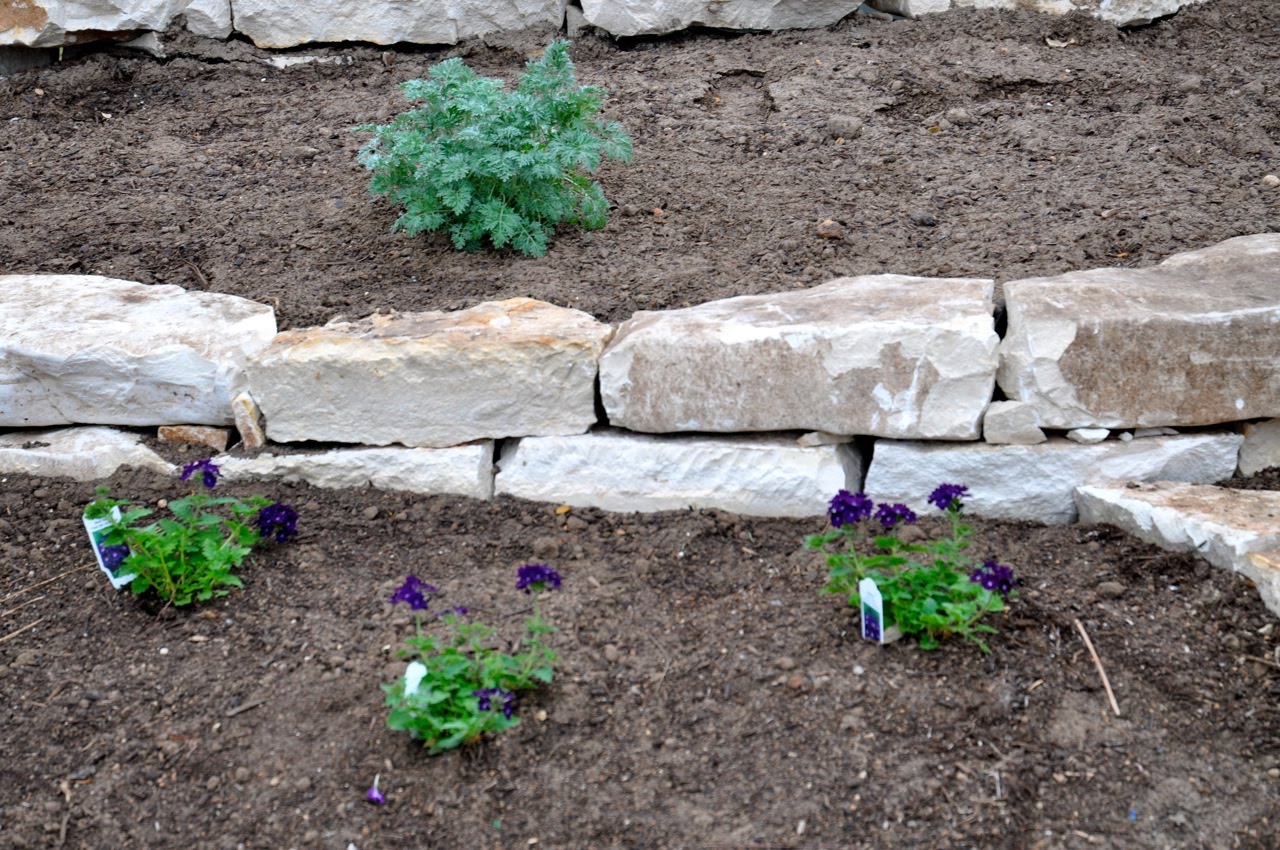
Up here is Artemesia powis castle which I hope will spill over the wall to mix with Blue Velvet Trailing Verbena, Verbena hybrida.
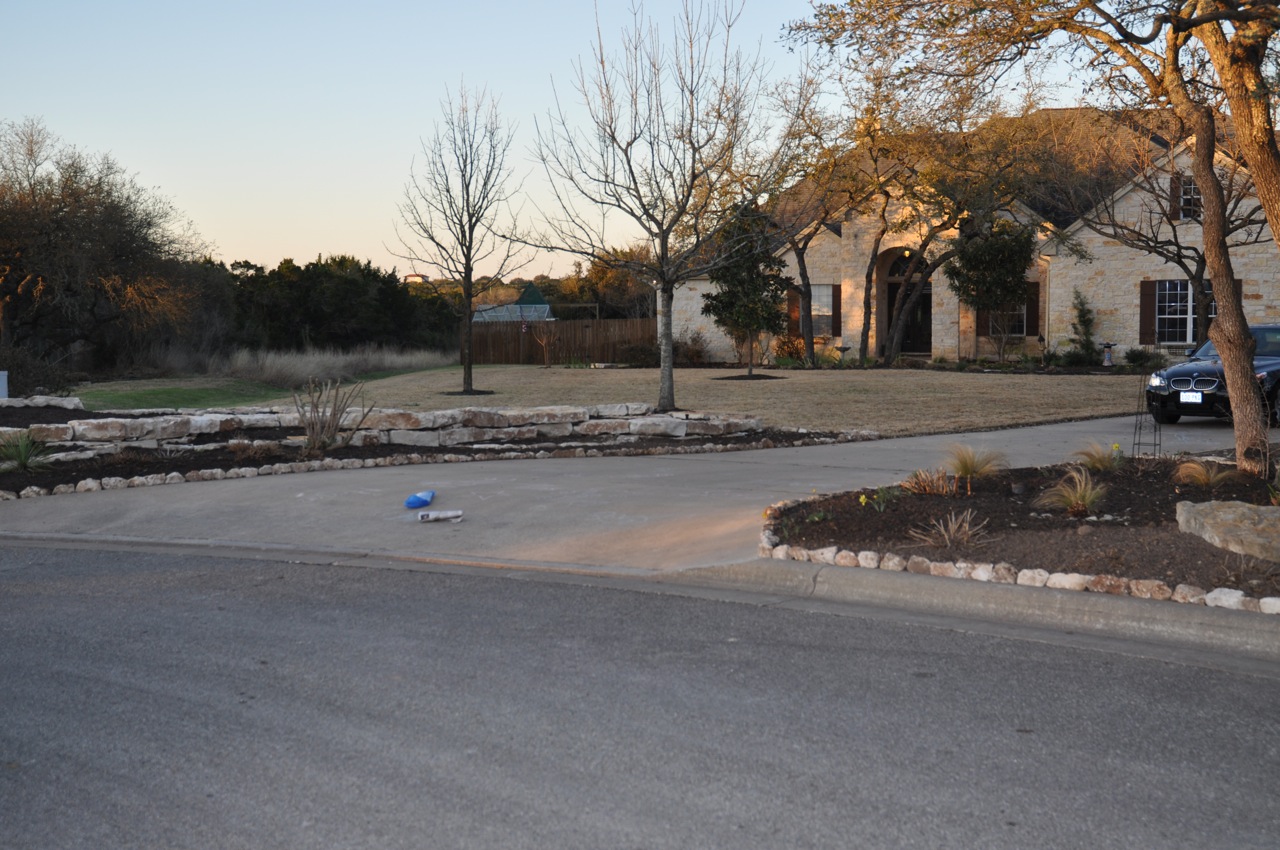
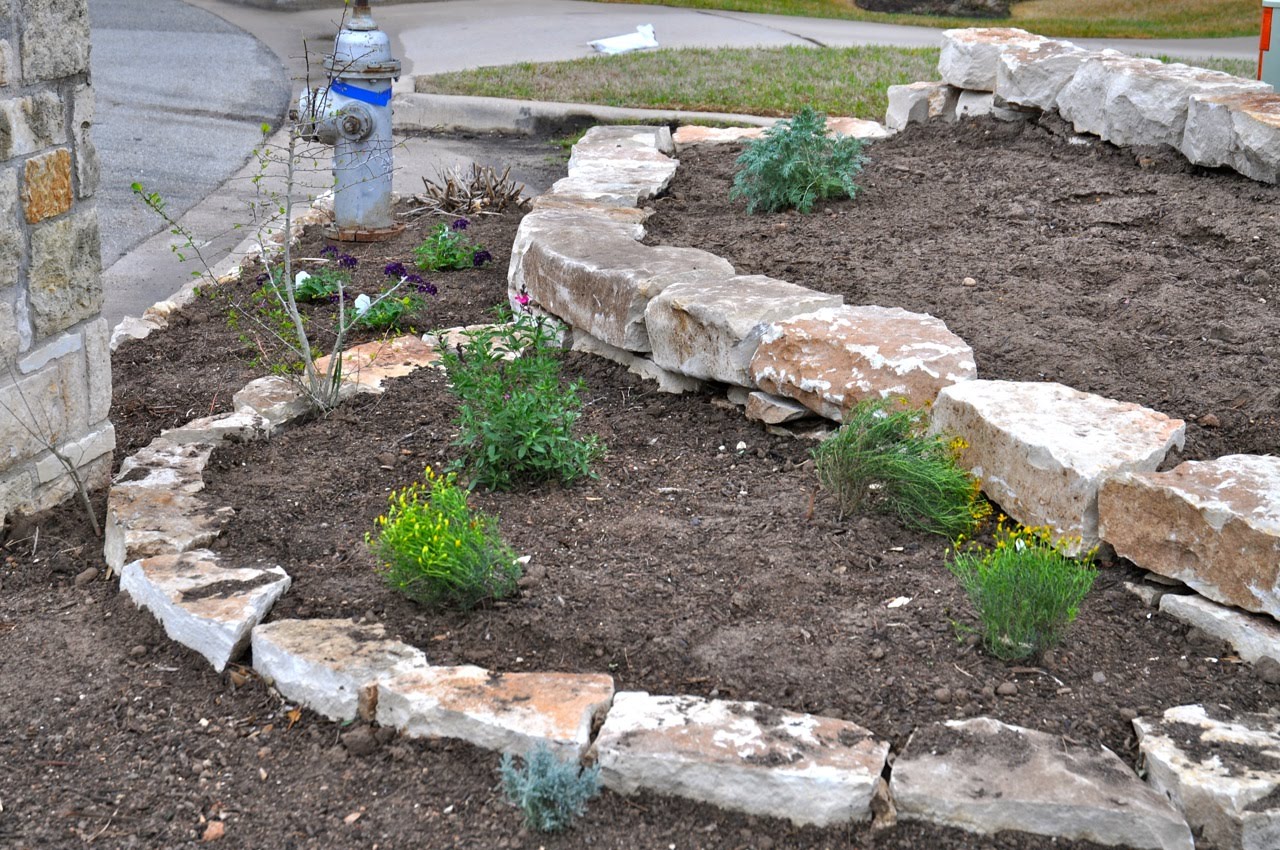
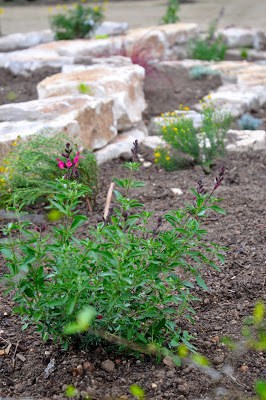
Obstructing your new here is a stick-like native persimmon. I was going to take it out, but I may prune it a bit and look at it for a while to see if it will fit in and can stay. Look closely behind it and you will see a Salvia GreggiiHot pink.’ Next to it are three Daimianita daisies, Chrysactinia mexicana. You can see them better below. Then on the lower level, almost out of sight, are 5 gray Santolinas, Santolina chamaecyarissus.

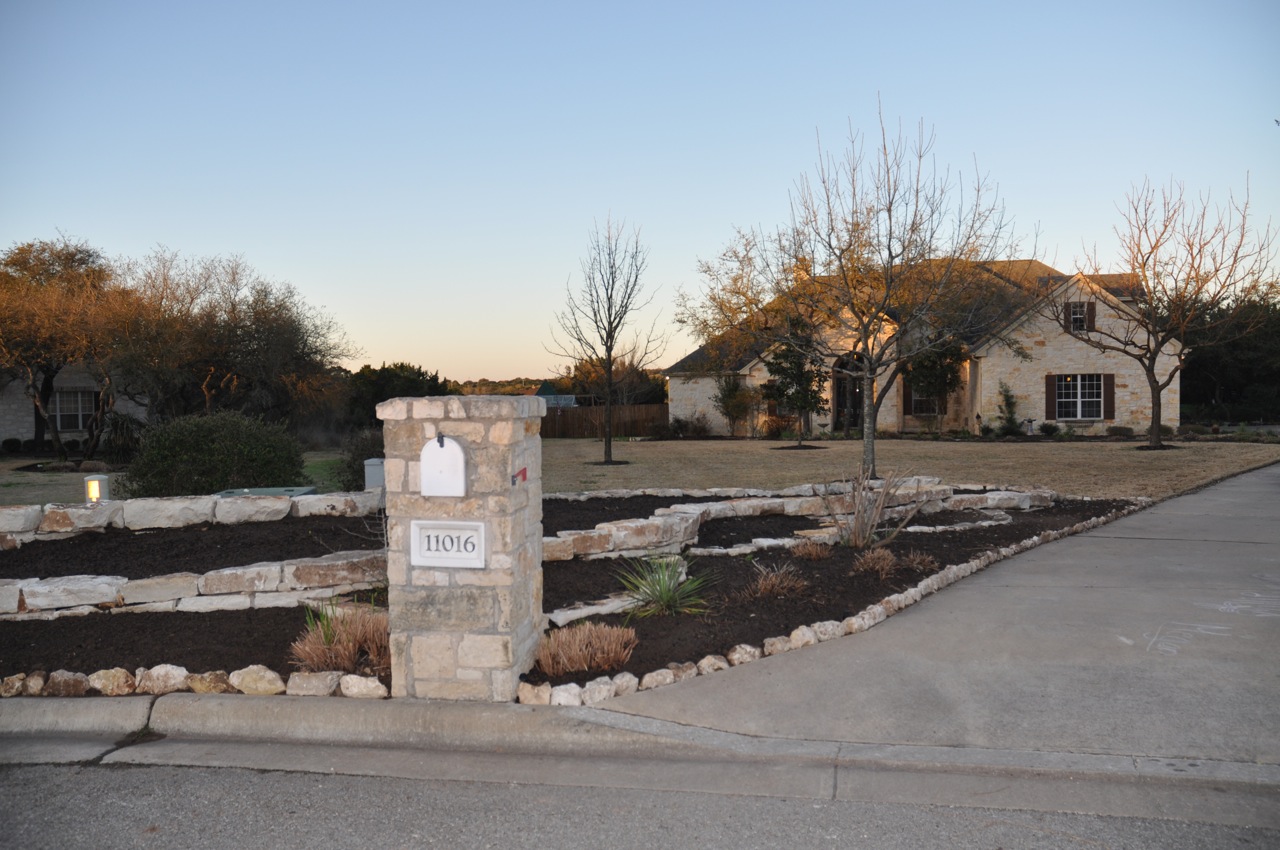
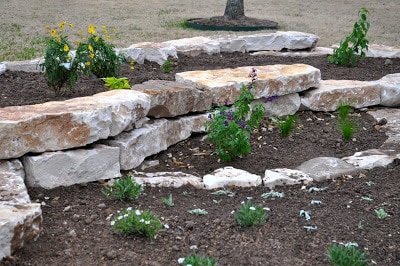
On the upper level there are three Euryops chrysanthemoides with some Sweet Potato vines Ipomoea batatas to surround it and trail down the wall around the Salvia Mesa ‘purple‘ and the Mexican Feather grasses Nasella tenuissima. Blackfoot daisies and Lamb’s ears in foreground. To the left of the Euryops will be a large blue Agave, a small boulder and some ground cover of Purple Wine Cups.

So, that’s it so far. I’m quite happy with this very xeric bed. Still searching for Mexican Oregano, LARGE Blue Agave, Color guard yucca, and a Queen Victoria agave or something similar with the upright form and strings! And another ground cover.

Almost after…

The beds are finished and begging for plants! Can you hear them?

Yesterday, after a trip to It’s About Thyme Nursery, I came home with a purple Salvia, Daimianita, Santolina, Jerusalem Sage and some Four Nerve Daisies.
The plants that remain from the previous bed will all move — some will be relocated in the bed and some will go elsewhere to fill in spots left empty by the hard winter.
Today it’s Barton Springs Nursery and maybe the Great Outdoors — looking for Agaves, Yuccas, Salvias, grasses, Blackfoot Daisies, Silver Ponyfoot, Mexican Oregano — and more!
Then I will dig up a few volunteers from other beds and add in Wine Cup and Lamb’s ears.
This bed on the other side just got an updated and coordinated look with a rock edge.

Is there anything else you think I need to plant that I haven’t thought about yet?!

Before and during…

It’s getting warmer, daffodils are blooming, oak leaves are dropping, and gardeners are getting project fever.

This week marked the beginning of a new project in my garden.

I’ve been working on the front mailbox bed since we moved in. The previous owners had a mishmash of meatball-shaped shrubs. I took them out several years ago and planted a nice array of native and drought tolerant shrubs and perennials. Plants included Lantana, Butterfly bush, Loropetalum, Blackfoot daisy, Hymenoxis, and Bi-color iris.
Don’t get me wrong — I love the plants. But I still had issues with the almost square bed which lacked definition, was too deep and flat.

So, this week I started on the project to make the entrance a welcoming addition to our landscape.

See how overgrown it looks without some way to break up the depth?
The right side will get a little sprucing up with just a few new plants — I have to replace two agaves that died in our cold winter. And it will get updated as well, with a natural rock edge to match the left side.
It looks o.k. in early spring before the plants grow, but it still has an odd, uninteresting shape with no flow.
Just imagine a small rock wall that provides an elevated garden bed along the left half of the existing bed and extending it down to meander along the driveway. Then the lower lever of the front bed will meander in front of it, segmented by little vignettes separated by smaller rocks, providing spaces to highlight favorite plants and create focal points.
Tons of rock for the raised bed arrived this morning. Rock breaking starts Monday (I will not be a part of that team..I’m the design team!)

A few little garden early birds…

Most of my garden is awash in a sea of browns, grays and deads. Everywhere you look, there are dried limbs, waiting, desperately waiting to be pruned.
But thank goodness for my passion for early spring bloomers. They never fail me. There are daffodils scattered all about … Yellow Fortune, Tete a tete, Dutch Master, Double Campernelle, Jonquil Simplex. These are Dutch Masters above, also known as King Alfred.
And here we have one of the newer Hellebores. I believe that this one is Phoenix, but I’m not sure because the two about to bloom are not tagged, I didn’t keep the receipt, and I didn’t blog their names or record their names in my master notebook.

I hate it when I do that! I do have two that have tags, but they are sad and pathetic and not blog-worthy! That’s how it goes, isn’t it?!
This is the Double Campernelle Daffodil. See how fluffy and full it is?
And right behind it I have this lovely Japanese Quince that blooms and heralds the spring every year.
Not sure which one this is. I keep meaning to take photos of them all and try to pin point which is which, but that’s low on the list of garden-to-dos!
This one I can ID – it’s the Tete-a-tete. They are tiny little Daffs with a nice upright shape and lovely, neat little blooms.
Unknown variety hyacinths from a grocery store bulb planter I was showing off inside the house two years ago — see it here.

So, while I’m waiting to prune, purge and plant in the garden, I can always count on these pretty early birds to perk me up.

Who’s perking you up in your garden? Any signs of spring yet?

Wait until last frost before you bring out the pruning tools

We left January with a 78-degree high one day and welcomed February with a 17-degree low the next. These dramatic swings in temperature are often painful for Austinites, for whom prolonged bitter cold is an anomaly. And it can wreak havoc on our gardens. Our plants don’t know if they are supposed to be dead, dormant or budding out.

As gardeners, we certainly want to take advantage of those sporadic and delightfully warm days to get caught up with our landscaping chores. But it’s still just a bit early.

There are still a few more weeks left with a danger of frost. According to the USDA Hardiness Zone map for the Austin area, our average last frost comes between March 1 and March 31. It’s typically the middle of March. (As we all know, using the term “typical” can get you into some gardening trouble here with our yo-yo like weather patterns.)

Try to be patient.  (I know it’s hard when the sun is shining and everything is dead, brown and ugly.)  Waiting to prune until after the last freeze prevents stimulation of new, tender growth that can be damaged by frost and can stress the plant by bringing it in and out of dormancy.

Getting started – pruners, loppers and shears

Good tools can make a big difference – for you and for your plants.  A clean cut is much better for plants than ragged or torn edges.  Sharp, high-quality tools like Felco or Fiskars brands make cutting easier for the gardener, too.  Use hand pruners for smaller plants and some woody perennials up to 1 inch in diameter.  For larger woody perennials and shrub limbs, longer-handled loppers help provide more leverage when cutting.  Shears work best for shaping smaller shrub branches or grasses.

Woody Perennials

First, assess the damage on your dormant perennials — plants like Lantana, Esperanza, or Salvia. If you scrape the stem of most of these perennials you will be able to tell whether it is alive and dormant, or whether it has succumbed to winter. Look for signs of green close to the base of the plant. Normal pruning of most of our perennials will suffice if the plant is just dormant. These woody perennials are typically very hardy. While it might take them a little longer to bud out after a cold winter like this, most do, unless they were newly-planted before winter or are particularly small and not well established. Make clean sharp cuts leaving about 6” of stem above ground. New growth from these plants will come from the base, so cutting them low will not affect their development.

Succulents

Many aloes and agaves were severely damaged by our hard freezes this winter.  Freeze-damaged succulents usually turn a lighter color, almost white, soon after the freeze. Later, the damaged part of the plant will wilt, and then turn black with rot. In some succulents, the affected parts eventually fall off.

If the center bud remains green and firm, the plant will likely to grow and recover, in spite of dead leaves. However, dead and damaged parts will never recover, and you can remove them. You should also look for new growth underneath the dead leaves and down in the base of the plant. These pups can often survive under the cover of the dead leaves.

Palm trees

If the center of the tree is fine, it will probably survive. Cut off dead or highly damaged leaves. Palms grow primarily in the warm spring and through the summer, and may look much better by the end of the summer.

Cycads – Sago Palms

Sago palms are popular in Austin, and many gardeners have them in their landscapes. Not actually palms at all, Sagos are cycads and they are normally hardy to 26 degrees. However, prolonged hard freezes cause damaged leaves to turn yellow or brown. These should be pruned to encourage new growth. You can remove all the leaves – they will grow back. If the trunk and leaf crown are still firm, the plant will likely recover.  Don’t worry if it looks like a bad haircut for a while – all the leaves will eventually regrow from the trunk.

Crape Mrytles

Some people start pruning Crape Myrtles earlier, but just like other plants, they are still susceptible to late season frosts and should not be pruned until after that danger has passed. In spite of industry-wide efforts to educate homeowners and maintenance crews about the dangers of “Crape murder,” you can still spot Crape Myrtles all over town that have been topped off — cutting back all the major limbs severely and straight across. It’s almost as though they’ve been put in a guillotine — and about as attractive.

It’s an odd practice, considering that no other trees like live oaks, elms, yaupon hollies or mountain laurels, are treated that way when they are pruned.

Crape Myrtles should never be topped. Removing the terminal growing section of a tree ruins the natural shape and appearance, stunts its growth and weakens it.  It can also reduce the number of blooms that the tree produces in the summer.  When pruned back too far, new branches may not be able to support the weight of summer’s blooms, particularly when wet. Crape Myrtles should be pruned for shape and style, removing any twigs or branches smaller than the diameter of a pencil.  To prune larger branches, trace down from the seedpod to where the stem meets a branch, and cut approximately 6 inches above that intersection.  This ensures that the new branch will be strong enough to support future growth below your cut.

Once you’ve finished pruning and everything starts to bud out, don’t be tempted to fertilize newly pruned plants. They need to use all of their energy to begin new growth.  Fertilizing now will over-stress them. Wait until later in the spring — at least a month — when they are established again.

By |2017-11-29T23:27:24-06:00February 19th, 2011|Articles|0 Comments

The grass is always greener … in the spring!

Well, this sure isn’t grass, but it is very green for the Foliage Follow-Up day, when Pam, of Digging, entices gardeners around the globe to share what’s green and growing in their gardens.

My greenery is actually in the greenhouse – safe from several long and hard freezes we’ve suffered this winter.

The unusually cold temperatures have turned many of my favorites outside into mush or kindling.

I almost missed the lovely bloom on this little succulent, shoulder to shoulder with other heat-loving plants in the greenhouse like the geranium that’s cozying up next to it.

The geranium is a passalong from Robin, of Getting Grounded. But I can’t remember the name of my succulent though. It grows from little corms and spreads like crazy. Any ideas on what it might be? — My friend Ronnie tells me he thinks it’s a Silver Squill, and that’s exactly it! How nice to know. Aren’t garden bloggers wonderful sources of shared information. Now I can sleep at night knowing my mystery is solved!

It reminds me that the new growth of spring really is right around the corner.

And it’s nice to have a little peek at it ahead of time, isn’t it?

Go to Top