vegetables

Sow seeds now for spring vegetables

txaas_mastheadIMG_2357
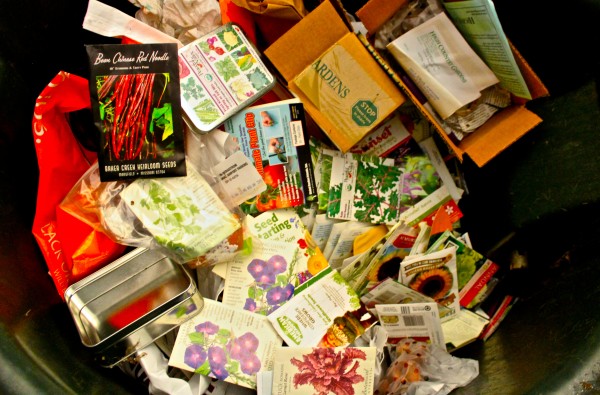
It’s seed-sowing time in Central Texas.  Indoors, that is.  If you’re eager to try some new varieties of vegetables in your spring garden, now is the time to check out seed catalogs and the seed displays at your local independent nurseries.

Seeds won’t germinate in the garden yet. The ground is too cold. But if you have a greenhouse or a cozy indoor spot to keep them warm, you can start growing now.

Generally, the time to plant seeds inside is about 8 weeks before the average last frost date – for us, that’s about early March in Austin.  Areas around the Hill Country usually have to wait just a little bit longer for the ground to warm up. With the unusual winter we’ve had thus far, it’s hard to predict what the next two months will hold for gardeners.

Planting early and indoors will give your vegetables a nice head start so you will have well-established plants to put into the garden when spring arrives.  You can certainly put in transplants once the weather warms up, but planting from seed allows you to choose from hundreds of different varieties of vegetables since nurseries can only bring in so many plants to sell.

You can plant in many different containers – you can buy nice plastic flats with multiple planting holes or biodegradable pots that can be placed directly into your garden when it’s time to transplant. Or you can repurpose washed out yogurt containers as long as you punch a drainage hole into them.

Many people are surprised to learn that you shouldn’t use potting soil for planting seeds. Instead, buy small bags of specially-prepared sterile seed starter mix – it doesn’t compact as much as potting soil and gives your tender seeds more room to germinate and grow.

I’ve had the best success with seeds when I used a heat mat.  Even in the warm house, the seed mix must remain at just the right temperature, and a heat mat ensures that continuous warmth for germinating seeds. You can find them at many  nurseries or online. You can also place your seeds on top of the refrigerator, but I forget about them up there and then…no seedlings. If you place them near a sunny window, remember to move them away from the windows at night because the cooler air by the window will lower the temperature too much for them to germinate. They have to stay warm, day and night.

Be sure that you keep the soil moist. You can water with a spray bottle so you don’t disturb the seeds. As soon as the seedlings emerge, give them lots of light. You can put them by a window or place them under grow lights. Turn them regularly when they begin to lean toward the sun. If they seem long and stringy, they need more light. The first leaf shouldn’t be more than an inch from the soil.

Now you can start watering your plants gently and letting them dry up a little in between waterings. You can move them to larger pots if you need to.  It’s also time to give them a little liquid fertilizer like liquid seaweed or fish emulsion.

When the chance of frost has passed and the ground begins to warm up you’re ready to put your seedlings into the garden. Not so fast, though. Seedlings need to be hardened off before they can be plopped in the garden. That’s a fancy way of saying they need to get used to being outside in the elements since they’ve been babied in the house over the winter months.

Just take them outside into a shady spot for half a day for a few days, then for a full day or two and then slowly move them into the sun in the same way.

Remember, spring winds can be hard on delicate plants, so be prepared to give them some wind break if you need to. And my sweet transplants seem to emit a signal to insects that the buffet is open. You can protect the plants from some of them by cutting a solo cup in half to make a cylinder, and placing it around the base of your seedling until it gets a little bigger and stronger, just make sure it doesn’t block the sun or the water.

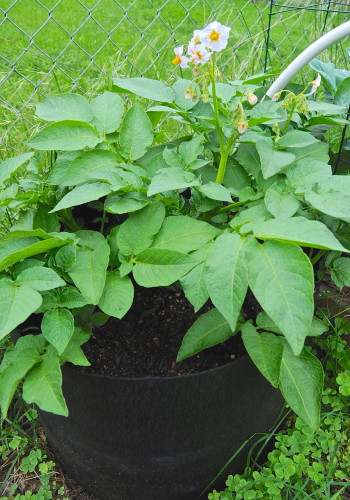
Once you have all your seedlings planted, mulch, water and eat.

By |2017-11-29T23:27:11-06:00January 29th, 2014|Articles|Comments Off on Sow seeds now for spring vegetables

Your local grocer can provide you a place to garden

txaas_masthead

Potato Bag Container Garden

Many would-be vegetable gardeners are thwarted by a lack of space, impenetrable rocky soil or clay, or a shortage of sunshine. With limited space on a balcony or patio, too much shade or landscape conditions that aren’t conducive to vegetable gardening, what’s a wannabe green thumb to do?

The burgeoning gardening movement and the increasing national interest in growing vegetables at home has fueled the creation of many alternatives to a patch of rich soil in the ground.

Alternative growing containers are the latest trend, making vegetable gardening easier than ever, even for those who have been limited in the past. To go along with the increasing desire for small space alternatives, there are also more container-sized vegetable varieties now than ever before.

Patio gardens and garden container alternatives can be grown with just 5 or 6 hours of sun each day. Don’t forget about vertical spaces, too. Hanging baskets can be used for lightweight greens and herbs and some fruits or vegetables will even grow in upside-down hanging planters. Some of the more popular container options include:

Grow Bags

Most vegetables, potatoes and tomatoes in particular, can be grown in a whole host of containers. From boring plastic pots to specially designed potato grow bags, trash bags, compost bags or even some of those plastic-coated grocery bags we all seem to be accumulating, bags are in.

Still adjusting to the new Austin disposable plastic bag ban, I’ve had to buy more reusable bags and now bags seem to be the latest freebie giveaway of choice for marketing items. I now have enough to cart home groceries for a year, so I might as well put some of those extras to good use in growing my own groceries.

Simply cut drainage holes in the container to allow the water to run out and fill the bag with four to six inches of good soil and compost. Roll the sides of the bag down a little so the young plants get enough sunlight when they are small – you can add more soil later and roll the sides up as the plant grows up. Keep a close eye on the moisture needs of the plant though – remember, containers dry out faster than soil in the ground. It will be time for fall tomatoes and potatoes in just a few weeks, so now would be a great time to start planning for your creative alternative garden.

Many garden supply companies and local independent nurseries also sell grow bags designed specifically for growing vegetables, if you don’t want to do it yourself.

Straw bales

So, maybe you have a yard, but your yard is full of limestone or only has a few very small sunny spots. Straw bales are another alternative to the traditional in-ground vegetable bed. Individual bales can be placed together, to make one big bed that doesn’t require any digging (an absolute plus), or bales can be strategically placed to make the best use of limited sunny spaces by scattering them around.

Just soak the straw for a few days before you plant – it will make it easier to dig a hole in the straw and it starts the decomposition process that adds nutrients to the soil. Then scoop out a hole and fill it with compost and you’re ready to plant. A standard straw bale can usually accommodate 2-3 tomato plants, depending on whether they are determinate or indeterminate. (Determinate tomatoes grow to be medium to large-sized plants; indeterminates are, well, monsters, so plan accordingly based on the plant label.) Plant deep into the straw to give the roots room to grow.

Earth boxes

Earth boxes are another gardening space alternative growing in popularity. Earth boxes are self-watering containers with built-in water reservoirs that can keep the plants watered for several days. There might be excess evaporation exceptions for 107 degrees days, though. The boxes also have a built-in fertilizer band to help feed the plants on an ongoing basis. These containers can be purchased ready to plant or you can make one yourself. With a plastic bin, some PVC pipe, a few tools and a Saturday afternoon, you can create a unique vegetable garden that requires less maintenance and is a great solution for a deck or patio.

For step-by-step information about how to build your own box, check out this tutorial from Texas A&M.

There are many other container options for inexpensive and moveable mini-gardens, too. Consider large 5-gallon plastic buckets, leftover from house projects, bird seed, or containers being discarded by restaurants or grocery stores. Other options include wooden barrels, galvanized tubs, even bushel baskets. Just make sure the container has adequate drainage by poking holes in the bottom. And, if you’d rather not look at a white plastic pickle bucket housing your tomatoes, you can spray paint your container to match any garden decor.

Local Landscape Designer and Garden Coach Diana Kirby provides landscaping tips at http:/www.dianasdesignsaustin.com and writes a garden blog at https://www.dianasdesignsaustin.com


By |2019-07-15T19:14:41-05:00July 27th, 2013|Articles|1 Comment

Austin’s temperate climate yields year-round vegetables

It’s hard to believe that we can still plant a last round of winter vegetables right now.

But instead of protecting our vegetables from freezes like we would in a ‘normal’ winter, we might be shading them from the hot sun.  While vegetables like chard, baby beets or newly sown carrots can be susceptible to a strong frost; lettuce and sweet peas can wilt or bolt with too much heat.

The unseasonably warm weather we’ve been having has confused both plants and people alike.

But then, that’s what gardening is all about, isn’t it?

Second-guessing Mother Nature.

For the next few weeks, (we assume that winter will eventually make another appearance) there is a window of planting time left for some more wonderful winter vegetables.

Now is the time to plant seeds and transplants of these vegetables:

  • Onion sets (the width of a pencil or smaller)
  • Shallots
  • Cabbage transplants
  • Cauliflower transplants
  • Turnips
  • Broccoli transplants
  • Swiss chard
  • Collard transplants
  • Beets
  • Spinach
  • Lettuce
  • Potatoes
  • Asparagus crowns
  • Kale transplants
  • Leek transplants
  • Radishes
  • Cool season English peas

In addition to late winter vegetables, now is also a good time to plant strawberries, bare-root fruit trees, berries and grapes.  For more specific information on planting fruits and berries, check with your local independent nursery.

Now is also prime time to plant cool-season herbs like chives, cilantro, parsley, dill and fennel.  Watch for cold weather, though, dill and fennel will need to be covered if it freezes. 

To succeed with your vegetable planting there are different strategies for growing different kinds of seeds.  Seed packets have specific information for planting – be sure to follow the directions for how deep and how far apart to plant the seeds.  But there are some other planting and growing tips you might not find on the back of the envelope.

Lettuce and spinach seeds should be planted gently and should not be planted deeply.  They need light to germinate, so sprinkle them and keep them misted daily until they sprout.  Soak beans, peas and carrots overnight to help them get started.  This helps speed up the growing process

On particularly warm days, consider setting up a little shade cloth to help keep your lettuce and greens from bolting. If you don’t have shade cloth, something as simple as an umbrella set on its side can help give them some cover from the warm afternoon sun.  And be sure to keep the lettuce seeds moist during the approximately 10-day germination period.

English peas will need a trellis to climb.  If planted now, peas should produce by early March.

With our clay and caliche soils, it’s best to loosen the soil to about a foot deep before planting carrot seeds.  The seeds should only be planted about 1/8 to ¼ inch deep, but this will prevent you from harvesting stunted or deformed carrots because they couldn’t force their way down through the hard soil.

Beets produce seed clusters that contain several seeds rather than seeds that produce one plant. When the seedlings come up, thin them to one plant per group for the largest beets. You can also eat the micro greens that you thinned out.

Once any seedlings appear, you do have to thin them out.  I know, they’ve come up, they’re alive, why not leave them all there to grow?  It’s more to eat, right?  Well, no. (It’s painful for me to thin, too.  Live plants are, after all, live plants.)  But, if you thin them out, you give the remaining seedlings room to grow more vigorously and you don’t crowd their roots or make them fight for water or nutrients.

For many plants, like lettuce, broccoli and cabbage, stagger your planting time by putting in a few plants each week for the next 3 weeks so your vegetables aren’t all ready to eat at once.

While we enjoyed a little rain to end 2011, it’s been dry again since the first of the year.  Climatologists are continuing to forecast to warmer and drier than average weather into the summer, so don’t forget to water your vegetable garden regularly to keep tender new plants growing and strong.

Growing your own vegetables is fun and rewarding.  There is something energizing about being outside in the sunshine, harvesting your vegetables and then enjoying a fresh, tasty dinner.  And luckily, Central Texas gardeners can enjoy the pleasures of vegetable gardening year round.

By |2017-11-29T23:27:19-06:00January 2nd, 2012|Articles|0 Comments

Some plants like bare feet in the winter

By now, most central Texas gardeners have experienced at least a light frost if not a hard freeze.  Our summer-loving perennials are fading, losing blooms, dropping leaves and going to seed in preparation for winter dormancy.

While it may seem like it’s break time in the garden, now is actually a great time to plant a number of things.  Nurseries are now stocking up on bare root plants – a wide variety of plants, vegetables and trees that are available for sale with their roots exposed instead of planted in containers with soil.

Bare root plants are dormant, dug up by the grower and kept cold until they are shipped.  They weigh less without soil and containers and are much easier to ship, therefore, they are a great value because they cost less.  Once the plant is placed in the ground and watered, it will begin to grow again.

According to Jeff Ferris, of the Natural Gardener, “It is less expensive to plant a bare root tree.  If a bare root tree and a container tree are planted at the same time, with the exact same care and conditions, they will reach the same height at the same time.”

Larger container trees take longer to overcome the setbacks and shock of transplanting from the grower and having their roots cut to place them in containers.  So buying a smaller, bare root tree will give it a better start and cost less, too.

What kinds of plants are available bare root?

  • Fruit and nut trees
  • Berries
  • Vegetables
  • Roses
Fruit trees

Most fruit trees require a specific number of “chilling hours” to grow and fruit properly.

This is the number of hours of winter temperatures between 32° to 45° F to break dormancy and induce normal bloom and vegetative growth. Varieties with a chilling requirement that is too low are likely to bloom early and be more susceptible to frost. If the chilling requirement is too high, they may be very slow to break dormancy and may abort fruit.

According to Texas A&M University’s Agricultural Extension Service, Travis County has approximately 700 average chill hours.  (Bear in mind, “average” is a very slippery slope for central Texas gardeners, given our seesawing weather patterns in recent years.)

The specific varieties listed below meet the appropriate chilling requirements for the Travis County.  (In an “average” year!)

Peaches  (Well-adapted to our extreme climate swings)

  • TexStar
  • La Feliciana
  • Spring Gold
  • June Gold
  • Bicentennial
  • Sentinel
  • Harvester
  • Red Gold
  • Dixiland

Plums

  • Methley
  • Morris
  • Ozark
  • Premier
  • Alfred
  • Bruce

Pears  (Easy fruit trees to grow, require least pruning and insect control)

  • Ayers
  • Magness
  • Orient
  • Maxine
  • Keiffer
  • LeConte
  • Moonglow

These are generally the most popular fruit trees grown in our area.  Apples, apricots, citrus, figs, pecans, persimmons and others can also be grown successfully in central Texas.  Ask your local nursery expert about well-adapted varieties of these trees.

Some trees are self-pollinating, however most fruit trees require cross-pollination. These trees need pollen from another tree to produce fruit, and the tree must be a different cultivar.  Pollen from its own flowers or those of another tree of the same cultivar will not successfully pollinate the female parts of the flowers, due to incompatible timing.  Be sure to check with the nursery to determine if a specific variety needs a pollinator to produce fruit.

Berries

Grapes  (Nearly half of all species of grapes are native to Texas. While wild mustang grapes are prolific here, they aren’t as versatile for table use.)

  • Blanc Du Bois
  • Champanel
  • Golden Muscat
  • Carlos
  • Jumbo
  • Magnolia

Black berries

  • Brazos
  • Womack
  • Shawnee
  • Rosborough
  • Navajo
  • Arapaho
  • Brison

Strawberries

  • Chandler
  • Sequoia
  • Douglas
  • Tioga, Fresno, Tangi

Raspberries

  • Dorman Red
Vegetables

Artichokes

  • Green Globe
  • Imperial Star

Asparagus

  • Martha Washington
  • UC 157
  • Jersey Giant
  • UC 72
  • Jade Cross
  • Long Island Improved
  • Diablo
Roses

There are at least 100 varieties of roses that grow well in central Texas – far too many to list.  For specific varieties, from climbers to floribundas, the A&M horticulture website has an extensive listing at:

http://aggie-horticulture.tamu.edu/PLANTanswers/publications/roses/south.html

How to know if the plant is healthy

If you’ve never bought bare root plants before, they might look like dead sticks.  But there are ways to make sure you’re getting a good specimen.

  • Check for mold or mildew on the roots. If the mold coverage is very light, you can clean it off.  But, if mold covers the roots or the root feels soft, the plant is dead.
  • A healthy specimen will have lots of intact root “hairs.” Check for broken roots, you can cut off the root at the bend but never cut a healthy root to accommodate the size of your hole.
  • The plant may smell earthy, but should not smell bad or rotten .
  • The branches should not be damaged. A few broken twigs are okay.
  • Roots, rhizomes, and other parts should feel heavy. If they feel light and dried
  • out then the plant probably will not grow.

At most local nurseries, customers wrap and bag their own fruits and vegetables – placing the plant and some sand in newspaper, wetting the newspaper and then placing it in a plastic bag around the plant.  I always get a kick out of the process, feeling like I somehow have a more personal connection with the plant after I’ve lovingly wrapped it up to bring home.

How to plant and care for bare root plants

Once you’ve taken your plants home, remove any packing material, such as sawdust or sand and soak the root portion of the plant in water, several hours for woody plants and 10-20 minutes for perennials, asparagus, strawberries, etc.  It is important to get bare root plants into the ground quickly.

Dig a hole that is wide enough and deep enough to put the plant in without

bending or crowding the roots.  Place the plant in the hole at the same level it was grown by the nursery — where the roots start and top shoots begin (the crown). Don’t cover the root graft or the crown of your plants. Spread the roots out evenly and don’t backfill the holes of trees with anything other than the soil that was dug out to create the hole.

Water the plant thoroughly, making sure that the soil around the roots is moist.  And finally, mulch the plant to help protect it.  Water new plants regularly until established.

Bare root trees will probably need to be staked for one year.

By |2017-11-29T23:27:25-06:00December 10th, 2010|Articles|0 Comments

With cold weather on the way, prepare now to protect your plants

The recent dip in nighttime temperatures had many people (including me) scurrying around outside at night to protect their tender plants.

It is that time of year, when we play chicken with Mother Nature.  Will it really get that cold?  Am I in a little pocket that’s warmer/colder/somehow different than the forecast?  Some of us are in perpetual denial, while the rest (like me) run around like Henny Penny thinking the sky is falling.

Depending on the source you check, the average first frost in Austin is said to be anywhere between November 28 and December 5.  That means the time to prepare is now.

What’s the difference between a frost and a freeze?  Frost occurs when temperatures drop and moisture in the air condenses to dew and freezes on plants when it reaches 32F. (Plants lose heat faster than air, so it’s important to remember that plants can be damaged even if air temperatures don’t actually reach freezing.)

Frost may then turn into a freeze when temperatures fall below 32F. At that point, ice crystals may form inside plant cells, rupturing them.  When the temperature rises again, the cells leak, turning to mush and the resulting black foliage.

A “hard” freeze occurs when the temperature drops to 28F or below.  Long, hard freezes, such as those we experienced last winter, are almost impossible to protect against.

But, in an average Central Texas winter, there are many things you can do protect plants from frosts or freezes.

First, water moderately before the freeze.  Water loses its heat more slowly than air throughout the night.  Combined with covering plants or even a heat source, watering can help make a real difference by a few critical degrees.

Sheets, blankets and heavyweight row cover can all help protect plants from a freeze.  But it’s important to note that it’s not the cover that keeps the plant warm, it’s the radiant heat coming up from the ground that is held in by the cover.  Drape the cover all the way down to the ground and secure it like a tent with rocks, bricks or my favorite – canned vegetables (lighter than rocks, easier to find in a pinch, and they don’t mess up your sheets and blankets).

Do not, however, drape something over the top of the plant and then tie it around the trunk like a giant lollipop.  This is pointless, because you are actually keeping the heat away from the plant.  If you have plants that can’t withstand the weight of a blanket or sheet, you can plan ahead and use tomato cages, large boxes or PVC hoops or frames – really, anything to hold up the cover.

For particularly tender plants or a really cold night, you can also add a droplight or the large-bulb Christmas lights under the cover to create some additional heat.  Be careful not to let the bulb touch either plant or cover.

If temperatures rise above freezing – remove covers the next day to allow the plants to absorb the next day’s heat and recover as necessary.

Protecting container plants is a little trickier.  Their roots are much less insulated than plants in the ground and will get much colder.  To protect them, you can group them against your house and use the same techniques as you would for in-ground plants.  Even the littlest radiant heat from the house can help make a difference on a cold night.

But what do you do when we have a colder winter, or you have larger or more tender plants, that just need more protection.

If you have one, you can put them in a greenhouse.  There are many on the market – from traditional glass structures to mini houses made of plastic.  But beware, in the cold of winter, the temperature inside is usually the same as it is outside.  A greenhouse will require a heater to protect plants.  And, with our wildly fluctuating day and night-time temps, you will frequently have to open it all up and water daily when the days are nice and warm.  Even though the nighttime cold doesn’t change the inside temperature, the daytime sun most definitely does! My greenhouse can be 20 degrees hotter inside than the outside temperature on a really warm day – so be prepared to tend to the plants often and open and close the greenhouse daily.

Having spent years putting big pots of plants in the garage, this is also a great way to overwinter them, with a few conditions.  Remember, plants need light, and overhead light won’t cut it.  If you don’t have windows in your garage, make sure you open the garage door to let in sunlight and fresh air when temperatures allow.  In the garage, some plants will go dormant for the winter reserving their energy in their roots for the next spring.  Water them sparingly and let them rest for the winter. Once indoors, these plants require less water since there is no wind, and winter

daylight hours are shorter and lighting levels lower. More houseplants are lost to over watering than under watering. Water only when the top 1/2-inch of soil is dry to the touch. When their leaves drop, don’t worry and don’t fertilize them to try to push them into growth while they are inside.

How do you decide what to cover?  Different plants have varying cold hardiness – more established and mature plants have stronger, deeper root systems and can withstand more than tender plants or newly planted plants.  You may want to take extra care if you’ve put in a new fall bed or have recently planted new perennials.

Let’s say you weren’t watching the weather forecast and you lost some perennials.  What do you do now?  Don’t prune them.  I know it’s tempting to take that dead stuff off so you don’t have to look at it.  But, those freeze-damaged stems provide some protection for the plant for the rest of the winter.  And pruning encourages growth – the last thing you want now when there are several more freezes to come.  A repeat cycle of growing and freezing is hard on the plants.  Just consider them items of sculptural interest in your garden!

So, plan now – collect your sheets and blankets, find some tomato cages, lights and canned goods and you’ll be ready to go when a surprise weather forecast sets you scurrying at 5 p.m.

Frost tolerance of fall vegetables:

Possible damage by light frost:  Beans, cucumbers, eggplants, cantaloupe, Okra, peppers, pumpkins, summer squash, tomatoes

Can tolerate light frost:  Artichokes, beets, carrots, cauliflower, celery, Chinese cabbage, lettuce, peas, Swiss chard

Can tolerate hard frost:  Broccoli, Brussels sprouts, cabbage, collards, kale, kohlrabi, onions, parsley, peas, radishes, spinach, turnips.

And remember, frost can make leafy greens and root vegetables sweeter, so leave some of your chard and carrots in the ground until you are ready to eat them.

By |2017-11-29T23:27:25-06:00November 13th, 2010|Articles|0 Comments

Fall for gardening all over again

A vegetable gardening wave is sweeping the country.   More and more people are relying less on store-bought vegetables and plotting their own gardens — enjoying the fresh, home-grown taste of their own food, enhancing their sustainability, and getting their children excited about growing and harvesting vegetables from their own back yards.

Luckily, we enjoy two long and bountiful growing seasons here in central Texas.  September is the magic month for planting many of the fall garden vegetables we can grow.  And that means it’s time to pull the summer garden plants out, revitalize the beds and start fresh for fall.

Whether you still have tomatoes and peppers and okra producing in these dog days of summer, or your garden is already a crispy critter, now is the time to make some fall gardening choices.

It’s tough love time in the garden.

Many summer vegetables like tomatoes, peppers and okra are spent and should be removed to leave room for a new fall garden. Some plants can have a second fall crop, but once they are done, it’s too late to plant many of our favorite fall veggies, so you have to decide which is more important to you. Also, since the days are getting shorter many vegetables store more sugar and actually have better flavor than some spring-grown crops.

The first thing to do to prepare for a fall garden is prepare the soil.  The easiest step is to add a few inches of compost to the beds.  You can also add a little 8-2-4 fertilizer because fall vegetables tend to be heavy feeders.  This will help give your new plants a healthy growing medium in which to get a good start.

Should I plant transplants or seeds?

There is still time to plant some vegetables as transplants, and it’s the perfect time to plant many varieties of seeds.

Transplants

Although many vegetables bask in our full sun, there is an exception – the typical heat of August to mid-September.  New plants will definitely need some shade from the blazing sun.  Transplants aren’t strong enough or well enough established to withstand the heat.  Shade cloth, floating row cover or any other cloth hung above the new plants, umbrellas, or anything you can find to shield them from the hottest hours of sunlight will help ensure their survival through this difficult time.  They will also benefit from a generous layer of mulch to help protect them.

Seeds

Seeds need the same TLC as new transplants, including a little shade. Water the soil well a few days before planting the seeds so that it isn’t so hot and dry when you plant them.  Then keep soil moist with frequent watering during germination by using a gentle spray to moisten the soil well. Hand sprinkle at least once daily unless it happens to rain.

It is usually more difficult to start seeds during hot, dry weather.  Larger seeds like beans can be soaked overnight between two damp paper towels.  Smaller seeds like carrots should also be covered with a light application of mulch or compost to help them retain enough moisture to sprout. Once seedlings are established, you can water deeper and less frequently.  Also, don’t be alarmed if it takes your seeds longer to reach maturity than the printed date on seed packets. Because the days are getting shorter, it may take your seeds longer to germinate.

Favorite Fall Crops

Once your garden soil is amended, you’re ready.  When you begin planting, make sure you plan for successive planting.   You don’t want 10 cabbages ready to eat all at the same time.  Instead, plant a row, wait a week and plant another row.  The same rule applies to vegetables like carrots and beets planted one plant at a time.

Why is selecting the proper vegetable varieties so important? If you’ve been gardening for any length of time, you know there are many different varieties of garden vegetables. However, only three or four varieties of any one vegetable are well suited or adapted to our area.

For additional detailed information about gardening in central Texas, check out the Garden Guide from the Texas Cooperative Extension’s Master Gardener program, available at most local nurseries and garden centers. 

Central Texas Vegetable Varieties

Vegetables to plant as transplants and recommended varieties for our area:

Broccoli  Green Comet, Packman, Premium Crop, Baccus

Carrots  Imperator, Nantes, Texas Gold Spike, Orlando Gold

Cabbage Bravo, Rio Verde, Red Rookie
Cauliflower Snow Crown

Vegetables to plant as seeds and recommended varieties for our area:

Beans
Snap Topcrop, Tendercrop, Tendergreen, Kentucky Wonder, Greencrop
Pinto UI-114, Dwarf Horticultural, Luna
Green Beans Roma II, Contender, Tendercrop.

Beets Pacemaker, Detroit Dark Red
Carrots Imperator, Nantes, Texas Gold Spike.

Chinese Cabbage Jade Pagoda, Monument, Napa, China Pride
Cucumbers Poinsett 76, Sweet Success, Dasher II, Sweet Slice, Calypso, Carolina

Garlic Texas White
Greens

Collards Blue Max, Georgia Southern,

Chard Lucullus, Ruby
Mustard Green Wave, Tendergreen, Southern Giant Curl
Kale Vates, Blue Knight
Lettuce
Crisp Head Mission
Loose Leaf Prizehead, Red Sails, Black-Seeded Simpson
Butter Head Buttercrunch
Melons
Cantaloupe Mission, Primo, Caravelle
Honey Dew TAM Dew, Honey Star
Onions
Bulb Texas 1015 Y, Early Grano 502, Granex 33
Green Evergreen, Bunching, Crystal Wax
Potatoes
Irish Red, Red LaSoda, Norland
White Kennebec
Sweet Beauregard, TAMU Corder, Centennial, Jewel
Radish Cherry Belle, Sparkler, White Icicle, French Breakfast
Spinach Savoy, Green Valley II, Ozarka II, Fall Green, Coho
Squash

Summer Goldie, Gold Bar, Multipik
Zucchini President, Senator
Butternut Waltham, Early Butternut
Turnips White Lady, Royal Globe II

By |2017-11-29T23:27:26-06:00September 18th, 2010|Articles|0 Comments
Go to Top