spring

Garden’s blooms bursting thanks to mild winter

We didn’t really have much of a winter this year.  In spite of dire forecasts of a wetter and colder than average El Nino winter, it was a milder and drier than normal winter.

As a result, spring is spectacular in the garden this year.  Some fall-blooming plants never even stopped blooming.

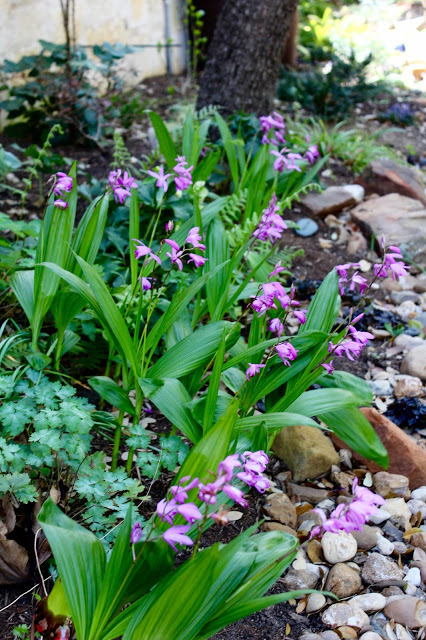
My ground orchids were zapped by the late freeze last year when their leaves were only 1/2 up out of the ground.  Bletilla striata are deciduous orchids that come back reliably year after year. They are bulbous rhyzomes, and can have up to 10 flowers per stalk.  I first saw them in my friend, Eleanor’s, garden and fell in love with them.  I started with 3 several years ago, and they are slowly starting the spread and fill in their space.  They’re special to me since I can’t seem to grow orchids indoors.

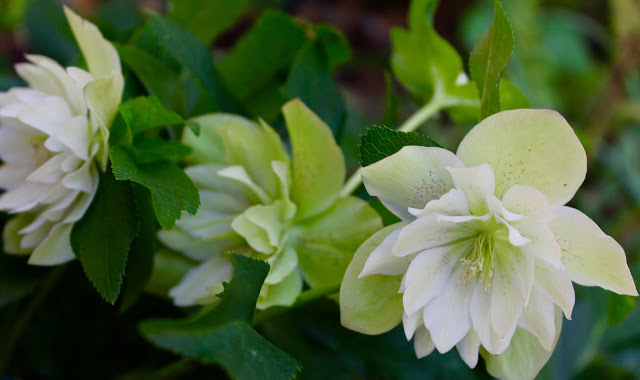
But the mild winter hasn’t been as fun for the hellebores.  There are only a few of them blooming — they really prefer to have cooler temperatures in the winter.

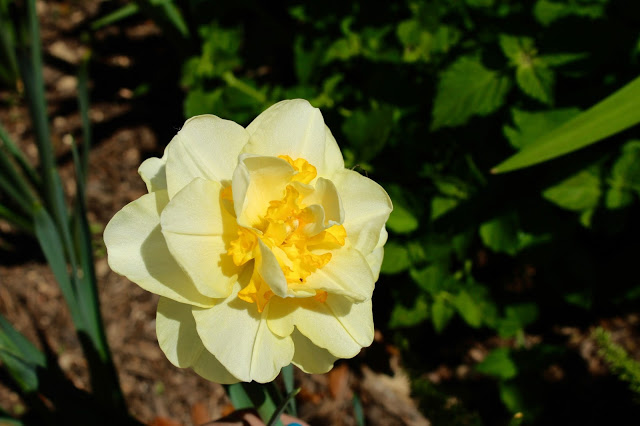
I’ve searched through all my receipts and records and can’t match the names of the daffodils I’ve bought with this variety.  Any ID suggestions?  She’s so pretty.

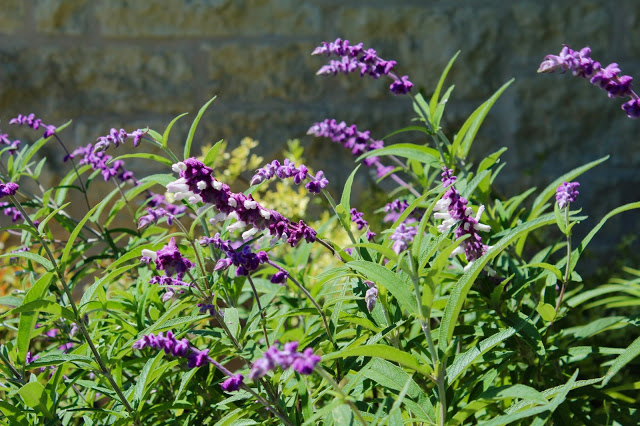
The Mexican bush sage is STILL blooming from last fall.  Crazy.

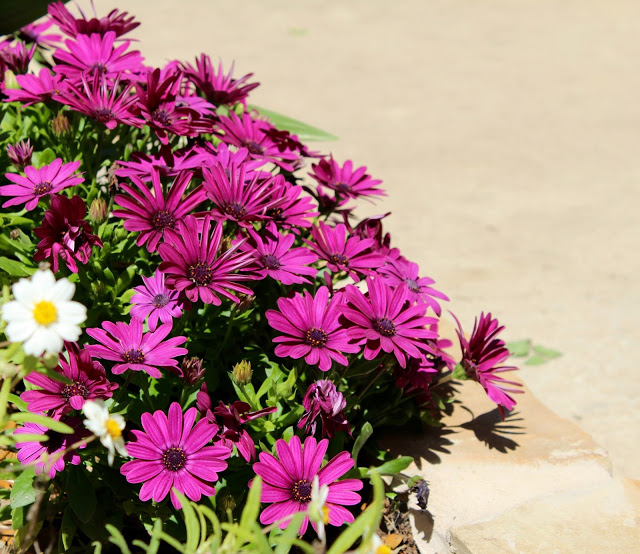
These osteospermum are blooming again — they are considered half-hardy perennials or sub shrubs, so this was the perfect year for them to show off.

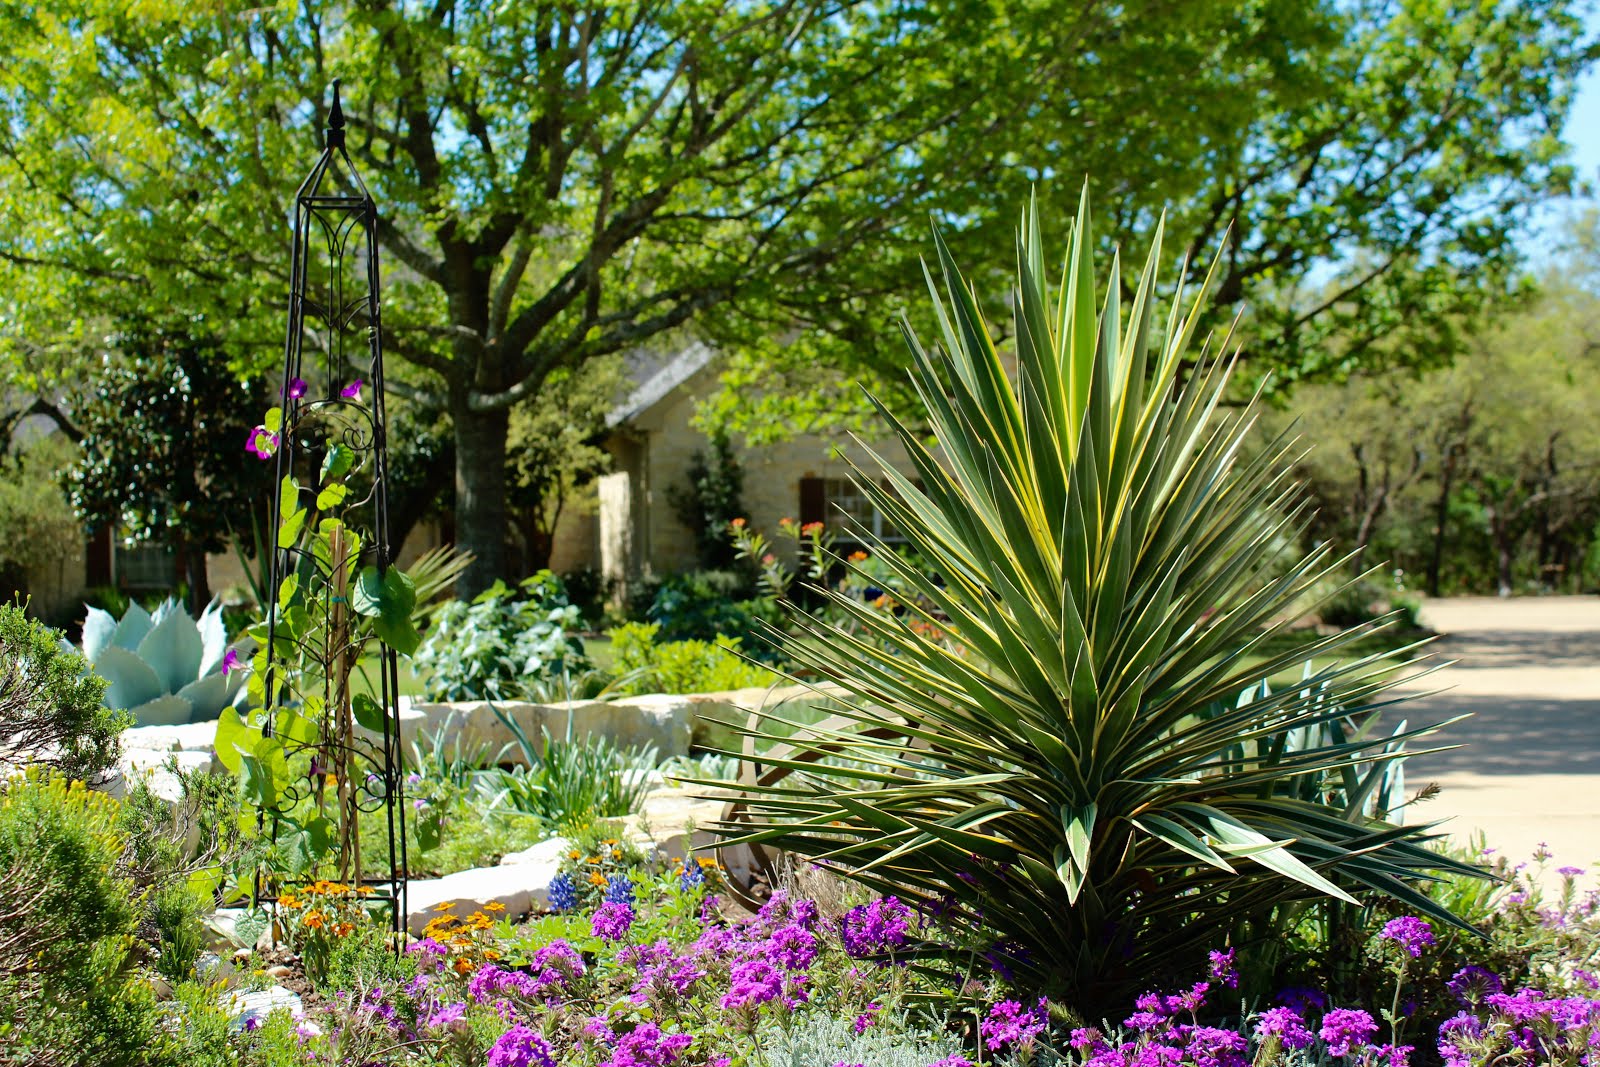
The hideous bed (it’s a long story!) is full of color.  The homestead verbena create a bed of purple for this sculptural yucca.

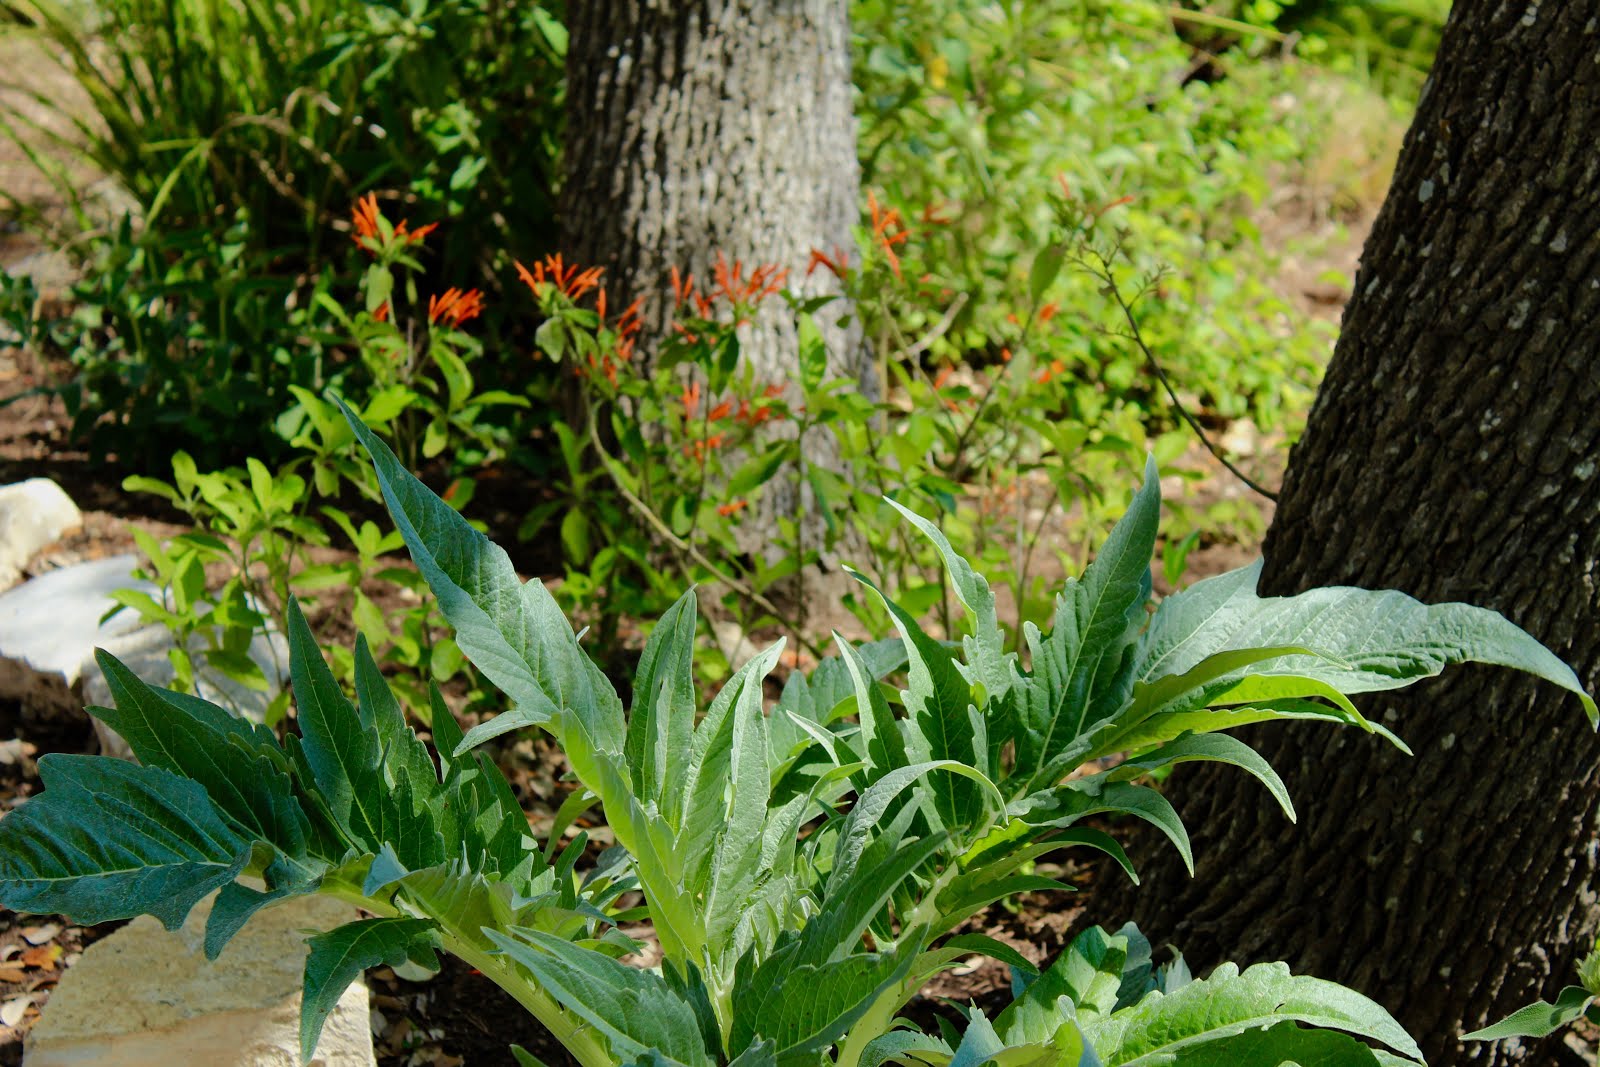
The hot heads of Mexican honeysuckle are beginning to appear in the background of this cardoon — a striking cousin of the artichoke.

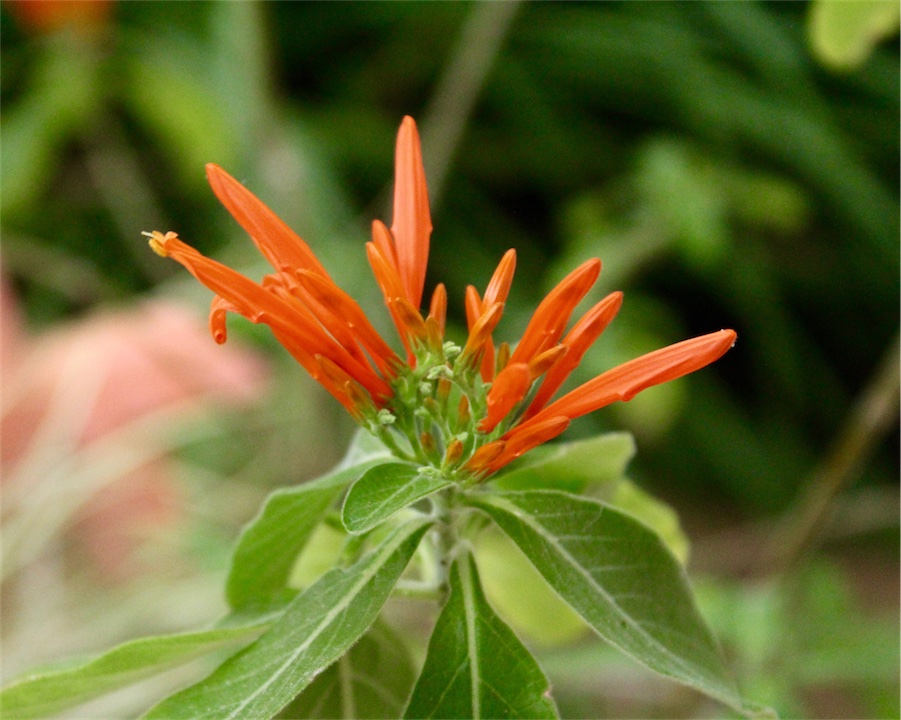
Looks almost like a bursting firecracker, doesn’t it?

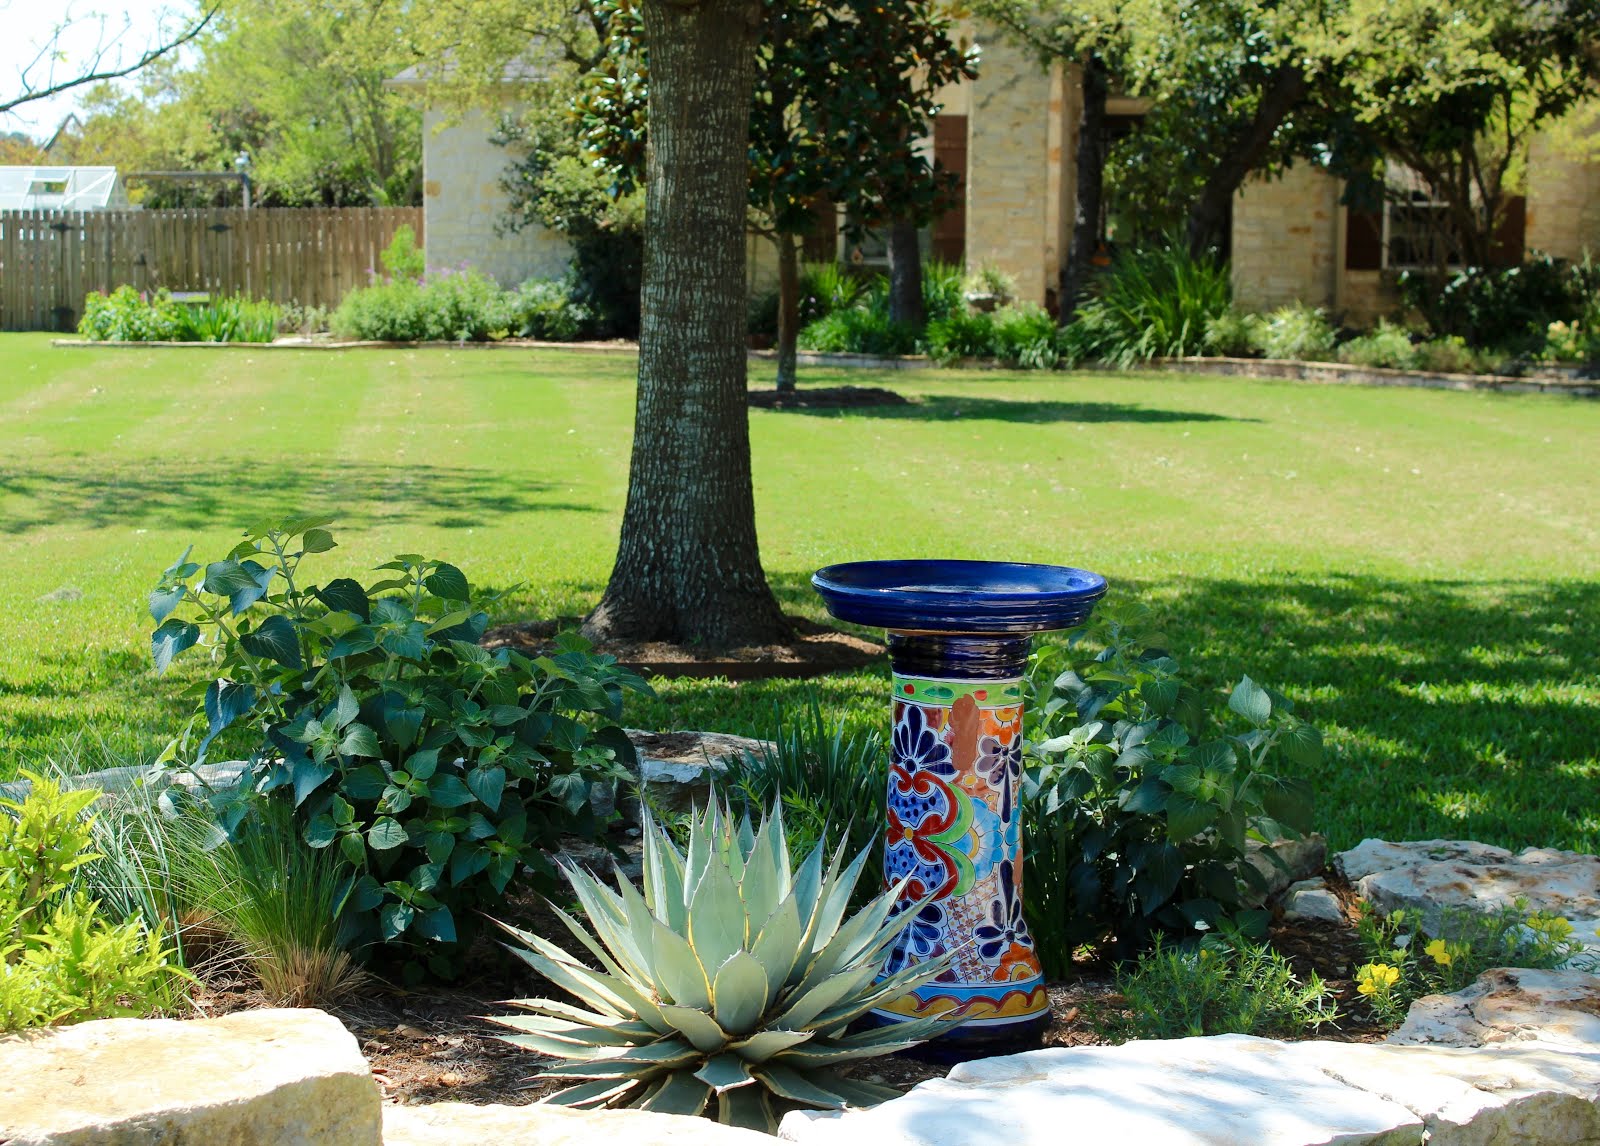
I moved the Mexican pottery birdbath here and can’t wait for the blue salvia ‘limelight’ to grow in and bloom behind it.  In front are a few yellow Calylophus and to the left of the ‘limelight’ is an orange Tecoma stans ‘bells of fire.’  I think those hot colors will echo the pattern in the Talavera nicely.  Here is what the ‘bells of fire’ looked like last summer.

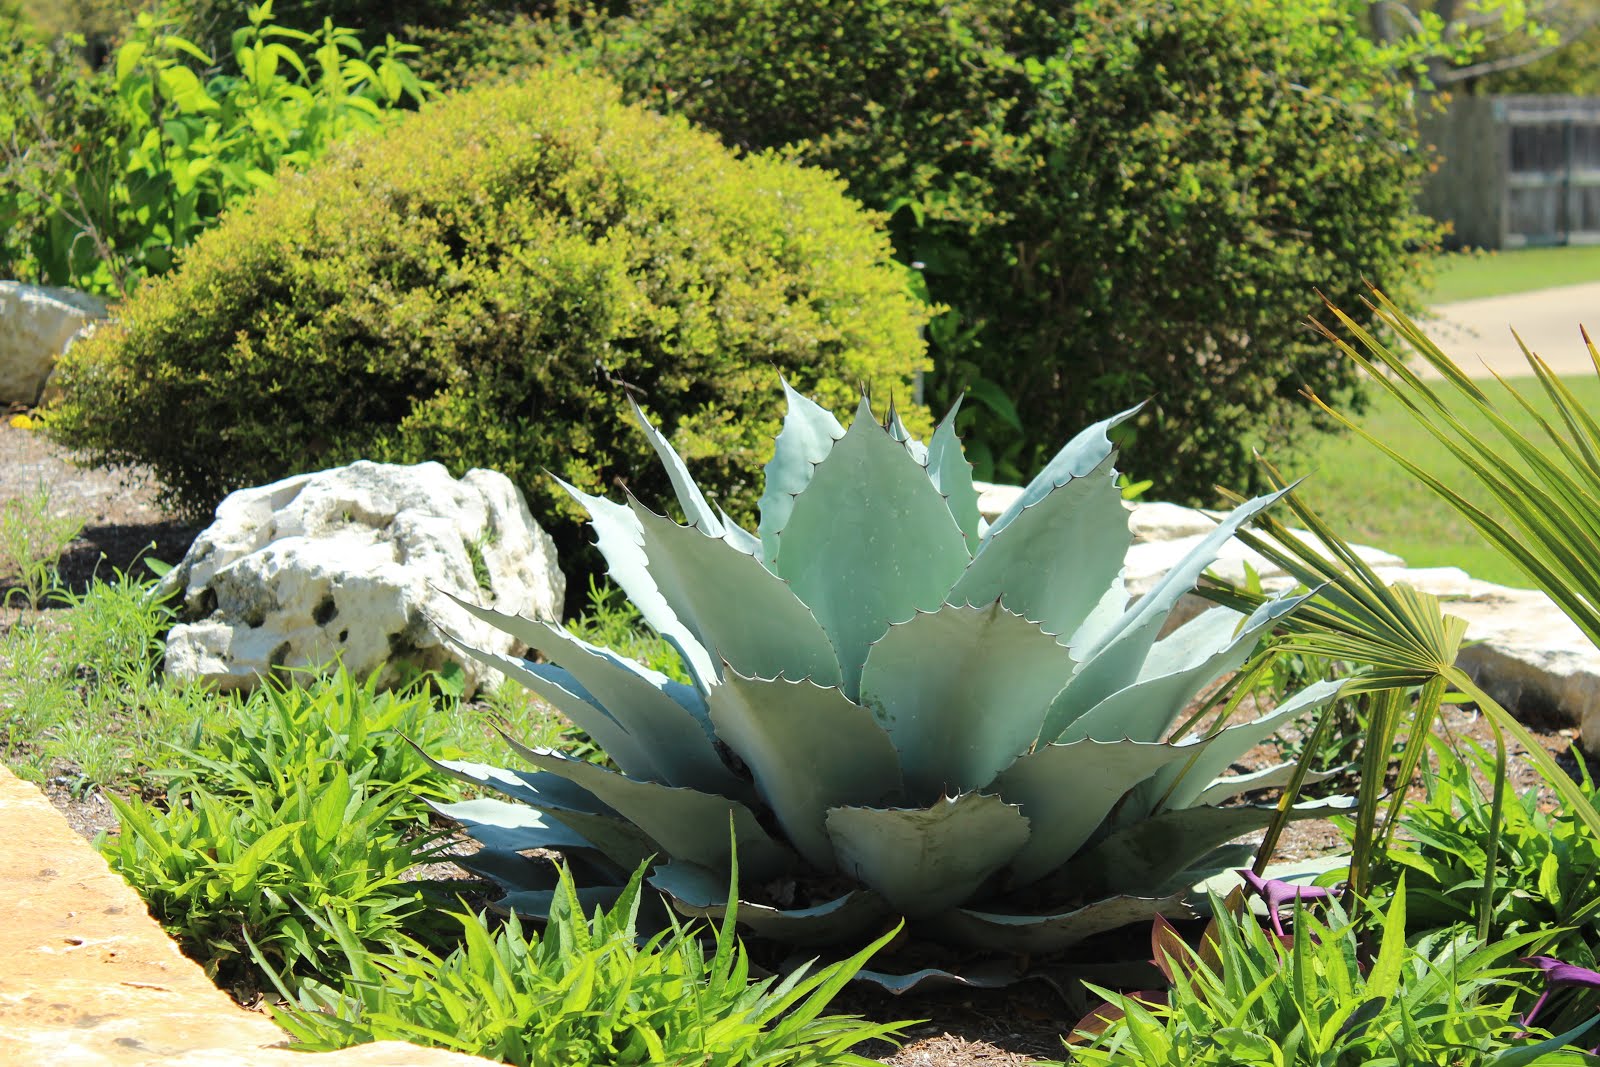
This whale’s tongue agave, ‘ovatifolia,’ has grown quite a bit since last year and it’s growing on me.  And, I don’t have to cut out pups from around it every month!

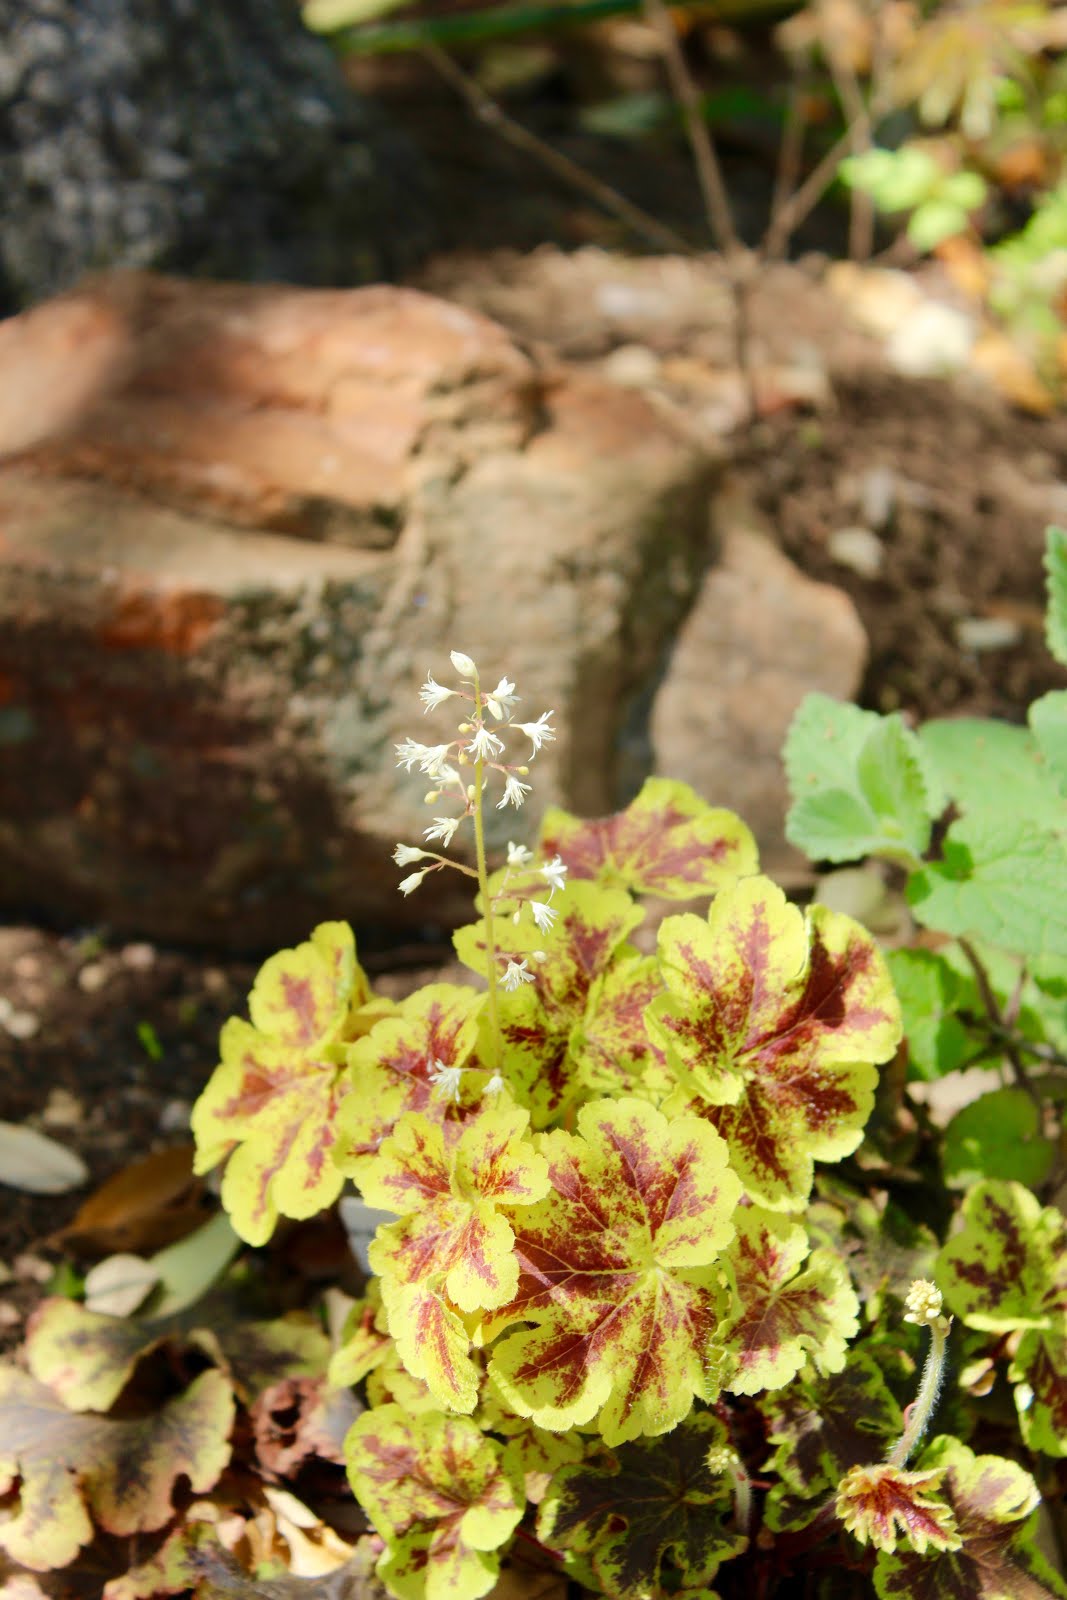
One last little photo — this gold zebra heucherella that I planted last fall has tiny, delicate blooms on it this morning. I didn’t realize that they would bloom – I have a few others that have never bloomed in about 6 years.  A sweet little garden surprise.

By |2017-11-29T23:26:56-06:00March 20th, 2016|Blog, Sharing Nature's Garden|0 Comments

March Tip: Spring has sprung, and so have the weeds

photo of dandelion weeds

Now that the veil of winter has finally lifted, gardeners eagerly await green growth in the garden. Daily surveys begin – in an attempt to detect tiny buds lining tree limbs or a hint of foliage emerging at ground level from the roots of our hardy perennials.

Not so difficult to find, however, is the burgeoning crop of spring weeds. They’re everywhere. Having spent a cold, quiet winter dormant and lying in wait, they’ve germinated and are spreading like … well, weeds.

What is a weed? One man’s weed is another man’s wildflower, right?

According to Webster’s dictionary, a weed is: “a plant that is not valued where it is growing and is usually of rank growth; esp: one that tends to overgrow or choke out more desirable plants.”

The most obvious method to rid the garden of weeds, is to pull them or to pop them. It’s generally easier to pull them when the soil is moist, so take advantage of our infrequent rains or water the affected area before starting.

Read the full article.

By |2017-11-29T23:27:11-06:00March 22nd, 2014|Tips|Comments Off on March Tip: Spring has sprung, and so have the weeds

Spring has sprung, and so have the weeds

txaas_mastheadweed puller

Now that the veil of winter has finally lifted, gardeners eagerly await green growth in the garden. Daily surveys begin – in an attempt to detect tiny buds lining tree limbs or a hint of foliage emerging at ground level from the roots of our hardy perennials.

Not so difficult to find, however, is the burgeoning crop of spring weeds. They’re everywhere. Having spent a cold, quiet winter dormant and lying in wait, they’ve germinated and are spreading like … well, weeds.

What is a weed? One man’s weed is another man’s wildflower, right?

According to Webster’s dictionary, a weed is: “a plant that is not valued where it is growing and is usually of rank growth; esp: one that tends to overgrow or choke out more desirable plants.”

The most obvious method to rid the garden of weeds, is to pull them or to pop them. It’s generally easier to pull them when the soil is moist, so take advantage of our infrequent rains or water the affected area before starting.

There are a variety of tools designed to make this process easier. My favorites are the Garden Weasel weed popper and the CobraHead weeder and cultivator.

The first allows you to remove larger weeds like crabgrass and dandelions while standing up – a big plus for me. The tool has a row of sharp tines. Using your foot on a pedal, you push the tines into the soil at the edge of the weed and then push down on the pedal and the weed literally pops up out of the ground.

The CobraHead weeder enables you to whack at the weedy area and loosen the soil like a short hoe, and drag it toward you to pull it out of the ground.

If pulling isn’t your passion, there are several other safe and proven methods you can try to remove your weeds without dangerous herbicides that pollute our groundwater.

Corn gluten is an excellent pre-emergent that prevents weed seeds from sprouting or kills them right after they germinate. Only use corn gluten near shrubs and perennials or on lawns. Do not allow it to come in contact with areas where you intend to sow seeds. The corn gluten should be spread before the emergence of weeds in early spring and fall.

One of the simplest approaches, if your weeds are somewhat isolated from desired plants, is to pour good old boiling water on them. But be careful, as this method will kill anything else in its path. Make sure it doesn’t run over to something you’ve been working hard to grow.

You can also apply the same method with bleach – putting it in a small sprayer and using the concentrated nozzle to gently spray specific weeds.

Some gardeners also use vinegar in this manner. But grocery store vinegar is only 5 percent acetic acid and won’t work. To use this method, you would need to use a vinegar that is 20 percent acetic, which is not available in grocery stores. However, at this strength, the vinegar can cause skin, eye, ear, nose and throat irritation. Goggles should be work to apply it. And it may not kill the roots, just the foliage, which really isn’t very helpful if you want to eradicate the weeds.

Some serious gardeners have also taken to using a small propane torch, like that used to caramelize the top of delicious creme brulee. Torching weeds make be fun, but again, it doesn’t necessarily get at the roots. This method would work best on annual weeds, but is not recommended for use around mulch, bark or pine straw. Given our drought, winds and periodic burn bans, this method should really only be considered only in areas with rock, concrete or pavers to avoid any possibility of fire.

For those with a wide area of weeds, smothering them is another option.  Layer newspaper (at least 4 sheets thick) or cardboard over the offending area for a while. The length of time will depend on the weeds and the time of year, but they will eventually die from lack of sun. Be sure to leave the layers on long enough to ensure that other weed seeds aren’t sprouting as well.

And, finally, my favorite way to deal with weeds is to simply hide them or choke them out with beautiful plants. In the competition for sunlight, water and nutrients, a garden thick with ground covers, low-growing perennials or flowers can overwhelm weeds.

Whichever method you use, the best approach is to keep after them on a regular basis, so they don’t get out of hand.

Local Landscape Designer and Garden Coach Diana Kirby provides landscaping tips at http:/www.dianasdesignsaustin.com and writes a garden blog at https://www.dianasdesignsaustin.com

By |2017-11-29T23:27:11-06:00March 22nd, 2014|Articles|Comments Off on Spring has sprung, and so have the weeds

Sow seeds now for spring vegetables

txaas_mastheadIMG_2357
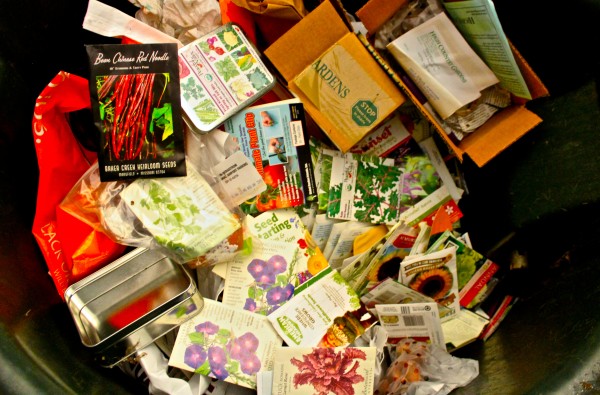
It’s seed-sowing time in Central Texas.  Indoors, that is.  If you’re eager to try some new varieties of vegetables in your spring garden, now is the time to check out seed catalogs and the seed displays at your local independent nurseries.

Seeds won’t germinate in the garden yet. The ground is too cold. But if you have a greenhouse or a cozy indoor spot to keep them warm, you can start growing now.

Generally, the time to plant seeds inside is about 8 weeks before the average last frost date – for us, that’s about early March in Austin.  Areas around the Hill Country usually have to wait just a little bit longer for the ground to warm up. With the unusual winter we’ve had thus far, it’s hard to predict what the next two months will hold for gardeners.

Planting early and indoors will give your vegetables a nice head start so you will have well-established plants to put into the garden when spring arrives.  You can certainly put in transplants once the weather warms up, but planting from seed allows you to choose from hundreds of different varieties of vegetables since nurseries can only bring in so many plants to sell.

You can plant in many different containers – you can buy nice plastic flats with multiple planting holes or biodegradable pots that can be placed directly into your garden when it’s time to transplant. Or you can repurpose washed out yogurt containers as long as you punch a drainage hole into them.

Many people are surprised to learn that you shouldn’t use potting soil for planting seeds. Instead, buy small bags of specially-prepared sterile seed starter mix – it doesn’t compact as much as potting soil and gives your tender seeds more room to germinate and grow.

I’ve had the best success with seeds when I used a heat mat.  Even in the warm house, the seed mix must remain at just the right temperature, and a heat mat ensures that continuous warmth for germinating seeds. You can find them at many  nurseries or online. You can also place your seeds on top of the refrigerator, but I forget about them up there and then…no seedlings. If you place them near a sunny window, remember to move them away from the windows at night because the cooler air by the window will lower the temperature too much for them to germinate. They have to stay warm, day and night.

Be sure that you keep the soil moist. You can water with a spray bottle so you don’t disturb the seeds. As soon as the seedlings emerge, give them lots of light. You can put them by a window or place them under grow lights. Turn them regularly when they begin to lean toward the sun. If they seem long and stringy, they need more light. The first leaf shouldn’t be more than an inch from the soil.

Now you can start watering your plants gently and letting them dry up a little in between waterings. You can move them to larger pots if you need to.  It’s also time to give them a little liquid fertilizer like liquid seaweed or fish emulsion.

When the chance of frost has passed and the ground begins to warm up you’re ready to put your seedlings into the garden. Not so fast, though. Seedlings need to be hardened off before they can be plopped in the garden. That’s a fancy way of saying they need to get used to being outside in the elements since they’ve been babied in the house over the winter months.

Just take them outside into a shady spot for half a day for a few days, then for a full day or two and then slowly move them into the sun in the same way.

Remember, spring winds can be hard on delicate plants, so be prepared to give them some wind break if you need to. And my sweet transplants seem to emit a signal to insects that the buffet is open. You can protect the plants from some of them by cutting a solo cup in half to make a cylinder, and placing it around the base of your seedling until it gets a little bigger and stronger, just make sure it doesn’t block the sun or the water.

Once you have all your seedlings planted, mulch, water and eat.

By |2017-11-29T23:27:11-06:00January 29th, 2014|Articles|Comments Off on Sow seeds now for spring vegetables

Plan to start projects now for a well-balanced spring garden

Now that we’ve had a brief hint of cooler weather, it’s time to think about fall and how we can use this time in the garden to prepare for spring.  Once the temperatures drop and we get some rain, it will be the perfect time to start planning a new landscape project.

Preparing and creating new flower beds now can actually save you money.   You can buy and put in smaller, less expensive plants this fall, letting them overwinter and get well established before spring.  This enables them to develop strong root systems so you can enjoy bigger, hardier plants when they begin to grow in the spring.

So where do you start?

Do you have a sore spot — some section of your garden that needs a little pick-me-up?  Or do you have a bed with thirsty plants that didn’t make it through the summer that you want to transform into a xeric bed?  Or are you ready for a little hardscape – an extended patio, a shed or a little garden room?

Once you determine what improvements you want to make, it’s time to start planning.

The first question to ask yourself is:  What’s my style?  Is it English cottage garden, native Southwestern, Asian contemporary, xeric, formal or informal?  What are your favorite colors?  Do you like a muted peaceful pastel garden or are hot, tropical colors your preference?  What is the architectural style of your house and my existing garden?  Do you want to do something new to complement it or do you want some contrast?

If you’re working on a garden room or new hardscape – ask yourself how you want to use the space and what you will need to make it functional and attractive.  How will it fit into the existing landscape and be a natural extension?

Next, do a little homework.  Watch the sun rise and set over your yard.  How many hours of sun does your project area get?  Knowing when and where you have sun and shade will determine what kind of plants you can use or where you might want to put a new seating area.  You’ll want to group like plants based on their water needs – if you want to create a drought-tolerant new bed, make sure all of the plants you put in it have the same water needs.

Follow a few basic rules, add a little inspiration and you can transform your yard into a fresh and inviting landscape.

Tips to designing a beautiful garden:

There are a lot of design elements to consider when creating a landscape bed.

First, think focal.  The first step is to stand back and look at the space.  Close your eyes and picture what you’d like it to be. What is your vision?  Then think about what would make a great focal point in that space. A focal point attracts the eye and creates interest. It focuses the attention of the person passing by or looking at your garden.   A focal point can be a beautiful tree, a statue, a birdbath, a bench – anything different that adds interest to your landscape.

As you begin to think of plants, harmony is your goal.  You want the plant colors in your bed to complement or contrast each other.  Colors either next to each other or across from each other on the color wheel make great combinations.

Complementary: Colors directly across from each other on the color wheel, like red and green, yellow and violet, and blue and orange. These are dramatic colors that create a bold landscape..

Adjacent: This refers to the two or three colors next to each other, such as red, red-orange and orange. Or yellow-green, green and blue-green. These are harmonious colors.

Monochromatic: This refers to a single color family with various hues or intensities. This creates combinations of subtle differences.

Primary: Red, yellow and blue. All other colors are made of these.

Secondary: Orange, green and violet

Tertiary: These are blends of primary and secondary colors; for example, yellow-orange or blue-violet. They help make the transition from primary to secondary colors.

Polychromatic: A bold mix of colors used together in a confetti fashion.

Neutral: White, gray, silver

In addition to color, texture and variegation are also important.  So that your leaves aren’t all the same green, consider combining silvery-leaved plants with lime greens to help them each stand out in their own right.  Variegated plants add interest and help brighten up shady areas.  The texture of our native agaves, yuccas and cacti work wonderfully with soft shapes and delicate blooms or fuzzy leaves.

Height and shape are also key.  A desirable combination in a bed might include some height to anchor the ends of a bed, some larger foundation plants like evergreen shrubs and then layers of slightly smaller perennials annuals or ground cover for the front of the bed.  Do your homework when planting – consider how large the plants will be at full size, not the size they are when you bring them home.  This will ensure that plants in front of a border don’t tower over the plants behind them.  If the nursery tag on the plant doesn’t have this information, you can research the plant name online and get all the data you need to know.  Most local nurseries are diligent about including all the necessary growing information.  Big box stores sometimes get unlabeled plants from far away that aren’t appropriate for our growing conditions. I shop almost exclusively at our wonderful local nurseries because my pet peeve is finding big box garden center plants labeled simply – “Perennial.”

It’s also important to consider the size and style of your yard and home so your new project matches in scope and scale.

Add movement or fragrance to the garden. We are fortunate to have a large number of pretty, xeric grasses native to Central Texas.  You can also include fragrant plants, or night blooming plants to enjoy alongside a patio space or seating area.

Now that you’ve thought about your vision for the project, start defining the space.  Sketch it out to scale on paper and include existing structures or elements like large trees.  Then “draw” the boundaries of what you want to create on the ground, using a garden hose or spray paint to outline the bed or patio and ponder it for a while.  Do you like the shape?  Is it in the right place?  Is it big enough? Too big?

Consider the other elements you might want or need to include, like irrigation, lighting, a water feature, and work inclusion of those elements into your timeline.  Sprinklers need to go in when beds are laid out but not planted to avoid having to tear out plants for sprinkler heads or lighting wires.

Creating a new garden space can freshen up your landscape and increase your curb appeal and your home’s value.  New beds and new plants can bring peace and serenity to your garden or they can brighten and liven up your entertaining areas.

As you consider new projects for the fall, remember to think xeric and look for native or drought tolerant plants that can survive our brutal summers.  Think about landscape designs that use less lawn and more hardy plants.  Using quality soils and environmentally friendly products and materials will also reward you with healthy, thriving plants once your project is complete.

By |2017-11-29T23:27:20-06:00September 24th, 2011|Articles|0 Comments
Go to Top